My youngest son & me

My youngest son & me

About me

Hi!
My name is Tanja (Sater) Miller and I'm excited about sharing my journey of converting my favorite recipes to gluten free! I am not a fancy cook - I prefer just a casual, fun meal. I am married with grown children (and have small grandchildren) & 3 dogs. I work full time as a registered nurse & I am a geek. Yes, I love Star Trek, Star Wars, Fringe, Firefly, Farscape and most of the other Scify shows. You will probably see a little of my geek side come out once in a while! Please join me on my journey of cooking, baking & converting every day recipes into yummy gluten free meals that everyone can enjoy (not just those with a gluten allergy!) Don't be shy about checking out my recipes....I have the gluten free version along with the regular recipe that I adapted from!

Friday, May 31, 2013

Banana Pudding Trifle

Banana Pudding Trifle. This is a very easy, very casual recipe that is always a hit at our casual BBQs. Traditionally it is usually made with either vanilla wafers or pound cake....but since I needed to make it gluten free...I have tweaked the recipe just a little so that everyone can enjoy it! The great thing about this recipe is that you can purchase gluten free cookies or cake for convenience or you can make it from scratch. Both ways are delicious! For today's recipe, it was made from scratch so I have included my recipes for everything homemade but also listed substitutions for store-bought items that make this dessert super easy to make!

Okay, confession time! The main reason I made this recipe for the Memorial Day BBQ was because I was making a gluten free vanilla cake birthday cake (zombie style!) and I was too impatient to wait for the cake to cool in the pan before removing it so it crumbled. Rather than waste it, (I am pretty good at recycling my "rejects") I crumbled up the entire cake and decided to make the banana pudding trifle with it since I had all the ingredients to make it.

My mom always made this recipe using cooked vanilla pudding rather than instant so that is what I prefer. However, I have friends that make it using instant vanilla pudding. You can make homemade pudding or you can use a store bought pudding mix. (I have included the recipe for homemade cooked vanilla pudding below in case you want to try it). I know a lot of people are thinking..."why in the world would you want to make home-made pudding mix when you can run to the store and get a box of mix?!" BUT...I grew up about 20 minutes outside of town and it wasn't convenient to run into town to purchase just a couple of things so my mom made do with what she had on hand. (A good cook follows a recipe but an EXCELLENT cook will improvise with what is available!) I will tell you that you can absolutely make this recipe WITHOUT the powdered milk but you will lose a little of the rich flavor so just add a little extra vanilla extract. I have friends that make a wonderful cooked pudding made with milk, sugar, cornstarch and a cinnamon stick - it does not contain powdered milk. It is one of my favorites! If you have an allergy to cornstarch or dairy then you can substitute tapioca starch and use a non-dairy substitute for the milk. If you do not have a gluten allergy then you can use regular cake or cookies in place of gluten free items!

Banana Pudding Trifle Recipe:
  • 16 oz. Cool Whip topping (or you can use whipping cream prepared)
  • 4 large bananas, ripe but not mushy
  • 2 regular size boxes of cook & serve vanilla pudding mix, prepared (or use my homemade recipe below)
  • 1 gluten free cake (9x13 size), crumbled or cubed OR substitute 1 box of gluten free animal cookies or sugar cookies crushed or 1 box of gluten free graham cracker crumbs
Prepare your 9x13 vanilla cake recipe (you can use my recipe below or you can purchase a store bought gluten free mix). Crumble after cake has cooled. If you prefer a quicker method then you can just use crushed gluten free cookies like the animal cookies, sugar cookies or graham cracker crumbs which you can find at Sprouts, Whole Foods, Military Commissary and select grocery stores.

Prepare your pudding mix according to directions. Cover or stir frequently as it cools so it doesn't get a "skin" on it. Once it is cooled, Stir in 1 cup of the Cool Whip to give the pudding a nice light texture.

Sprinkle half of the cake or cookie crumbs into a trifle bowl or large glass bowl. Layer half of the pudding onto the crumbs. Slice up the bananas and layer half of them on the pudding. Put about 1 1/2 cups of the Cool Whip on top of the bananas. Repeat layers ending with Cool Whip on Top. I had a tiny bit of the crumbs left so I sprinkled on top of the Cool Whip for decoration but you don't need to do that. Refrigerate until serving. (If your trifle bowl is a little smaller and you have leftovers...BONUS! Just layer in wine glasses or mason jars so you can enjoy it later after everyone goes home!)


Homemade Vanilla Pudding Mix
(This recipe makes several batches so store the remainder that you don't use with a label & instructions in an empty glass jar or ziplock bag).
  • 1 cup powdered milk (you can substitute an unflavored non-dairy creamer like Coffee Mate) or just leave this out if you don't have it on hand - just add more vanilla extract when cooking.
  • 1 cup corn starch or tapioca starch
  • 3/4 cup sugar (if you use raw sugar or brown sugar you will get more of a caramel flavor)
I usually put in the blender to blend it all together really fine but you can just stir it really well. Store in glass jar or ziplock bag until ready to use.

To prepare one batch (equivalent to a regular size box) you will need:
1/2 cup pudding mix
2 cups milk or non-dairy substitute (not powdered milk - liquid milk!)
1 tsp. vanilla extract or vanilla bean paste or butter vanilla baking emulsion

Cook on medium heat stirring constantly until smooth and thick. Remove from heat and let it cool. Either place a lid or cover on the pan or stir frequently as it is cooling to prevent a skin from forming on the top. NOTE: The recipe for the banana pudding trifle requires two boxes so you will need to use 1 cup pudding mix, 4 cups milk + 2 tsp. vanilla extract to have enough!


Vanilla Cake Recipe: (or if you prefer a pound cake then see my recipe posted August 2012)
  • 2 1/2 cups gluten free flour mix (I like Trader Joe brand or my recipe below). I do not like to use any flour mix that contains sorghum in my sweet baked goods. It gives it a weird after taste.
  • 1 tsp. xanthan gum (only use this if your flour mix does not contain it or guar gum)
  • 1 tbs. baking powder
  • 1/2 tsp. salt
  • 1 tbs. custard powder or vanilla pudding mix (this gives the gluten free flour a nice heavy texture similar to regular flour for baked goods)
  • 2 cups sugar 
  • 2/3 cup melted butter or Crisco (if you substitute margarine: make sure it is 65% fat or it won't rise correctly!). Make sure the melted butter is slightly cooled.
  • 1 1/2 cups milk (you can substitute rice milk, soy milk, almond milk or coconut milk). Water can work in a pinch but the milk will give the white cake a nice moist texture and flavor that water can't. Even diluted non-dairy coffee creamer will work!)
  • 2 tsp. butter vanilla flavor baking emulsion. (I get it at Hobby Lobby in the cake decorating department or sometimes I can find it at Home Goods or TJ Maxx in their food section). This will give the cake a fabulous flavor. However, if you don't have the butter vanilla baking emulsion then just substitute vanilla extract. (Don't forget to go online to Hobbylobby.com and print out your 40% off coupon to use on the baking emulsion!)
  • 2 eggs or 4 egg whites 
Preheat oven to 350 degrees. Grease one 9x13 pan OR two 8 or 9" cake pans. Combine the gluten free flour, xanthan gum if it isn't already in your gluten free flour mix, baking powder, salt, custard powder or pudding mix and sugar. Beat in eggs. Add milk and melted butter (or Crisco or margarine). Add the butter vanilla emulsion. Beat for 2-3 minutes on high speed. Pour batter into cake pan. Bake until cake springs back when lightly touched or toothpick inserted comes out with moist crumbs). Bake two 9" pans for 22-28 minutes or until toothpick inserted comes out with moist crumbs. (Oven temperatures and altitude can affect baking times so check at the lowest cooking time and adjust. You may need to bake longer). 9x13 pan you will need to bake about 35-45 minutes. 


My Homemade Gluten Free Flour Blend Recipe:
  • 1 1/2 cups brown rice flour
  • 1 cup white rice flour (I used sweet rice flour for this batch)
  • 1/2 cup glutinous rice flour (made from sticky rice, gluten free)
  • 1 cup potato starch (not flour)
  • 1/2 cup nonfat dry milk, make sure it is very fine in texture
  • 1 cup corn starch or tapioca starch (I used corn starch for this batch)
  • 3 tbs. xanthan gum
Combine all ingredients together well. You can put it in the blender for an extra smooth texture if desired. I store mine in a glass container and use it in place of regular flour in all my recipes. This particular blend I really like for baked sweet goods. (A friend of mine that has a dairy problem used non-dairy creamer powder in place of the powdered milk and said it worked just fine!)


Up close view of banana pudding trifle

Hope you enjoy this very casual dessert! My family loves it! It feels like a step back into the 1970s when I eat this pudding dessert! People seem to have gotten away from pudding desserts but they are so easy and many of the desserts are gluten free or can be converted easily to gluten free!

Tanja
Gluten Free Casually


Thursday, May 23, 2013

Baked Cauliflower

Baked Cauliflower. I love fried cauliflower but since I can't eat regular flour...eating appetizers or side dishes like this at a restaurant is out of the question. The idea came to me when I looked in my refrigerator and noticed I had two gorgeous heads of cauliflower but I was SICK of it cooked the traditional ways. I wanted something simple but tasty.

Since I was already home from work and into my comfy clothes...there was no way I had any motivation to go shopping for supplies! So I searched my cupboards for something I could use as a coating that would withstand baking but not have too thick of a batter to take away from the cauliflower flavor. I spotted a bag of tortilla chips and some spices and that became my "breading" for the cauliflower! It was crispy and had a nice flavor. My husband never asks for a second helping of cauliflower....until now! :)

Baked Cauliflower Recipe:

  • 1 large head of cauliflower, cut into appetizer sized pieces
  • 2 large handfuls of tortilla chips, crushed really fine (I put mine in the blender but you can just use a rolling pin to finely crush them). Most brands of tortilla chips are gluten free but check your ingredients to be sure! I used "On the Border" brand which are labeled GLUTEN FREE. If you have an allergy to corn then you can just substitute regular potato chips! No problem! 
  • 1/2 tsp. paprika
  • 1/2 tsp. chipotle chile powder (optional) - we like the slightly spicy flavor but you can leave it out or substitute regular chile powder or cayenne. You can add more if you like it really spicy!
  • 2 tbs. parmesan cheese, grated (I wouldn't run out to the store to get this ingredient if you don't have it on hand. You can just substitute some garlic powder or steak seasoning for a little flavor instead)
  • 1 egg or egg substitute for dipping

Combine the finely crushed tortilla chips, spices and cheese (if you are adding it) together in a bowl. Whisk the egg with a 1/8 cup of water or milk in a separate bowl until well mixed. Dip the cauliflower into the egg mixture and then into the crushed chip mixture. Place on a foil lined baking sheet. Bake in pre-heated 350 degree oven for about 20-25 minutes until fork inserted into the cauliflower is tender and the coating is golden brown. If the coating is not getting golden then you can remove them from the oven and spray a light coating of cooking spray on them and then return them to the oven.

Ready to eat!


Just out of the oven on the baking sheet!
Tender center with a crispy coating! Ready to eat!
I hope you enjoyed this extremely simple recipe. I am going to try the same coating with some zucchini and mushrooms this weekend for a nice casual "appetizer". I love recipes like this that everyone can enjoy and it doesn't cost a fortune for "special ingredients".

Enjoy your holiday weekend!
Tanja
Gluten Free Casually


Tuesday, May 14, 2013

Strawberry Summer Cake

Strawberry Summer Cake! Nothing says SUMMER like this lovely cake! I love the taste of yummy butter cake that is moist (almost like a sponge cake) with fresh strawberries and glaze. Everyone in my family loves this dessert so I just had to convert it to gluten free! (Of course if you don't have a gluten allergy then you can make it with regular flour!) My sister-in-law Barb made a cake similar to this many years ago for a family get together and we just loved it. For her recipe you could use a cake mix but since gluten free cake mixes are so expensive....I prefer making this recipe from scratch. It reminds me of the yummy fruit desserts in Germany that use fruit instead of frosting! You can also make this with ANY fruit instead of strawberries. My mom used to make similar German style cakes with fresh peaches, blueberries, gooseberries, rhubarb or raspberries. I liked them all! (Blueberry & Strawberry mixed is pretty for July 4th or a military homecoming party! It gives the red, white & blue theme!) I prefer using fresh fruit but you can use frozen fruit... but the fruit will not look as perky!

My husband is a chocoholic but some of our family members aren't crazy about chocolate desserts so this is one of my favorite summer recipes. It is great for mother's day, father's day, BBQs, and just weekend casual dinners with friends. You can even drizzle melted chocolate or white chocolate on top for an elegant touch. I generally serve it with Cool Whip or Vanilla Ice cream. It doesn't require refrigeration if you are going to eat it within a day or two. Left overs freeze great also.


Strawberry Summer Cake Recipe:
  • 2 1/2 cups gluten free flour mix (I like Trader Joe brand or my recipe below). I do not like to use any flour mix that contains sorghum in my sweet baked goods. It gives it a weird after taste.
  • 1 tsp. xanthan gum (only use this if your flour mix does not contain it or guar gum)
  • 1 tbs. baking powder
  • 1/2 tsp. salt
  • 1 tbs. custard powder or vanilla pudding mix (this gives the gluten free flour a nice heavy texture similar to regular flour for baked goods)
  • 2 cups sugar 
  • 2/3 cup melted butter or Crisco (if you substitute margarine: make sure it is 65% fat or it won't rise correctly!). Make sure the melted butter is slightly cooled.
  • 1 1/2 cups milk (you can substitute rice milk, soy milk, almond milk or coconut milk). Water can work in a pinch but the milk will give the white cake a nice moist texture and flavor that water can't. Even diluted non-dairy coffee creamer will work!)
  • 2 tsp. butter vanilla flavor baking emulsion. (I get it at Hobby Lobby in the cake decorating department or sometimes I can find it at Home Goods or TJ Maxx in their food section). This will give the cake a fabulous flavor. However, if you don't have the butter vanilla baking emulsion then just substitute vanilla extract. (Don't forget to go online to Hobbylobby.com and print out your 40% off coupon to use on the baking emulsion!)
  • 2 eggs or 4 egg whites 
  • 1 1/2 - 2 pounds of fresh strawberries, sliced (or substitute your favorite berry or fresh fruit)
  • 3 tbs. cornstarch or tapioca starch
  • 4 tbs. sugar or stevia
  • 2 cups water
Preheat oven to 350 degrees. Grease one 9x13 pan OR two 8 or 9" cake pans. Combine the gluten free flour, xanthan gum if it isn't already in your gluten free flour mix, baking powder, salt, custard powder or pudding mix and sugar. Beat in eggs. Add milk and melted butter (or Crisco or margarine). Add the butter vanilla emulsion. Beat for 2-3 minutes on high speed. Pour batter into cake pan. Bake until cake springs back when lightly touched or toothpick inserted comes out with moist crumbs). Bake two 9" pans for 22-28 minutes or until toothpick inserted comes out with moist crumbs. (Oven temperatures and altitude can affect baking times so check at the lowest cooking time and adjust. You may need to bake longer). 9x13 pan you will need to bake 35-45 minutes. You can also bake these individual in cupcake lined pans and serve fruit on top for individual shortcakes. 

Strawberry Glaze:
Bring water, cornstarch or tapioca starch & sugar to a full boil. Cook about 1-2 minutes stirring constantly until it starts to thicken. After cake is cool, slice the strawberries and place on top of cake. Pour glaze evenly over strawberries & cake. (If you are using fruit that was previously frozen and a little mushy then it is easier to mix the cooked glaze and fruit together and then pour over the cake).


My Homemade Gluten Free Flour Blend Recipe:
  • 1 1/2 cups brown rice flour
  • 1 cup white rice flour (I used sweet rice flour for this batch)
  • 1/2 cup glutinous rice flour (made from sticky rice, gluten free)
  • 1 cup potato starch (not flour)
  • 1/2 cup nonfat dry milk, make sure it is very fine in texture
  • 1 cup corn starch or tapioca starch (I used corn starch for this batch)
  • 3 tbs. xanthan gum
Combine all ingredients together well. You can put it in the blender for an extra smooth texture if desired. I store mine in a glass container and use it in place of regular flour in all my recipes. This particular blend I really like for baked sweet goods. (A friend of mine that has a dairy problem used non-dairy creamer powder in place of the powdered milk and said it worked just fine!)


I hope you enjoy this super delicious summer dessert! :)

Tanja
Gluten Free Casually

Friday, April 26, 2013

No Bake Pretzel Bars


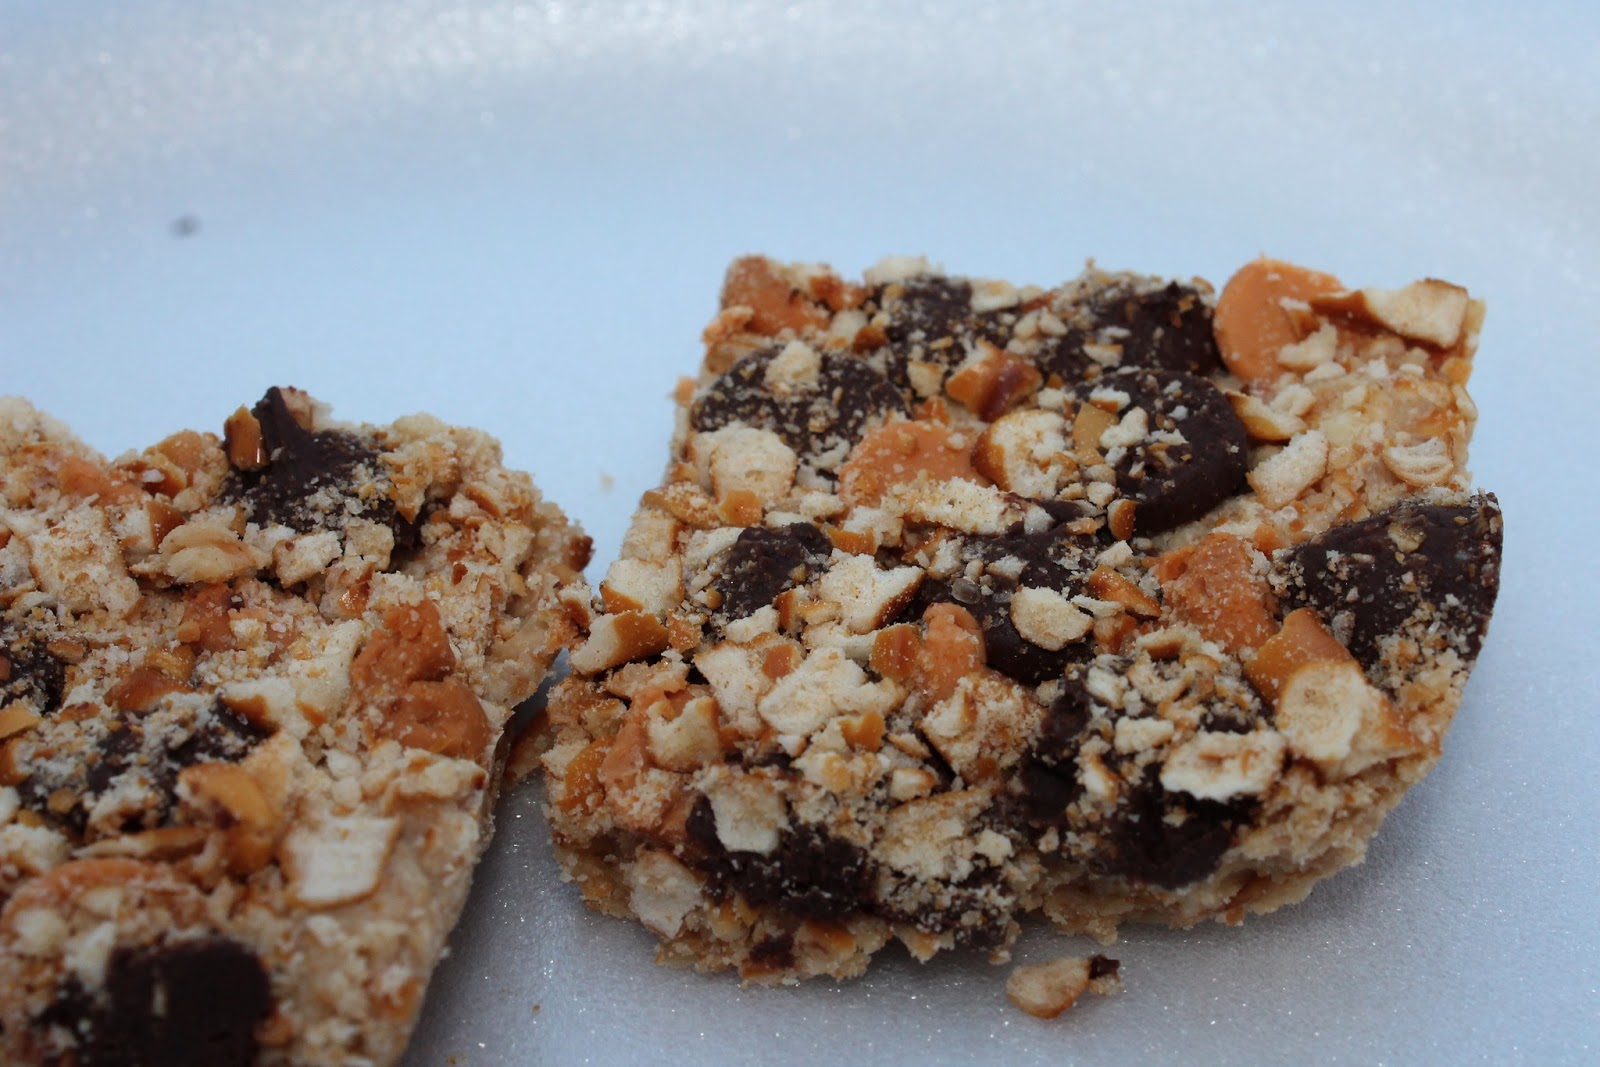
No Bake Pretzel Bars. I love the combination of sweet and salty. It is magic in the mouth! This is another great recipe for Arizona because when the heat hits 110+ degrees outside...no one wants to turn on their oven! This is a very casual dessert that is fun and easy. Great for a Friday evening with friends on the patio, potluck, BBQ or just watching Dr. Who movie marathon on the weekend! :)

This recipe was easily switched over to gluten free by using Snyder's Gluten Free Pretzels. (I found my gluten free Snyder's pretzels at Albertson's grocery store mixed in with the other Snyder's pretzels. They were the SAME price as the regular Snyder's pretzels which I thought was AWESOME! I get tired of getting gouged extra $$$ because it is gluten free! I was told that Whole Foods also carries the gluten free pretzels. If you can't find them at your grocery store, you can ask them to order them or you can purchase online at Amazon.com. I have also used the Glutino brand gluten free pretzels and they work great too! (They have a nice buttery flavor to them). Glutino brand GF pretzels are available at most Walmarts, Military Commissary Stores, Sprouts, Whole Foods, some Fry's/Kroger stores. The best price for them is at the Military Commissary Stores or Walmart. Look for Glutino brand in the "Gluten Free Aisle" since they are generally not located with the regular pretzels. Of course if you don't have a gluten allergy...you can just use regular pretzels!

No-Bake Pretzel Bars Recipe:
  • 1 1/2 cups powdered sugar
  • 1 cup peanut butter (you can use creamy or crunchy)
  • 1 stick of real butter or margarine
  • 2 cups crushed pretzels (I used GF Snyder's brand)
  • 2 cups of butterscotch baking chips
  • 1/2 cup dark chocolate chips (optional)
  • 1/4 cup whipping cream (or heavy cream)
  • additional 1/2 cup pretzel pieces, coarsely chopped
Line a 9x13 pan with foil. Lightly coat the foil with cooking spray & set aside. In a large mixing bowl, stir together powdered sugar, peanut butter and melted butter. Stir in 2 cups of the crushed pretzels. Press firmly into the bottom of 9x13 foil lined pan. Melt the butterscotch pieces (I reserve a small amount to sprinkle on top) and whipping cream in microwave or on stove top in a saucepan just until butterscotch pieces are pretty much melted. Pour the melted butterscotch mixture over the "crust". Sprinkle the dark chocolate chips (and if you reserved any butterscotch baking pieces then sprinkle them on top too) + the remaining 1/2 cup crushed pretzels over the top. Gently press down. (I use a piece of waxed paper or the back of a rubber spatula to press down). Cover and chill for at least 2 hours to set. Cut into bars and enjoy!


I hope you enjoy this quick & easy no bake pretzel bar recipe. They are a great treat for the summer heat! :)

Tanja
Gluten Free Casually


Sunday, April 14, 2013

Gluten Free Vanilla Cupcakes

 Gluten Free Vanilla Cupcakes. I have tried several gluten free cake recipes and the texture and flavor just wasn't what I was looking for. Most of the recipes out there are too crumbly and the flavor is bland. I wanted something that was moist with a nice "normal" texture and great flavor. I have tweaked several recipes and researched until I experimented and came up with this cake recipe that met my approval. My grand daughter's first birthday is quickly approaching and my friend Judi and I were looking for a great gluten free cake recipe for her "smash" cake. Not to mention that I was craving something sweet and cupcakes sure sounded awesome!
   
     This recipe could easily be tweaked to make a chocolate cake by adding some unsweetened cocoa powder in place of some flour or fruit flavored if you added fruit juice/puree in place of the milk. (This recipe can easily be cut in half if you want to make just a dozen cupcakes and not the full batch. You can also use this recipe to make a 9x13 cake or two round or square 8" cakes. (I added confetti sprinkles to the batter before cooking so I had confetti cupcakes)

     I made cupcakes for a recent family get-together just for a trial run. There were NONE left. Everyone ate them and couldn't believe they were gluten free. I added a dash of almond baking emulsion in place of the vanilla extract so it gave the cupcakes a really nice, rich flavor. It was like some gourmet wedding cake. I had some homemade frosting left over that my mom had made for my grand daughter's baptism so I frosted them with it. (But you can use either your favorite  homemade frosting recipe or store-bought frosting).

My July 4th version of the GF Vanilla Cupcakes with my homemade buttercream frosting


Gluten Free Vanilla Cupcakes
  • 2 1/2 cups gluten free flour mix (I like Trader Joe brand or my recipe below). I do not like to use any flour mix that contains sorghum in my sweet baked goods. It gives it a weird after taste.
  • 1 tsp. xanthan gum (only use this if your flour mix does not contain it or guar gum)
  • 1 tbs. baking powder
  • 1/2 tsp. salt
  • 1 tbs. custard powder or vanilla pudding mix (this gives the gluten free flour a nice heavy texture similar to regular flour for baked goods)
  • 2 cups sugar
  • 2/3 cup melted butter or Crisco (if you substitute margarine: make sure it is 65% fat or it won't rise correctly!). Make sure the melted butter is slightly cooled.
  • 1 1/2 cups milk (you can substitute rice milk, soy milk, almond milk, coconut milk or fruit juice/puree)
  • 3 tsp. vanilla extract or 1 1/2 tsp. almond baking emulsion or extract (I used almond baking emulsion. I get it at Hobby Lobby in the cake decorating department or sometimes I can find it at Home Goods or TJ Maxx in their food section). Since the flavor of almond is more pronounced than vanilla - go lighter on the amount!)
  • 2 eggs or 4 egg whites
  • 1/3 cup confetti (optional)

Cake Batter
Preheat oven to 350 degrees. Grease or line cupcake pan or two 8 or 9" cake pans. Combine the gluten free flour, xanthan gum if it isn't already in your gluten free flour mix, baking powder, salt, custard powder or pudding mix and sugar. Beat in eggs. Add milk and melted butter (or Crisco or margarine). Add the vanilla or almond flavoring. Beat for 2-3 minutes on high speed. Stir in confetti if you are adding it. Pour batter into cupcake pan or cake pan. Bake 15-18 minutes for cupcakes (until they spring back when lightly touched or toothpick inserted comes out with moist crumbs). Bake two 9" pans for 22-28 minutes or until toothpick inserted comes out with moist crumbs. (Oven temperatures and altitude can affect baking times so check at the lowest cooking time and adjust. You may need to bake longer). 9x13 pan you will need to bake 35-45 minutes.


My Homemade Gluten Free Flour Blend Recipe:
  • 1 1/2 cups brown rice flour
  • 1 cup white rice flour (I used sweet rice flour for this batch)
  • 1/2 cup glutinous rice flour (made from sticky rice, gluten free)
  • 1 cup potato starch (not flour)
  • 1/2 cup nonfat dry milk, make sure it is very fine in texture
  • 1 cup corn starch or tapioca starch (I used corn starch for this batch)
  • 3 tbs. xanthan gum
Combine all ingredients together well. You can put it in the blender for an extra smooth texture if desired. I store mine in a glass container and use it in place of regular flour in all my recipes. This particular blend I really like for baked sweet goods. 


Cupcakes right out of the oven 


Cupcakes that are ready to eat!


Cupcake up close view. See how moist? 

I received this shortcake maker as a gift. I tried my GF batter and it worked great!

Made in my shortcake maker

I used buttercream frosting in center which made them taste like twinkies. You can use whipped cream and berries instead!


I hope you enjoy this recipe for a really good cake/cupcake! It is now one of my favorite recipes for birthdays! My mouth is watering right now. I am wishing I had one of these lovely little cupcakes to eat while I am working on my blog and drinking coffee this morning.

Enjoy your day.

Tanja
Gluten Free Casually


Monday, April 8, 2013

Coconut Macaroons (Only 2 ingredients!)


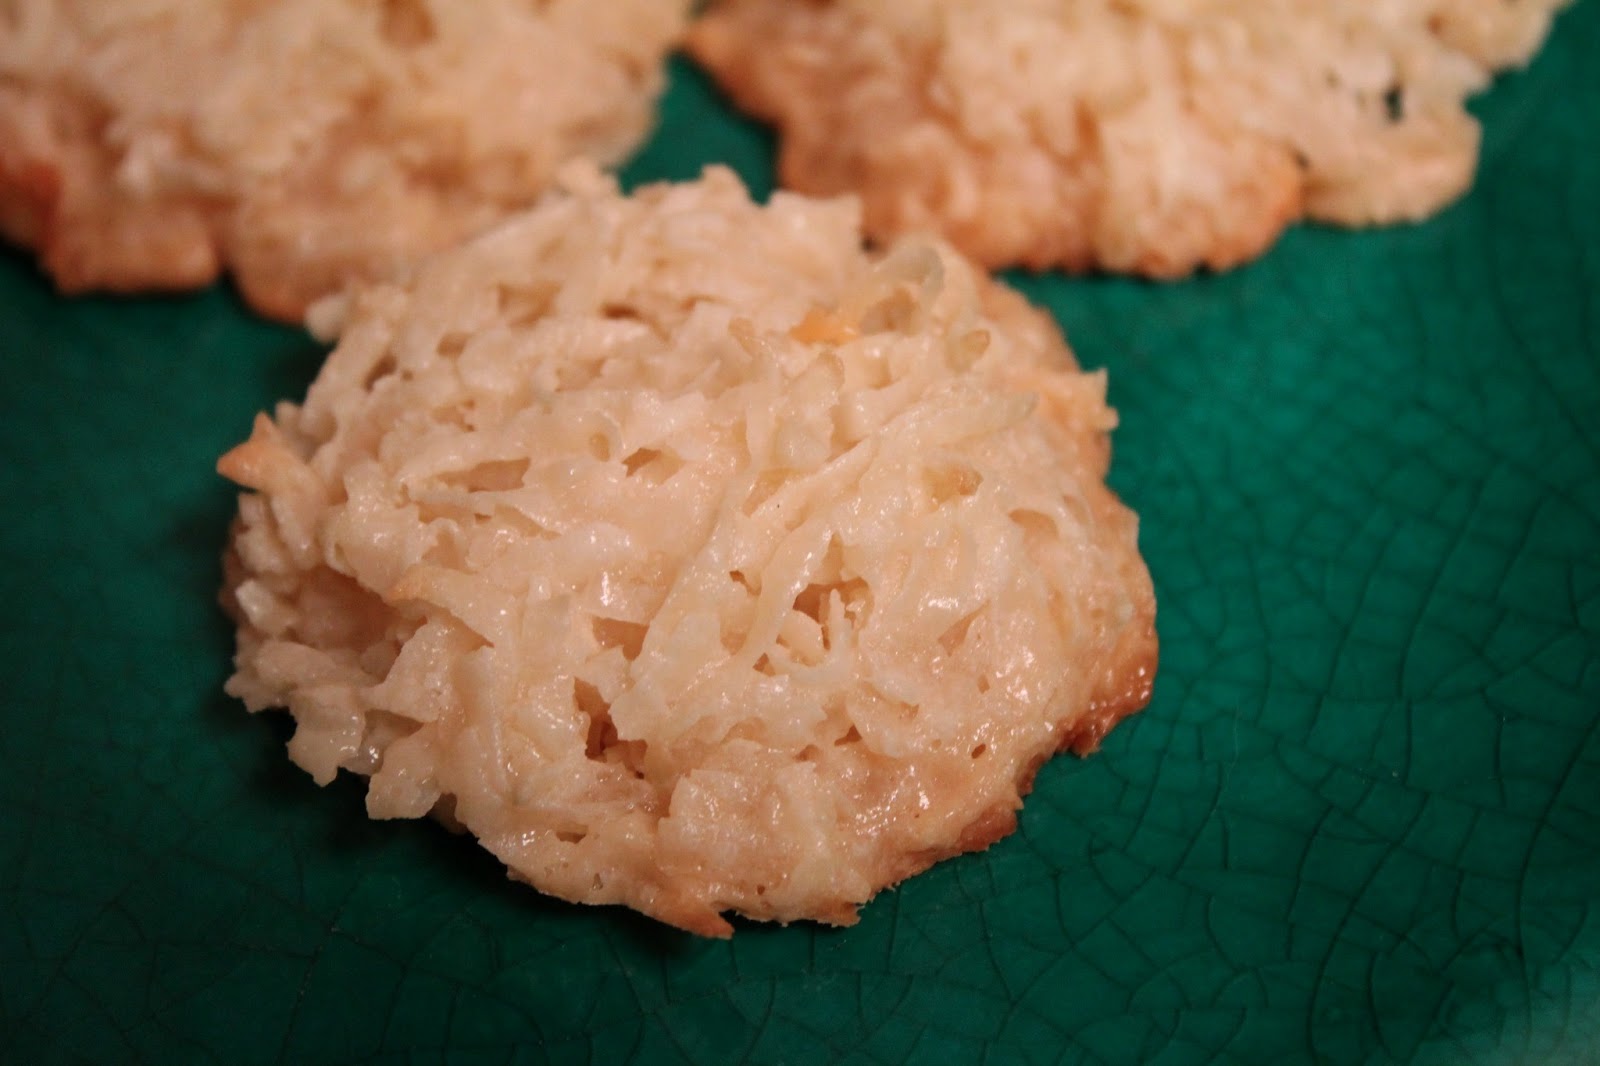
Coconut Macaroons. Mouthwatering. Moist. Chewy. I love coconut. I know it is one of those things that you either love it or hate it. For the avid coconut lover...this recipe is a must for your recipe box! It is simple, inexpensive and absolutely heavenly!

     This is one of the recipes that I almost hate sharing because it is SO EASY and delicious. Now people will have my secret to quick & easy cookies. They won't think I slaved all day over these. I thought I would be nice and share the recipe because it is a huge time saver when you need quick cookies that taste like you spent all day making them! These are a great addition to cookie plates for parties & holidays. It is also great for bake sales, potlucks or picnics. You can also dress them up with chocolate and put them in a nice tin or box for gift giving. (For Easter you can press your thumb in the center to give the cookie a "nest" look. Bake as directed & when they are completely cool then add some egg shaped M&M candies. Everyone loves eating these cute little nests!) You can also fill the thumb imprint with lemon curd, jam or a chocolate Hershey Kiss. That is why I love this recipe...it is so versatile!

     These macaroons can also be dipped in melted chocolate if you want your macaroon to taste like a Mounds or Almond Joy candy bar.  Or add mini chocolate chips or 2 tbs. unsweetened cocoa powder to the dough! I have used this recipe in place of a traditional pie crust for my cream pies. It is not only quick & easy but it is already gluten free and doesn't require expensive flours. I just spray my pie pan with non-stick cooking spray press the cookie mixture in the bottom and up the sides of the pan and bake 350 degrees until it is golden brown on top. Cool & fill with your favorite no-bake pie filling. (This is great for chocolate cream pie, vanilla cream pie, coconut cream pie, banana cream pie, no-bake cheesecake, etc.)

     My entire family loves coconut so this recipe was something we used to make on vacations. When my kids were small, we used to vacation in Florida frequently and stay in a condo or apartment close by the beach. Eating dessert out can be expensive for the entire family so this was a recipe that I would make with the kids (we also used to make the peanut butter cookie recipe that only took 3 ingredients - see the recipe for that on my blog in Feb 2013). This recipe was less expensive than buying pre-made cookie dough & just as easy! Doesn't require a mixer - just a bowl & spoon. Plus, these cookies stayed fresh for a loooooong time!

Coconut Macaroon Recipe:
  • 1 ( 14 oz.) bag of shredded coconut (I used the sweetened kind)
  • 1 can (14 oz.) sweetened condensed milk (NOT EVAPORATED!)

Yep, that is it! Just these two ingredients. Mix together in a bowl with a spoon until all the coconut & condensed milk are incorporated. The dough will be sticky. (At this point I like to put the bowl in the refrigerator for a couple of hours if I am making cookies. It helps keeps them in a ball shape when baking. ). Drop by rounded spoonfuls onto parchment lined cookie sheet (makes removing the cookies much easier!). I use a cookie scoop because it packs the cookie dough tight and keeps them from spreading much while baking. If you don't have a cookie scooper then just press the cookie dough together with your fingers or two spoons. Bake 350 degrees for about 12-15 minutes or until lightly golden brown on top. Cool & eat. You can bake these bars in a 8x8 greased square pan for 20-25 minutes if you prefer. If I am spreading into a 9x9 baking pan to cut into squares then I just spread in prepared pan and bake without refrigerating first. I like making these into cookies rather than bars because it seems like you get more! (I don't don't recommend using the light or fat free condensed milk in this recipe).


Just out of the oven. 


Up close view of inside of cookie. Slightly crunchy top with moist chewy center

 
Here are the cute little "nest" cookies with chocolate eggs


Here are the cookies with a thumbprint indented center filled with chocolate

Up close view of my moist coconut macaroons! Yummy!


I hope you enjoy this super easy, yummy and very versatile recipe!


Tanja
Gluten Free Casually

Friday, April 5, 2013

Hash Brown Casserole


Hash Brown Casserole. The first time I ever had hash brown casserole was at my Aunt Carol's house on Christmas day many years ago. It quickly became a family favorite and I looked forward to having this on Christmas day at her house. Matter of fact...I think I made a meal on just the potatoes and her Chex mix! After I had children and couldn't always make it to Christmas dinner at her house, she shared her recipe with me. Since then, my family has enjoyed the hash brown casserole on most of our holidays. (And sometimes we just craved it so we had it on a casual weekend with steak dinner!) Then I found out I had a gluten allergy and haven't made these potatoes for a couple of years. Our family really missed these scrumptious potatoes at the last few holidays. I was determined to make them gluten free, delicious and economical. I do not think that gluten free food has to be expensive or tasteless!

     I grew up in a family that has some fabulous cooks (many of our friends are great cooks too!) and food is an important part of our socializing. We get together for holidays, celebrations and just to visit. Food is always in the center of the entertaining. No one wants to eat tasteless food and purchasing special food is extremely expensive. I want to enjoy the comfort foods that I grew up eating and I don't want to sacrifice flavor + I want my guests to enjoy the meal also. (Let's face it...if the food sucks then no one wants to come to my house for dinner! My goal is to make my food gluten free and delicious so everyone loves it and those with gluten allergies can have a great meal without health issues).

     I have been to several restaurants including Cracker Barrel, that have similar potatoes but they all have gluten in them. All the recipes that I have come across have cream soups in them which are not gluten free. (Yes, you can go to a specialty store and buy expensive gluten free soups but I am way too frugal for that!) So, I have tweaked Aunt Carol's original recipe to make it gluten free so everyone that eats at our house can enjoy the hash brown casserole and would never guess it is gluten free. It doesn't require any expensive "special" ingredients. The nice thing about this casserole is you can make it in advance and bake it the day you need it. It also freezes very well. (And leftovers taste great stuffed inside a homemade egg burrito made with corn tortillas...just saying!)

If you have a dairy allergy then you can substitute dairy free cheese, dairy free margarine (or oil) and you can use dairy free evaporated milk. (I included a recipe below for dairy free evaporated milk for those of you that want to try it).

Hash Brown Casserole Recipe:
  • 30 oz. bag of frozen hash browns (shredded or cubed), defrosted. You can use potatoes that you have shredded or cubed yourself if you prefer. It is a good way to use up potatoes. Potatoes are cheap if you are willing to do the work yourself.
  • 1 onion, chopped fine
  • 1 tbs. chopped garlic
  • 1 can (12 oz.) evaporated milk (I used fat free). You can also substitute 1 1/2 cups heavy cream or half & half for the evaporated milk. 
  • 2 tsp. chicken bouillon granules (Make sure they are gluten free. I used Goya brand today. Better Than Bouillon brand is a paste form that is gluten free and wonderful to use also). If you are vegetarian then substitute a gluten free mushroom bouillon or any other gluten free flavoring you prefer. I have even added 1/2 cup of left over gluten free alfredo sauce and it was a yummy addition!
  • 1 cup sour cream or plain yogurt (I used non-fat greek plain yogurt today). You can also substitute mayonnaise or a dairy free equivalent. 
  • 1 tbs. corn starch 
  • 8 oz. shredded cheese (I used Mexican blend cheese. You can use cheddar cheese if you prefer)
  • 1/4 cup of melted butter (I used real butter because I prefer the flavor but you can substitute margarine or oil)
  • 2 cups crushed tortilla chips (or you can use gluten free corn flakes cereal or regular potato chips)
Spray a 9x13 pan with non-stick cooking spray. Combine the hash browns, chopped onion, shredded cheese and sour cream together. Warm the milk in the microwave or stove top with the chicken bouillon and corn starch until smooth and slightly thickened. Stir into the potato mixture. Spoon into 9x13 pan. Mix the melted butter or oil with the crushed tortilla chips (or corn flakes or potato chips) and sprinkle on top of the potato mixture. Bake 350 degrees for about 45-60 minutes or until heated through so cheese is melted and top is golden brown and crunchy.

Diary free evaporated milk recipe:

  • 12 oz. Rice Milk
  • 12 oz. Coconut Milk

Shake the can of coconut milk well to incorporate "cream" that solidifies at the top of can. Combine the rice milk and coconut milk in pot on medium-high heat, stirring frequently. Bring to a slow boil. Turn heat to low and simmer (stirring occasionally) until liquid has been reduced by half. Cool to room temperature before storing in a mason jar or container that seals. Store in refrigerator up to 5 days before using. NOTE: Liquid will separate after it is cooled. Just whisk together before using.


I hope you find this recipe becomes a holiday tradition for a casual side dish!
Enjoy!

Tanja
Gluten Free Casually