My youngest son & me

My youngest son & me

About me

Hi!
My name is Tanja (Sater) Miller and I'm excited about sharing my journey of converting my favorite recipes to gluten free! I am not a fancy cook - I prefer just a casual, fun meal. I am married with grown children (and have small grandchildren) & 3 dogs. I work full time as a registered nurse & I am a geek. Yes, I love Star Trek, Star Wars, Fringe, Firefly, Farscape and most of the other Scify shows. You will probably see a little of my geek side come out once in a while! Please join me on my journey of cooking, baking & converting every day recipes into yummy gluten free meals that everyone can enjoy (not just those with a gluten allergy!) Don't be shy about checking out my recipes....I have the gluten free version along with the regular recipe that I adapted from!

Tuesday, November 26, 2013

Fire Crackers (Gluten Free Style!)

FIRECRACKERS! I always loved the zesty flavor of Fire Crackers. They are usually made with oyster crackers but since going gluten free....I can't have them. I started thinking about them one day and decided that I could make the same thing....only with Rice or Corn Chex and gluten free pretzels. Kind of like a Chex mix with a kick. I couldn't find my recipe so I looked online. I tried the first recipe and it contained an Italian dressing mix packet which wasn't too bad but the vinegar smell wasn't pleasant. So I tried it again....but tweaked the recipe. This time, I really liked the results. You can use any gluten free crackers, Corn Chex, Rice Chex or gluten Free Pretzels (or a combination) for this recipe. If you like it spicy, add more pepper flakes or chipotle. If you like it milder...don't add so much. It's pretty flexible and you can tweak it to your preference. The recipe goes together quickly because there is no baking involved. (Of course if you don't have a gluten allergy then you can just regular pretzels or crackers!)

It's a great snack for the holiday season and for road trips. (Just make sure you pack a few water bottles because sometimes you get a "hot" one and need to drink a quick sip of water! ;)  You can put this on the table for snackers....or pack it up in cute bags for gift giving or road trips. Nothing like giving your traveling holiday guests a goody bag for the road. I like to purchase a $1 recycle grocery bag and fill it with some water bottles and snacks for our road trip traveling guests. (I get cute little plastic bowl sets at the dollar store or get some disposable containers to pack up for road trips. That way I don't have to worry about getting my dishes back. Or....you can put them in the clear cellophane treat bags that you can find in the birthday party section at places like Walmart. I think I paid about $1 for 20 clear treat bags with silver twist ties). You can always dress them up with cute curly ribbon but keep in mind that most people don't carry scissors in their car and we don't want traveling guests cutting their hands pulling on the ribbon to open the bag!

*For today's batch in photo I used: General Mills Rice Chex Cereal (unsweetened) and Snyder's Gluten Free Pretzels. I found both at my Albertson's grocery store. Ask your grocer if you can't find them or substitute another gluten free option if you want. 

Fire Crackers Recipe:

  • 1/2 cup oil (I used olive oil but you can use vegetable oil if you prefer)
  • 1 envelope of ranch dressing powder mix (make sure it is gluten free or use my recipe below)
  • 2 tbs. chili pepper flakes (add more if you like it extra spicy)
  • 3/4 tsp. Chipotle chili powder or regular Chili powder or Cayenne pepper (you can add more or less depending on your spicy preference)
  • 1/2 tsp. garlic powder (not garlic salt!)
  • 7-8 cups of Rice Chex, Corn Chex, Gluten Free crackers or Pretzels (you can use one variety or a mixture of them. I use whatever I have on hand or whatever is on sale. I'm cheap like that!)

Combine the oil, dry ranch dressing mix, chili pepper flakes, chili powder and garlic powder with a whisk until well blended. Pour over your gluten free crackers, Rice Chex, Corn Chex and/or Gluten free pretzels. (I used Rice Chex and Gluten Free Pretzels for my batch today). Gently stir the oil mixture over the "crackers" (or Chex, Pretzels, etc). I put mine in an airtight rubbermaid container with a tight fitting lid. I flipped it gently upside down so the oil mixture would go from the bottom of the container onto the crackers. I waited about 15 minutes and flipped the container back. I repeated this a couple times throughout the day. It coated all my little goodies and no oily residue was on the bottom of the container.

Ranch Seasoning Mix: (4 tsp. mix = 1 envelope of store bought mix)

  • 1/2 tsp. paprika
  • 8 tsp. parsley flakes
  • 4 tsp. salt (I use sea salt but you can use regular salt or a salt substitute)
  • 2 tsp. garlic power (not garlic salt)
  • 4 tsp. onion powder or onion flakes (not onion salt)

Combine all ingredients together. Store in airtight container or glass jar. (I usually just triple the recipe and store it in an empty jelly jar or olive jar. That way I have it when I need it. I prefer storing my spices in glass jars rather than plastic containers. I think they taste weird if stored in plastic after a while). I found this recipe for Ranch Seasoning Mix online: A Cook's Quest website.

(If you are using the ranch seasoning to make a ranch dip instead of FIRE CRACKERS: Combine 4 tsp. mix with 8 oz. of sour cream or plain greek yogurt. Let chill for at least 1 hour prior to using it so flavors blend). 

Up close and personal view of the FIRE CRACKERS

FIRE CRACKERS ready for a road trip!

FIRE CRACKERS bagged for the road!

I hope you enjoyed my gluten free Firecracker recipe. I like to have snacks at my house that all of our guests can eat. I took a regular recipe and made it gluten free by switching out the oyster crackers with Unsweetened Gluten Free Chex cereal and Gluten Free Pretzels. You could also add salted nuts or shoestring potatoes if you want to dress it up even more. You can swap out the Chipotle pepper for dill or another spice if you prefer. Since mine are called FIRE CRACKERS....I wanted a little heat.

Please note that not all generic Chex style cereals are gluten free. You must read labels! I always stick with the General Mills Chex cereals that are labeled GLUTEN FREE on the box! 

Enjoy!
Tanja
Gluten Free Casually

Sunday, November 17, 2013

Gluten Free Ice Cream Bundt Cake (only 3 ingredients!)

3 Ingredient Ice Cream Bundt Cake. It doesn't get much easier than this! I love this recipe because you can take any flavor of cake mix (including gluten free cake mix!) and any flavor of ice cream, sherbet, frozen yogurt or gelato (I use a gluten free flavor) so you can customize it for your special occasion. If you don't have a bundt pan then you can just bake it in cupcake pans or two loaf pans. I love chocolate hazelnut anything....but you NEVER find a chocolate hazelnut cake.....until now! I like to take a gluten free chocolate cake mix (you can use regular cake mix if you don't have a gluten allergy) and use chocolate hazelnut gelato. It is absolutely divine! The recipe goes together quickly with minimal mess in the kitchen which is great for the holidays! I like to buy glass or ceramic plates at the dollar stores and bake one of these to take to a party. That way it looks festive and I can just leave the cake & plate without worrying about getting my good dishes back. This recipe is great for dessert or for a brunch. You can add vanilla ice cream to a vanilla cake mix + a handful of blueberries = blueberry brunch cake or muffins. Yes, it's that easy! During the different holidays you will find special cake and ice cream flavors so you can be really creative. (Just be sure to read labels if you have a gluten allergy! Some of the ice creams that have candy and cake pieces contain wheat/gluten! You can substitute a dairy free alternative ice cream if you have a dairy allergy).

I like to make most of my stuff from scratch but I do like to have a couple of cake mixes on hand for a quick dessert for busy times. You can "doctor" them up and customize them to make them extra special. This is also a great way to use up the ice cream in the freezer. I know most of you are thinking "are you serious? What leftover ice cream?" At our house....we like ice cream but don't eat it regularly so this recipe is a great way to use it up instead of tossing it out, especially if we had a party and have a couple of flavors taking up "valuable real estate" in the freezer!

3 ingredient Ice Cream Bundt Cake Recipe:
  • 1 box of cake mix, dry (I used Betty Crocker Gluten Free Chocolate flavor today)
  • 2 cups of slightly melted ice cream, frozen yogurt, sherbet or gelato, any flavor (I used a gluten free Chocolate Chunk ice cream for today's recipe. I did not use a reduced fat version)
  • 3 large eggs
Combine the slightly melted ice cream with the dry cake mix and eggs. (You need to use the DRY cake mix, do not prepare it according to the box instructions!) Beat by hand or with a mixer until smooth. Poor into a greased bundt pan (I used a small size bundt pan since I used the Betty Crocker GF mix which contains less cake mix than a "regular" cake mix) and bake in pre-heated 350 degree oven for about 35-40 minutes or until it springs back when gently touched or toothpick inserted comes out clean. You can bake in cupcake pans for 18-22 minutes or in two loaf pans (1 loaf pan if you are using a Betty Crocker GF cake mix) for about 30 minutes. (Every oven is different and altitude can vary cooking times). When the cake is cool, you can dust it with powdered sugar if desired. I like to take about 1/2 can of Betty Crocker Frosting and melt it in the microwave or stove top until smooth and slightly runny and then drizzle over the cake. This is a gluten free (not to mention quick & lazy) way to add a little pizazz to an ordinary bundt cake. You can also drop some colored sprinkles or chopped nuts or candies on top if you really want to dress it up. Be creative! (NOTE: Betty Crocker Gluten Free Cake mix only makes 12 cupcakes instead of 24 like a "regular" cake mix but you still need to add the full 2 cups of ice cream & 3 eggs so it turns out moist and rises properly!) 

I saw a recipe on the internet recently that called for just 1.5 quarts of ice cream + 3 cups of self rising flour. Mix & bake in a regular sized bundt pan (or two loaf pans). I tried it and personally thought it wasn't very good. It was very dry and pretty bland even though I used a fancy ice cream. I tried tweaking the recipe again by using 3 cups of GF flour (I used Betty Crocker GF flour blend) + 2 tbs. baking powder + 1/4 tsp. salt + 1/2 cup sugar as the base mix and THEN added the 1.5 quarts slightly melted ice cream & 3 large eggs & 1/4 cup oil. I baked it in a regular sized bundt pan (or two loaf pans). It turned out just fine. It was more like a moist bundt cake rather than a dry bread. I tried it several ways and we all thought this particular recipe needed the oil for moisture. GF flour can be a little finicky to work worth. (This is a store bought cake mix alternative. Although, I really really like my Gluten Free Vanilla Cupcake Recipe. You can find that recipe on my blog).

Oh....and did I mention that taking a cake mix out of the box and putting it into an oven mit, adding a spatula or wooden spoon along with the directions makes a great last minute stocking stuffer or hostess gift?! Yep, my little gift giving secret is now out there. You all know what a resourceful gift giver I am now!  :) Having 3 kids....I ALWAYS had to have a few last minute simple gifts. Our life was hectic (to say the least!) and they always needed a small token gift for a Sunday school teacher, Girl Scout leader, bus driver, etc. Money was on a tight budget when I was going to nursing school so these little thoughtful cake mix/oven mit gifts always came in handy. I always dressed them up with pretty ribbons, a spatula or wooden spoon and added some sprinkles or something fun (I attached the recipe to the ribbon or to the cake mix pouch). I always got a comment back from the recipient that they really enjoyed the gift. Although I thought it was just a simple gift....they told me it came in handy for a last minute party or potluck or snow day fun with their kids. We did those simple gifts for a few years and then I thought I would get "real gifts" when money wasn't so tight. Most of the recipients said they were disappointed that they didn't get their cake mix oven mit kit. They actually looked forward to them! I guess they didn't figure out that it was just a box cake mix! :) My kids also like getting these little cake mix mit kits in their holiday stockings now that they are adults! :)  Just be sure if you are gift-giving a GF cake mix (like Betty Crocker GF mix that makes only 12 cupcakes or 1 8x8 cake pan) that you put instructions to bake in cupcake pan or 1 loaf pan. It will not make a full size bundt cake! If you are using a traditional "regular" cake mix then the instructions will need to say regular size bundt pan OR 2 loaf pans or cupcakes.  You want the recipient to be delighted in their gift...not frustrated!)

Ice Cream Bundt Cake Mit Kit ready for gift giving!
You can also use your own homemade gluten free cake mix recipe. I just wanted to try out the Betty Crocker Gluten Free Chocolate flavor and since I snagged them on sale cheaper than I could make them from scratch....well....enough said. Betty Crocker knows her stuff in the kitchen and the cake mix turned out just fine. I have also tried my own gluten free vanilla cake recipe (see recipe on the blog) and it works out great too. (You just need the dry cake mix so don't prepare it).


I hope you enjoyed my quick & easy dessert. It is flexible and you can easily customize it to your family's preference. If you don't have a gluten allergy then you can certainly just use a regular size cake mix (like Betty Crocker) and your favorite ice cream. You can even add a handful of colored sprinkles or chocolate chips. It is a quick & easy cake to make. It is even great with fresh berries or to use as a shortcake for summer time fun!

Tanja
Gluten Free Casually


Saturday, November 9, 2013

Whatchamacallit Candy Truffles (gluten free)

Whatchamacallit Candy Truffles. They taste almost like a Willie Wonka brand Whatchamacallit Candy Bar! They are sooooo EASY to make and they don't require "special" expensive ingredients. I love easy recipes that go together quickly, budget friendly, and even the kids (or grandkids) can help make them! I used to make a ton of holiday treats to pass out to friends and neighbors and I combined simple things like these on the cookie plate as well as the more gourmet, time consuming cookies and treats. My conclusion? Everyone seemed to enjoy the simple things the most. They LOVED these candies because they are just a little different than your traditional holiday cookie. If I put these on a holiday cookie platter....they are gone in an instant! They can be dipped in white chocolate, dark chocolate or milk chocolate. Or....if you are really pinched for time.....just roll them lightly in chocolate sprinkles, cocoa powder or powdered sugar. Oh....and did I mention that you don't need to bake them? They are a no bake treat! Simple! :)

They can also be made in advance so it is really convenient during the busy holidays. These are also great for potlucks, tailgating or any type of get together. This is a fun activity to make with the kids on snow days! You can even dress them up by drizzling some melted chocolate on them or pressing a Hershey Kiss in the center and wrapping the filling around it. Be creative! This recipe is so flexible and you can customize it easily! You can even dip them in the colored white chocolate that you buy in the cake decorating/candy sections of stores like Walmart, JoAnn Fabrics, Michael's Crafts, Hobby Lobby, etc for special parties! You can also press them into a 9x13 greased pan and pour the melted chocolate on top and cut into bars. But honestly, most people like to pop the truffles into their mouth for the exploding flavors and it seems like it serves more people when you make them into little truffles! I would also like to mention that these can really dress up some boring brownies! Instead of making them into little truffle balls....just spread the mixture onto the brownies after the brownies have baked and cooled. Then drizzle a little melted chocolate on top. It takes brownies to a whole new level of delicious! 

The original recipe was given to me many, many years ago. I can't remember the name that was on the original recipe card. My kids said they taste just like a Whatchamacallit Candy bar so that is the name that stuck. I know exactly what they are talking about when they request this candy! The original recipe calls for a Rice Crispy cereal but it does contain malt flavoring which is not gluten free friendly. They do make a gluten free Rice Crispy cereal but it never seems to be on sale....so I improvise and use the more cost effective choice: Post Cocoa Pebbles which are gluten free!

I would like to point out that most of the "generic" versions of cocoa pebbles and crispy rice cereals and  rice Chex style cereals are not gluten free since they contain malt flavoring or are processed in a facility that uses wheat. Please read your labels carefully. Post Cocoa Pebbles & General Mills Rice Chex cereals are marked on the front of the box as GLUTEN FREE which makes shopping convenient. You can also substitute the chocolate, vanilla or plain Rice Chex in this recipe but you will have to crush them up so they aren't so chunky!

Whatchamacallit Candy Truffle Recipe:

  • 2 cups of peanut butter (I used Jif Creamy)
  • 3 cups Post Cocoa Pebbles (or substitute a Gluten Free Crispy Rice cereal or crushed Rice Chex Cereal)
  • 3 cups powdered sugar
  • 1/4 cup melted real butter (or olive oil)
  • 2 (12 oz.) bags of any flavor chocolate, melted (optional). I used one bag of semi-sweet and one bag of milk chocolate mixed together for today's batch. You can use white chocolate chips, almond bark, peanut butter chips, etc) OR just roll into chocolate sprinkles, powdered sugar or cocoa powder

Mix together the peanut butter, cereal, powdered sugar and melted butter or olive oil. Roll into bite sized balls. I press mine so they are compact and won't fall apart when dipped in chocolate. (At this point I refrigerate them on a cookie sheet lined with waxed paper or parchment paper for at least 30-60 minutes to get them chilled so they stay together when I dip them into the hot melted chocolate).

(If you are planning on spreading this delicious, crunchy filling directly onto cooled brownies or cookie bars then you don't need to roll them or dip them first. Just spread onto the cooled bars and you can drizzle with melted chocolate if desired. It takes brownies or cookie bars to a whole new level of deliciousness! It's a good way to dress up an ordinary brownie!)

Melt your chocolate in microwave safe bowl or in a double boiler until melted and thin. It should drip in a steady stream when you spoon it out. If it appears too clumpy...add a tablespoon of Crisco to thin the chocolate a little more. Dip your candy balls into the chocolate using a fork and let the extra chocolate drip off a little bit before placing them on waxed paper or parchment paper to set. You shouldn't need to refrigerate them to set. (It can cause them to sweat). If you decide not to dip them in chocolate then go ahead and roll them lightly into any of the following items: chocolate sprinkles, powdered sugar or cocoa powder. The recipe makes about 40 truffles, depending on how large you make them.


The bite sized balls prior to dipping them in chocolate

The chocolate should be thin enough that it doesn't clump when you spoon it

I let the truffles sit on the fork for a few seconds to get excess chocolate off

Cooling on the parchment paper after their dip in melted chocolate

Ready to eat Whatchamacallit Truffles!

Variety of coatings on Whatchamacallit Truffles

Yummy! Inside view of the truffle!


Great favor for any type of party!

Below are photos of the same "whatchamacallit" filling but I used it on top of my gluten free plain brownies to dress them up for a party. Everyone LOVED them and couldn't believe they were so easy to make and gluten free! I just made the filling and spread it over my pan of cooled brownies. Melted some chocolate chips and spread on top. I had a little bit of melted white chocolate so I drizzled some of that on top too. It was a deluxe version of a brownie but it wasn't very difficult to make. (It's a good way to dress up a brownie made with a mix!)

Ready to eat Whatchamacallit Truffle Brownie!

Which would you eat? The brownie or truffle? Maybe both! :)

Delicious crunchy Whatchamacallit topping on a rich brownie! Yummy!

I hope you enjoyed one of my family's super easy dessert recipes. We like to do a fun, casual but delicious desserts at our house. This is a recipe that the kids could help me with when they were younger (and still can!) and it is something the rest of our family and friends enjoyed when we took to their house. I have to admit that every once in a while I make a batch of these because we just like to eat them even when it isn't a special occasion! These travel great in the mail. I generally put them in a container with waxed paper between the layers and they arrive intact. (Keep in mind if you are mailing them to a warm climate then consider rolling them in sprinkles, cocoa powder or powdered sugar instead!)

Tanja
Gluten Free Casually

Friday, November 8, 2013

Gluten Free Tuna Casserole

Gluten Free Tuna Casserole. There is something about fall and winter that make us all crave the comfort of a warm casserole. My husband really likes the basic tuna casserole so I pretty much stick with that. I used to make mine with the convenience of canned cream soup but since most all of them contain wheat flour as a thickener....I don't have that option any more. The canned gluten free cream soups are currently expensive and not all the stores carry them so I just make my own which is actually very easy and very economical! I have a couple of different recipes for "cream soup" and they all work just fine in casserole recipes. The thing I like about making a "cream" soup is that it is very forgiving and you can substitute broth or bouillon flavors for different recipes. Sometimes I like to add a dab of cream cheese to the cream soup or a splash of heavy cream for a richer flavor but you don't have to do that! I used a homemade cream of mushroom" soup for today's tuna casserole but you can make it into a cream of celery soup, cream of chicken soup or cream of onion soup instead. Be creative with what you have in your pantry! Just for the record...I improvised last time I made tuna casserole. I was in a hurry, didn't have time to make a cream soup so I looked in my cupboard to see what I had on hand. I spotted my husband's can of Progresso clam chowder which is gluten free....and I used it in place of the traditional cream soup. It worked just fine. It does have tiny cut potatoes in it but no one seemed to mind. Now I keep a can of it on hand....just in case! I was brought up with the following quote: "A good cook can follow a recipe but a great cook can improvise with the ingredients they have in their cupboard". 

It is now becoming easier to find gluten free noodles at just about any grocery store now so casseroles are coming back into our life again! I was so happy to see that Ronzoni and Barilla pasta are both now offering gluten free noodles which are on the grocery shelf right next to the regular pasta. The price is reasonable and it is very convenient to be able to just walk in and pick up a box of GF no matter what state you are in. It makes it easier to travel with a gluten allergy!  I was able to find the Ronzoni GF noodles for under $1.49 at Military Commissary, Fry's and Basha's had them for under $2.50 per box). I was happy to find that Smith's grocery store in New Mexico carried Barilla GF noodles. I sometimes feel a little anxious traveling because I hate to drag a suitcase of food with me but I don't want to get stuck without GF foods available!  Don't worry....I don't get paid for advertising so I can just give you my honest opinions on brands and where to find them! I do know that most grocery stores only order/stock what is in demand so if you aren't finding something you are looking for....ask the store manager to special order it. Most of them will at no extra charge to you. I was pleasantly surprised that my local Super Target store and Albertson's both carry a huge selection of GF items and they will special order items that are requested. (My favorite store to shop for GF items with helpful managers that are great about ordering specialty items is the Super Target store on Lake Pleasant in north Peoria, Arizona! I also like shopping at my local Trader Joe's store because they carry a lot of GF items and it's just a fun little place to shop! My grand-daughter loves to push the little grocery carts they have!)

Tuna Casserole Recipe:
  • 12 oz. gluten free noodles (I used Ronzoni brand today)
  • 1 recipe of homemade gluten free cream soup (or one 10-12 oz. can of gf cream soup or gluten free clam chowder (18.5 oz) or use my homemade recipe below)
  • 3 cans or packets of tuna, drained (more if you like extra tuna. I used tuna packed in water )
  • 1 cup of frozen peas, optional (I used petite peas without any seasonings on them)
  • 1/3 cup shredded carrot, optional (I use this mainly for a little color. The tiny bit of carrot doesn't really add any flavor to the casserole. I think it just adds some color to a bland looking casserole! I am all about presentation. I see food with my eyes. If it looks bland...it isn't quite as appetizing to me! You can leave this out if you don't have any or just don't like carrots!)
  • 2 tbs. chopped onion, optional (you can add fresh, frozen or dried)
  • 1 tbs. minced garlic (I used fresh garlic today but you can use dried, minced garlic or garlic in a jar. I do like using fresh garlic when possible but sometimes when garlic isn't the main feature in the recipe...I cheat and use the minced in a jar! Sometimes the difference between making a decent meal depends on how much time you have to do it. I cut corners when I am in a time crunch! It's okay to do that...it still beats a box of preservative filled dinners!)
If preparing your cream soup from scratch then I start making it while I put the water on to boil for the noodles. (Recipe below for cream soup). If you are using a canned cream soup or clam chowder then just start off by boiling the noodles. Boil your noodles and drain them. With the Ronzoni brand noodles I have noticed they stay a little firmer so I cook them a smidge longer than regular noodles. Just don't stir them too much or they will start falling apart. I wait to mix them in last with minimum trauma! I do add a splash of heavy cream, half & half creamer or 2 tbs. of cream cheese if I use a can of clam chowder. It adds a little more flavor to the canned soup. 

Shred carrot until you get about 1/3 to 1/2 cup of carrot. (Or you can buy the pre-shredded carrots if you are using them for something else later in the week...like soup! Sometimes when I find the larger bag of pre-shredded carrots for around $1 it just isn't worth my time and mess shredding carrots if I am going to be using them for soup, salad or another casserole later in the week! I know buying shredded carrots sounds frivolous to some people but if I have been working all day on my feet then the extra few minutes I can shave off my dinner preparation time is worth the extra $1 to me!) I put the shredded carrots, garlic & onion in the microwave for a about 1-2 minutes or until slightly tender but still firm. Or you can "blanche" them by putting them in the hot noodle water for a minute. This just keeps them from being crunchy in the tuna casserole since we aren't really going to bake it long. Actually, you don't even have to bake it at all since everything is already cooked. Gently combine all the ingredients together. I just add my frozen peas to the colander when I drain my noodles. This will thaw them right away without making them mushy. Don't over mix it or your noodles may start falling apart. I like to put mine in a greased casserole dish and sprinkle crushed potato chips or a handful of potato sticks on top and bake it in 350 degree oven for 15/20 minutes but you don't have to do that. (I like to add potato chips or potato sticks on the top of the casserole just like my mom did. The potato chips or potato sticks add a nice salty crunch. I know it is probably a hill billy thing...but I like it and that's the way we make it at our house! If you prefer topping it with GF bread crumbs mixed with a dab of melted butter....feel free to do that instead!) You can just mix it all together and serve it from the pot without putting it into the oven. Everything is already cooked. (Let's face it....Betty Crocker Tuna Helper isn't baked! It just gets served right from the pot! You don't need to add any bread crumbs or potato chips! It's a personal preference!)


Homemade Cream Soup Recipe:
  • 2 cups broth (or water + gluten free bouillon) or milk (If you are using gluten free bouillon then add 2 cubes or 2 tbs. bouillon. I used Better than bouillon mushroom flavor base in today's recipe. I actually used 1 cup milk + 1 cup water + 2 tbs. bouillon. I like the flavor of milk added but if you have a milk allergy or don't have any milk available....water + bouillon or broth will work fine. You can add any flavor bouillon or broth you want or you can just use milk with some sauteed onions, garlic and salt instead). I have a friend that uses all the tuna water mixed with onion, garlic and additional water to make 2 cups. Like I said before....this recipe is very flexible
  • 1/4 cup gluten free flour or corn starch or tapioca starch
  • You can add a small can of chopped mushrooms if desired or chopped celery or onions (which I saute or microwave until soft because you don't want crunchy pieces in your casserole!)
Heat the broth, water or milk until it gets warm. Add the gluten free flour or starch and whisk until smooth. (A hill billy secret...I take an empty jar with a screw on lid (like an empty jelly jar or pickle jar) and mix a tiny bit of warm water with the flour or starch and shake it until smooth and not lumpy. I find this MUCH easier than trying to whisk out all the lumps!) Mix it into the warm broth or milk and stir until it starts to thicken. Remove from heat and add any extras you want like the mushrooms, cooked onions and/or celery. You can also add additional spices if you prefer. Taste the soup. If it tastes a little bland then just add a tablespoon of cream cheese, butter, cream, shredded cheese or spices to get the flavor you are looking for. Customize it for your personal taste. Now it is ready to stir into your casserole or other recipe! If you are finding that the cream soup is too thick...add a smidge of water or additional broth. If you think it is a little too runny then add something to make it slightly thicker...additional flour/starch or heavy cream or creamed cheese. 

Note: In a pinch...I have used canned evaporated milk mixed with water to get 2 cups of liquid, I have also used 1/3 cup of powdered milk + water to = 2 cups of liquid. You can also substitute almond milk, coconut milk or a Lactose free milk if you want the flavor of milk in your cream soup but have dairy allergies. 

For a Deluxe version of Tuna Casserole: Try adding a small package of frozen very tiny salad shrimp (they are generally inexpensive and precooked. Just run them under warm water to thaw them quickly!) and/or a little bit of canned or frozen (pre-cooked) crab meat or scallops. I also LOVE to add about 1 cup of Loganstino Lobster tails which I can find seasonally at my local Trader Joe's store. This seems a little more gourmet than plain tuna casserole if you need something quick or if you have a houseful of guests and want to impress them with something a little fancier than basic tuna casserole. We went to a fancy restaurant on vacation years ago in Florida and they had a recipe similar to this Deluxe Tuna Casserole. It had little shrimps and tiny scallops mixed in with the tuna. It had a rich sauce that was probably made with some heavy cream added. Boy....it was delicious and it was one of their top sellers. They served it with seasoned bread crumbs on top & a side of garlic bread. ( I duplicated the recipe when I got home....WOW....my guests loved it! (I admit that I splurge on the calories and add a hefty splash of heavy cream when I make it!) I now make mine with finely crushed potato chips OR GF bread crumbs on top to keep it gluten free! (I have also added some left over chopped salmon or a mild white fish to the deluxe tuna casserole if I have some that needs used up! It's a great way to "recycle" leftovers!) I will say that the deluxe tuna casserole tastes great paired with a good wine!

Up close view of Basic Tuna Casserole

basic Tuna Casserole


I hope you enjoyed my recipe for a gluten free tuna casserole that is VERY FLEXIBLE with the ingredients. You can easily customize it to your flavor preference or allergy restrictions by tweaking the ingredients. Of course, if you don't have a gluten allergy then you can use regular noodles and regular soup! I will add photos when I make the deluxe tuna casserole recipe at a future date.


Tanja
Gluten Free Casually


Sunday, October 20, 2013

Lasagna

Gluten Free Lasagna! :)  Oh Lasagna....I have missed you during my gluten free journey! Lasagna is one of my favorite Italian foods and since I have not been able to find a decent lasagna noodle until now...it hasn't been part of my life for a couple of years. My family all love lasagna so it is something I like to make when the gang is all home. I like it because it goes together relatively quickly, feeds a bunch of people, can be made in advance and left overs (if there are any!) are even better! For those of you that didn't know....YOU DON'T HAVE TO PRE-COOK ANY LASAGNA NOODLE IN ADVANCE! Yes, that is correct! You don't have to buy the specially marked lasagna noodles that claim you don't have to cook them first. You can just layer the hard, uncooked lasagna noodles and they will cook as the sauce and cheese melt. Seriously....I've done it that way for years with all the brands! Otherwise...well, I wouldn't bother making lasagna. I hated fighting with the limpy cooked noodles that would tear.

I learned from an Italian neighbor years ago that you shouldn't pre-cook the noodles. They will absorb the flavors and liquid creating a lasagna that will be less "soupy" and it will hold together fantastically when it is cut. The photo above is taken 5 minutes after I removed it from the oven! Seriously! There are many different versions of lasagna out there. I have several friends that are from Italy and quite a few more that are first generation Italian-Americans. They ALL make lasagna differently. I have to say that I have enjoyed the variations from ingredients to sauces....but this is the one I like best. It is my own recipe that I have tweaked from several recipes. Of course you can change this up to add or delete your favorite ingredients. I used jar sauce today. Yes, I know all of my Italian friends just cringe when I say "store bought sauce"....but seriously....I really like Hunts brand in the can. I don't buy it because it is cheap...I buy it because I really like the flavor and of course it is convenient. My mom always made homemade sauce when I was younger...and canned it for future uses. I don't bother because the Hunts brand is already affordable, tasty and I don't have the mess and time involved in preparation. Plus....canning jars are not cheap these days! However....for this recipe you can either buy your favorite store bought sauce or make your own from scratch. It is a personal preference.

I also want to point out that I use BOTH cottage cheese AND ricotta cheese in this recipe. Again....my Italian friends will cringe! Let me explain WHY I do this. My mom used to use just cottage cheese in her lasagna when I was growing up. Mainly because we lived in a small town and choices were very limited. I never even heard of ricotta cheese until I got married. The first time I had lasagna with ricotta cheese....I wasn't sure if I liked it. It was too rich and had a slightly sweet flavor. It was a little too much for me. The next time my mom made her version of lasagna with just the cottage cheese....well it was too bland in comparison. I mix both the cottage cheese and the ricotta cheese together. I like the balance it provides. It has the rich sweet flavor of ricotta with the heartier more subtle flavor of cottage cheese. I also don't add eggs to my lasagna. I know a lot of my friends do....when I ask why....well the answer is always the same: "because my mom/dad did". Well...I don't add them. No one has proved to me that it makes it stick better or flavors the lasagna so I just don't add any. Until I am proven wrong...I don't add any eggs.

My kids wanted me to post my recipe on here for lasagna since it is one they really enjoy and they wanted the convenience of having access to the recipe via the internet so they can cook it anywhere, share it or gather ingredients by reading it from their smart phones. I was hesitant because....well...I am not of Italian decent and I don't claim that my recipe is "authentic" or even fabulous. I just know that my family likes and it they wanted it posted. I am sharing it in case you want to try it or tweak a basic recipe to your liking. If you don't have a gluten allergy then you can just use regular lasagna noodles. (I found the gluten free ones I used today at Walmart for about $2.19/box). However, I am noticing a lot of other name brand pasta companies are beginning to make gluten free noodles and they are also becoming affordable. Be sure to look when you go shopping because you might be surprised. I was pleasantly surprised recently finding both Barilla pasta & Ronzoni pasta have some gluten free noodle choices available now!)

Lasagna Recipe:
(I generally make my lasagna for a crowd in a heavy duty rectangular roasting pan that has quite a few layers and is enough ingredients that would make two 9x13 pans). The recipe below is just for one 9x13 pan of lasagna)
  • 1 box of lasagna noodles (I used gluten free noodles but if you don't have a gluten free allergy then you can just use regular lasagna noodles. No need to pre-cook noodles!)
  • 1 (16 oz.) container of Ricotta cheese (I used fat free today but you can use regular)
  • 1 (16 oz.) container of Cottage Cheese (I used 1% fat small curd today because I find that the fat free is runnier and I like it less runny but you can use any style cottage cheese you like). 
  • 1 can (15 oz) chopped tomatoes (I used the Italian style with basil and garlic added)
  • 1 1/2 cans of Hunts Zesty and Spicy spaghetti sauce (I save the other half of the can in case people want to add additional sauce on top when serving it. Some people like their lasagna a little more saucy and like to dip their bread in it)
  • 1-2 pounds of lean ground hamburger (I used about 1.5 pounds today because that is what I had left in my refrigerator and I wanted to use it up. Depends on how meaty you like your sauce. If you prefer vegetarian then you can substitute either the soy crumbles or leave the meat out)
  • 1 pound of ground sausage (you don't have to use this but I think it adds a little zesty flavor to the lasagna and we really like the combination. But if you don't eat pork or don't have any handy then just leave it out!)
  • 3-4 cups of shredded mozzarella cheese (or Italian blend cheese)


The ONLY thing you need to pre-cook in this recipe is the meat. Drain the grease well. You don't want grease floating around in your lasagna later. Combine the sauce and tomatoes (including tomato juice) with the meat and set aside. You don't need to heat up the sauce...it will heat up in the oven. Save yourself the step! Combine the Ricotta cheese & Cottage cheese together. I don't add any salt because the sauce and sausage are usually salty enough but taste it to be sure. I lightly spray my 9x13 (or roasting pan if doubling the recipe for a huge crowd!) with non-stick cooking spray. It just makes the lasagna come out much easier. Layer the UNCOOKED single layer of the lasagna noodles in the bottom of the pan. You may have to break some of the noodles to get them to fit. That is okay. The lasagna will be forgiving if you have some broken pieces in there! I generally spoon a layer of the meat sauce onto the noodles. You need to put just enough to cover the noodles so that when the sauce heats up it will cook the noodles when baking! Top the meat sauce with a layer of the Ricotta/Cottage cheese mixture and about 1 cup of the shredded cheese. Repeat layers ending with a layer of noodles on top with a little bit of sauce and shredded cheese. You should not end up with the Ricotta/Cottage cheese mixture above the top layer of noodles. The only thing on the last layer on top should be noodles, remaining sauce and some shredded cheese. If you are finding that you are skimpy on sauce for the top layer...just add the remaining 1/2 can. Cover with foil (I spray mine with non-stick cooking spray to prevent cheese from sticking to it). At this point you can either refrigerate or freeze for a later date. I generally make mine the day before and put in the refrigerator to bake the next day or I make it early in the morning and bake it close to dinner time. I personally think that by letting it sit for a few hours allows the sauce to soften the noodles a little bit but you really don't need to do that if you want to bake it right away. Bake in 350 degree oven (with pan covered in foil) for about 70 minutes or until a knife can be easily inserted into the noodles and they are soft. Remove foil and bake additional 10-15 minutes until cheese is bubbly on top and slightly golden. Let stand at least 5 minutes prior to slicing. Serve with additional sauce on top if desired.

I will add some better photos next time I make it. I wasn't originally planning on featuring this recipe on the blog so I took photos after it was made and the photos aren't the best.


Enjoy!
Tanja
Gluten Free Casually


Wednesday, October 9, 2013

Pumpkin Crumb Bars

Pumpkin Crumb Bars. My kids are all pumpkin pie eaters. (I personally can take it or leave it. Unless I am really desperate and craving something sweet...pumpkin pie just doesn't do it for me!) With the holidays quickly approaching...I needed to find a pumpkin pie or similar dessert that was gluten free and tasted great so EVERYONE could it eat. This recipe is one that even I will eat! :)

I took a couple of different pumpkin recipes and tweaked them until I got the flavor and texture I was looking for with the convenience of using a gluten free box cake mix. (If you don't have a gluten allergy you can make this recipe using a regular yellow cake mix!) Although, I love baking...I also don't like to be stressed over the holidays trying to fuss with making gluten free pie dough! This recipe tastes like the inside of a pumpkin pie...the pumpkin custard is silky smooth but instead of having a bottom crust it has a lovely crumb topping. You don't miss the crust and the slightly spicy topping just melts in your mouth. I could become addicted to these. I wasn't a pumpkin pie lover but I could quickly become a pumpkin crumb bar lover! You can also add about 1/2 cup chopped nuts like pecans, walnuts, almonds or macadamia nuts in the crumb topping. I chose not to add them today. I also think an 1/8 cup of toffee bits would be delightful in the topping mixture but I didn't have any to add to the mixture today.

Pumpkin Crumb Bars:
  • 1 can (15-16 oz.) pumpkin puree (not pie filling that already has other stuff added) You can also substitute sweet potatoes if you prefer
  • 1 can (10-12 oz) evaporated milk (If you don't have evaporated milk then you can cook 3 cups of regular or non-dairy milk on low heat until it reduces to 1 1/2 cups). Evaporated milk is just a cooked down thicker version of milk. Cool slightly before using it. It is not sweetened.
  • 1 cup of brown sugar (I pack it tight in the measuring cup). You can substitute regular or raw sugar if you prefer. I like using the brown sugar because I think it gives it a nice mild molasses  flavor to the custard.
  • 3 eggs (I prefer brown eggs because I personally think they make my baked goods seem fluffier but regular eggs will work fine too!)
  • 3 teaspoons of pumpkin pie spice (If you don't have pumpkin pie spice you can combine 2 tsp. ground cinnamon, 1/2 tsp. ground nutmeg, 1/2 tsp. ground ginger & 1/8 tsp. ground cloves)
  • 1 box of gluten free yellow cake mix (I used Betty Crocker Gluten Free yellow cake mix, 15 oz. size). If you don't have a gluten allergy then you can use a regular yellow cake mix!)
  • 1 1/4 stick of butter (I used real butter because I like the flavor but you can use a dairy free margarine or 3/4 cup oil)
  • 1 tsp. additional pumpkin pie spice or just substitute cinnamon
Cream the pumpkin puree, eggs, evaporated milk, sugar and 3 tsp. pumpkin pie spice together for about 2 minutes or until really smooth. I like to make sure it is whipped really good because it gives a nice silky texture after it is baked. Pour into a greased pan. I used an extremely deep dish 12" pie pan but you can use a 11x7 baking dish, two regular 8" pie pans or if you want slightly thinner bars just bake in a 9x13 pan. I wanted these a little thicker to get a decent layer of the silky pumpkin custard. I put mine in a preheated 350 degree oven for about 15 minutes BEFORE I added the crumb topping.

While the custard was baking, I combined the dry yellow cake mix, melted butter, additional 1 tsp. pumpkin pie spice together until it was crumbly. If you are finding it is too dry and powdery then just add a little extra melted butter or oil and if it is too moist then add either a couple tablespoons of sugar or GF flour or cornstarch to get it into a crumbly consistency. Remove the pumpkin custard from the oven and sprinkle the crumbly mixture on top. Return it to the oven and bake until the custard is completely set and no longer jiggly. (I have tried just sprinkling the crumb topping onto the custard prior to any baking but the crumbs sunk to the bottom and didn't give it the crumb texture I wanted. Therefore, I now bake the custard 15 minutes prior to sprinkling on the crumbs!) A knife inserted into the center should come out clean. It will depend on which size pan you use to bake your dessert but my 12" deep dish took about 50 additional minutes after I put the crumb topping on top of the custard to finish baking. Which is a total of 65 minutes of baking! (Everyone's oven temperature and altitude can vary baking times. I recommend checking your dessert after 40 minutes and check in 5-8 minute intervals until center is no longer jiggly). Crumb topping should be golden brown. I like to serve mine cooled at room temperature. It will slice much better. You can serve it with ice cream or whipped cream if desired.


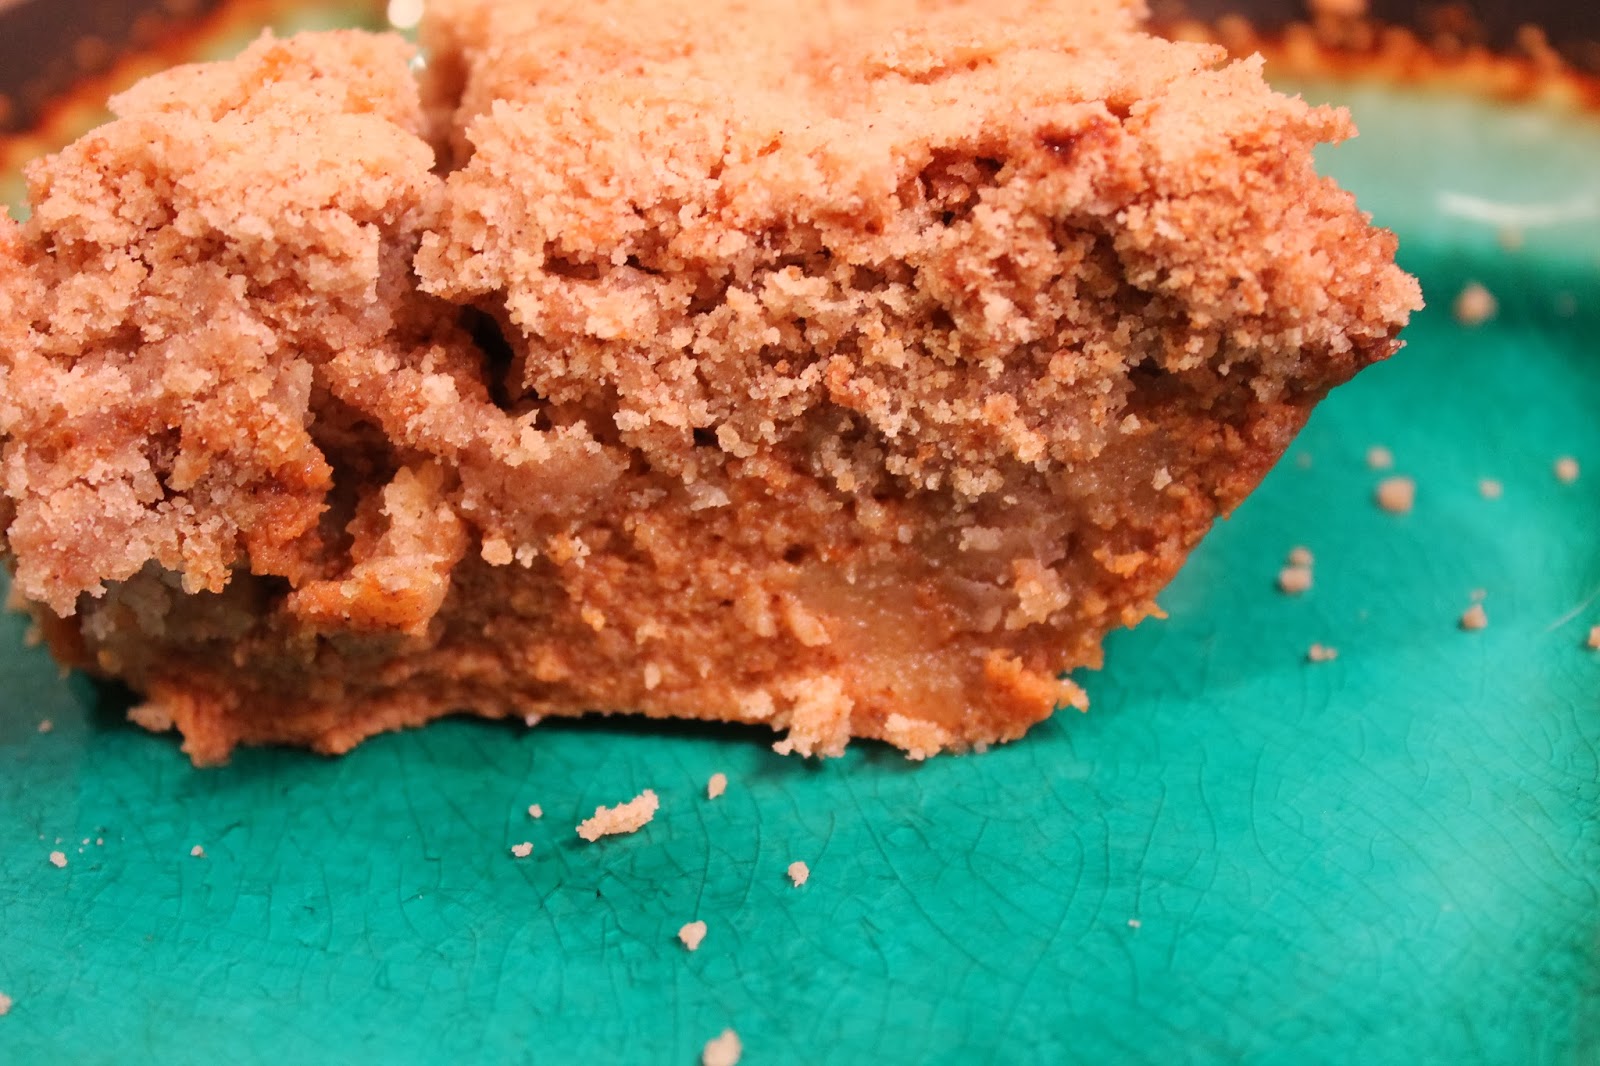
The pictures don't do the dessert justice. The custard portion is very silky and not too sweet while the crumb topping is slightly spicy and a hint of butter that just melts in your mouth. I was quite surprised at how much I really liked it considering I am not much of a pumpkin person! It will definitely be on my Thanksgiving and Christmas dessert table! It is easier than preparing a regular pie and MUCH more flavor and texture than a plain old regular pie! I highly recommend this for your holiday dessert!

Enjoy!
Tanja
Gluten Free Casually

Sunday, September 29, 2013

"Kinder Chocolate" (Vanilla Cream Chocolates)

Kinder Chocolate. This is my absolute favorite German candy! It's one of the little luxuries (next to Nutella) that I would look forward to in our goody boxes from our German relatives. I fell in love with this candy when I was 5 years old and visited my cousins in Germany for the first time. I love the creamy (yet slightly firm) texture of the the vanilla cream center encased in mouth watering milk chocolate. I could sit and eat an entire little box. Okay, I have done that AT LEAST once....truth be told....more times than I care to admit!  :)

I  have been known to fill an entire carryon suitcase FULL of these! NO JOKE! I am sure security/customs were wondering if I was up to something shady or if I was completely insane. For the record...let's just pretend that I am not crazy. I would also like to mention that my kids and husband also love these candies so the entire carryon full of kinder chocolate wasn't just for me!  If you are lucky you can find Kinder Chocolates at specialty stores in the import section but you pay dearly for them! I only treat people to those on special occasions and still flinch at the imported price!

I was given a challenge by my husband to "copy cat" the recipe for the Kinder Chocolates. Wow! I wasn't sure if I could do it. I tried a couple test batches and...not even remotely close. Finally, after several attempts....SUCCESS! They are pretty darn close to the real thing. Keep in mind that these are very rich & very sweet. I would categorize them in the same family as fudge or truffles. If you cut them into tiny bite size pieces then it makes a good amount. I like to put them in individual little mini-muffin liners (you can find the tiny ones frequently at the dollars stores! I got these cute little pumpkin ones at the dollar tree $1/pack of 100). They look festive and dress up a dessert table or cookie plate! I like to bundle a few of them up and put in a clear cellophane bag and give to friends.

Did I mention how EASY these are to make? They certainly look and taste like a lot of time and energy went into making them but I did it all in the microwave...3 ingredients and DONE! Yep, it's that easy! If you don't have a microwave, you can just cook in a double boiler. Just make sure water/steam doesn't get into your chocolate as it is melting or it will harden and get funky!

Kinder Chocolates (Vanilla Cream Chocolates):

  • 3 1/2 cups of white chocolate chips (I used Guittard brand for today)
  • 1 (12 oz.) pkg of milk chocolate chips (I used Guittard brand today)
  • 1 (14 oz.) can of sweetened condensed milk (this is NOT the same as evaporated milk!)

I melted 6 oz. of the milk chocolate chips in the microwave in 30 second intervals (stirring every 30 seconds) until melted. My microwave is acting hinky so it took about 3 minutes. Don't burn it...you just need it melted and smooth. I foil lined an 8x8 pan (didn't grease it). I spread the 6oz. of melted chocolate chips in the bottom of the foil lined pan as best I could. I tried to spread it pretty even. I put it in the refrigerator to cool a few minutes so it didn't have a runny texture. Next I got a fresh bowl and mixed the sweetened condensed milk with the white chocolate chips. I microwaved in 30 second intervals until smooth and melted. Don't overcook or it will burn. Spread over slightly set milk chocolate. Put in refrigerator to help it set faster if desired. I took the remaining 6 oz. milk chocolate and melted it in 30 second intervals in the microwave until smooth & then poured it as evenly as possible onto the vanilla cream filling. (The filling will have a fondant like texture at first). Cool completely until they are set and easy to cut into bite sized squares.

NOTE: I found it easiest to remove the cooled candy from the 8x8 pan and flip it upside down onto a cutting board. Cut into bite sized squares with a large sharp knife or pizza cutter.


These make gorgeous (and delicious!) little additions to any cookie platter or dessert table for parties, weddings, showers or for little favors. These are also a great little treat for tailgating or casual dessert. They are quick enough to make that you can get your fast chocolate fix!  These would also be great to take camping on a cool weekend. You can use these in place of plain ordinary chocolate in your smores OR use a couple of them in your hot chocolate or coffee in place of creamer! Oh yeah!!!! I am feeling a camping trip coming my way!  ;)

Enjoy these wonderful little treats that are based on a German candy. Our family really likes them!

Tanja
Gluten Free Casually