My youngest son & me

My youngest son & me

About me

Hi!
My name is Tanja (Sater) Miller and I'm excited about sharing my journey of converting my favorite recipes to gluten free! I am not a fancy cook - I prefer just a casual, fun meal. I am married with grown children (and have small grandchildren) & 3 dogs. I work full time as a registered nurse & I am a geek. Yes, I love Star Trek, Star Wars, Fringe, Firefly, Farscape and most of the other Scify shows. You will probably see a little of my geek side come out once in a while! Please join me on my journey of cooking, baking & converting every day recipes into yummy gluten free meals that everyone can enjoy (not just those with a gluten allergy!) Don't be shy about checking out my recipes....I have the gluten free version along with the regular recipe that I adapted from!

Sunday, May 29, 2016

Gluten Free Strawberry Shortcakes

Strawberry Shortcake! Nothing says summer like strawberry shortcake! The velvety texture of the buttery almond cakes with slightly sweet strawberries with their juices and a dollop of whipping cream (or cool whip). Actually, any type of fruit will work with shortcakes....but berries are my favorite. I chose this buttery cake recipe and baked in a little shortcake maker I bought on clearance. (Yes....it feels like an adult version of "Easy bake oven" but I just love it!) If you don't have a shortcake maker...no worries....just bake in a muffin pan or you can bake in a loaf pan or cake pan and just cut into cubes or squares.

I prefer making my cake from scratch when I have the time. However, if you are in a hurry or are not a baker...you can "doctor up" a gluten free cake mix to get similar results. Let's face it...you don't have to be a chef to get a great dessert! I will share my favorite shortcake recipe with you but I will also give you tips on how to "doctor up" a cake mix to get very similar results. Baking should not be stressful! If you don't have all the ingredients on hand for baking gluten free from scratch then it might make more sense for you to "doctor up" a gluten free cake mix. Pillsbury makes a pretty decent gluten free cake mix and the one they carry at Aldi in the midwest is also really good. Gluten free baked treats are rather expensive and difficult to find and many of them are just plain disgusting. This is an affordable and easy way to make a fantastic gluten free treat that EVERYONE will eat! :)

 Shortcake Recipe: (This recipe makes a bunch so you can half the recipe if you want)
  • 3/4 cup sugar (you can use raw sugar if you prefer)
  • 3/4 cup margarine (make sure it is a margarine that contains at least 65% fat or it will won't work well for baking! I found that Kroger brand works well and it is cheap! (It can be found at Kroger or Fry's grocery stores). Or substitute real butter or you can substitute Crisco if you are dairy free
  • 3/4 cup real mayonnaise (this will give the cake a moist, rich texture. You will not taste the flavor of mayonnaise at all! Trust me! This is a great option for people that need dairy free options! I use BEST FOODS brand since it is gluten free & dairy free. 
  • 1/2 cup water
  • 1 1/2 tsp. baking powder
  • 1/2 tsp. salt
  • 1 1/2 tsp. almond extract or baking emulsion (I prefer the baking emulsion which I find in the cake baking department at Michael's crafts, JoAnn Fabrics, Hobby Lobby & Walmart
  • 2 tsp. butter vanilla baking extract or emulsion (optional)
  • 4 eggs 
  • 3 cups of gluten free flour (If you don't have a gluten allergy then you can just use regular flour).
  • 1 tsp. Xanthan Gum if your gluten free flour blend doesn't contain it. If you are using regular flour or if you gluten free flour blend already contains it then you don't need to add this ingredient.
Combine the sugar, margarine (or butter or Crisco), mayonnaise, water and almond baking emulsion + the butter vanilla baking emulsion (optional) together until smooth. Add eggs and beat well. Gradually add the baking powder, salt and flour. (Dough mixture will be thick  - kind of like a brownie dough). Spoon into the shortcake maker as directed in the instructions or bake uncovered in 350 degree oven  [35-45 minutes for 9x13 pan, 45-50 minutes for loaf pan, 18-25 minutes for muffin pan] or until toothpick inserted comes out with moist crumbs and top is lightly golden brown in color. Check your oven at the lowest cooking time and adjust. Each oven cooks slightly different and altitude can affect baking times. These shortcakes can be made ahead of time and put in a covered container for several days. They can also be frozen.


IF YOU HAVE CHOSEN TO USE A GLUTEN FREE (OR REGULAR) CAKE MIX INSTEAD OF MAKING THE SHORTCAKES FROM SCRATCH THEN PLEASE DO THE FOLLOWING TO "DOCTOR UP" THE BOXED CAKE MIX.
FOLLOW THE INSTRUCTIONS ON THE BOX THEN ADD:
  • 1/2 cup mayonnaise
  • 2 tsp. almond baking emulsion
  • 2 tsp. butter vanilla baking emulsion (optional)


Take rinsed strawberries and slice them up and place in a bowl. I like to add just a tablespoon or two of sugar and then cover with plastic wrap and let them rest on the counter for at least an hour or two so the strawberries produce juice. Spoon the berries and juice over the shortcakes. I like to add a dollop of whipping cream (or cool whip - specialty stores carry a non-dairy coconut milk version of cool whip which works well too). I grate a sliver of chocolate on top for extra decoration but you don't need to do that. I like to serve in wine glasses, parfait cups or pretty plates. If we are going to a picnic or a huge group of people...I put in individual plastic cups with pretty spoons for single serving size. Less waste and minimal cleanup! :)


This is my handy dandy shortcake maker (AKA: adult easy bake oven!)

My shortcake maker box

The inside of my shortcake maker so you can see how it makes the shortcakes with the indention

My shortcakes are cooling
View of shortcake prior to topping it with whipping cream and chocolate shavings

Ready to eat!

Up close view

This one is on a plate rather than a wine glass

Up close view before cutting into it!

Delicious! See how moist and the juices are soaking into the scrumptious cake! Mmmmm!


I hope you enjoyed one my favorite summer treats! It is refreshing and super easy! It is a crowd pleaser and leftovers (if there are any!) will freeze fabulously. If you prefer chocolate cake in place of the almond cake then you can leave out the almond baking emulsion and leave out 1/2 cup of the flour and add unsweetened cocoa powder. The chocolate version shortcakes tastes fabulous with cherry pie filling and/or chocolate pudding. Yummy! :) This recipe (as well as ALL of my recipes can be made with regular flour if you do not have a gluten allergy.) These recipes have been created, tried and enjoyed by those of us that are gluten free!)

Welcome summer by treating your friends and family to this super easy dessert that can be made a couple days ahead of time. Bring on summer! 

Tanja
Gluten Free Casually


Monday, May 16, 2016

Pretzel Crusted Chicken

Pretzel Crusted Chicken! This chicken coating is SOOOOO much better than using bread crumbs! It has a fantastic crunch, doesn't burn easily and keeps the chicken super moist as you bake it. I came up with the idea one day when I was going through my cupboards and organizing. I found a partial bag of gluten free flavored pretzels that were getting close to expiration date (but they were still crunchy). So rather than waste them....I decided to crush them very fine and use them to coat chicken for dinner! The old commercial from "Shake & Bake" ran through my head. I haven't coated chicken and baked it for a long time! We absolutely loved the results. My mom was having dinner with us and commented on how moist the chicken turned out and the coating was extra crispy without frying!

The pretzel coating is not limited to just chicken! I have since done it to boneless pork chops and fish too! The results were the same....crispy coating with meat that was very moist! I used gluten free pretzels (honey mustard flavor this time) but you can use regular pretzels if you don't have a gluten allergy. This recipe is ridiculously simple but I thought I would post it because it offer new ideas to people with gluten allergies. Gluten free bread (and bread crumbs) can be really expensive and I want to keep you on your grocery budget. This way you can buy the pretzels to eat in your lunch or snack + use them for coating your meat. (I also use gluten free pretzels (the plain flavor) as a crust for cookie bars sometimes. It gives a great sweet & salty twist to cookie bars! (I will post a recipe soon!) You can also use other gluten free items like flavored potato chips or tortilla chips to coat your meat and bake it. I have recently started doing that too. I really like the Maui Onion flavored potato chips (I found a brand out here in Arizona that doesn't have gluten) and used them finely crushed as a coating for pork chops. DELICIOUS! However, my favorite is still the pretzel coating. It has extra crunch and the texture is just more dense than chips or bread crumbs.

Pretzel Crusted Chicken Recipe:

  • 4 bones chicken breasts or thighs (you can probably use wings and deep fry them but I have never tried it). You can substitute boneless pork chops or fish if you prefer.
  • 1 egg, beaten  (if you don't have an egg on hand then you can use mayonnaise which does contain egg). If you are allergic to eggs then you can substitute sour cream or plain yogurt. It will help the crumbs to stick to the meat. Just spread a light coat on each side prior to dipping in crumbs.
  • 1 1/2 cups finely crushed pretzel crumbs (depending on the size of your chicken pieces you may not use all the crumbs or you may need a little more)

Dip both sides of chicken (or other meat) pieces into the beaten egg then dip into the finely crushed pretzel crumbs. Place on cookie sheet (I line mine with parchment paper for easy removal and cleanup). Bake at 350 degrees for about 20-30 minutes or until juices run clear and center of chicken is no longer pink (but still moist) which will depend on the thickness of your meat. If your meat is really thick then you may want to consider slicing it into smaller pieces so it cooks faster and evenly. *Note: do not save any unused pretzel crumbs or beaten egg that has come into contact with the raw meat. I only use the minimal and add more as I need them so I don't waste any.

This is the brand of gluten free pretzels I used today. I liked the flavor it gave my chicken.


I used my handy dandy mini food processor but you can just smash in a ziplock bag

This is the chicken after I removed it from oven and put on a dinner plate

This is the same pretzel crumbs but on a boneless pork piece (the lighting gives it a different color)


Crunchy topping with moist meat & ready to eat!

I hope you enjoyed this super easy weeknight dinner recipe. Feel free to post any tips, substitutions or photos that you have tried. We all learn from each other and I enjoy the comments!

Enjoy your week!
Happy eating!

Tanja
Gluten Free Casually

Saturday, March 19, 2016

Chipotle Fudge Brownies (Gluten Free)

Chipotle Fudge Brownies! These dense, moist brownies have a deep chocolate flavor and a slight little touch of heat. (It is really subtle and just delightful!) These brownies are one of our favorite dark chocolate desserts at our house and I like to serve them for dessert after a Mexican inspired meal or on a night we are having friends over on the patio by the fire pit table relaxing. I never would have considered chile + chocolate = delicious but it really does. The subtle flavor of the smoked chile power makes the dark chocolate flavor of the brownies more intense. You absolutely must try these!

You can find Chipotle chile powder at most grocery stores in the spice aisle or order it online. I really suggest you use the Chipotle and not Cayenne because the flavors are different. However, in a pinch...I guess you can use the Cayenne pepper but you will miss the smokey flavor that the Chipotle chile brings into this scrumptious dessert. You don't need a lot....a little bit of the Chipotle chile is enough. You don't want to over power the brownies and make your friends rushing for a drink to get the heat out of their mouth. You want it to enhance the depth of the dark chocolate and feel a slight shiver of heat tingling on your tongue....like a gentle kiss. This dessert is great served with coffee or with red wine. (At least that is my story and I am sticking to it!) Don't let the idea of chile powder mixed into brownies turn you off. Most people assume they won't like them but are pleasantly surprised and this is one of my most requested recipes.

The brownies are great on their own with a light dusting of powdered sugar (or you can kick it up a slight notch and add a pinch of chipotle into the powdered sugar!) or I really like to dress them up with a dark chocolate glaze that is not too sweet. The brownies are also tasty if you want to leave out the Chipotle chile powder....they hold their own on any dessert table. I am sure this brownie recipe can be adjusted to add/delete items to get your customized flavor.

I designed this recipe by experimenting in the kitchen with different brownie recipes and wrote down all the ingredients I either added or deleted and adjusted oven temperatures until I got the consistency and texture I wanted. This is probably my absolutely favorite brownie recipe. Of course the geek that I am....I HAD to add some Star Wars white chocolate candies to the top. My friend Andrew suggested that I "draw" with icing the Death Star in the background. Obviously, he hasn't seen me draw....I guess we will have to wait until he visits to try that together since he is the artist!

Chipotle Fudge Brownie Recipe:

  • 1 bag (12 oz) dark chocolate chips (I use Guittard brand which is gluten free)
  • 3/4 cup of real butter (you can substitute Crisco vegetable shortening or Coconut Oil shortening but you won't get the exact same buttery flavor)
  • 3 large eggs (I prefer using brown eggs)
  • 3/4 cup granulated sugar 
  • 1/2 cup brown sugar (this gives a chewy texture to the brownies and a richer flavor)
  • 2-3 teaspoons Chipotle Chile powder 
  • 1/2 teaspoon of Espresso powder or instant coffee granules (you will not taste the flavor of coffee at all in this recipe. It actually helps enhance the dark chocolate flavor. I learned this trick from a patient that was a pastry chef. I learn so much from our lovely patients!)
  • 1/2 tsp. baking soda
  • 1 cup gluten free flour blend (If you don't have a gluten allergy then you can use regular flour). I used Pillsbury gluten free flour blend today. If your gluten free flour blend does not have either guar gum or xanthin gum then you will need to add 1 teaspoon of xanthin gum. If you are using regular flour you can omit this. 

Melt the dark chocolate chips and butter until smooth and melted. (You can do this in the microwave in 30 second intervals & stirring or you can do this on the stove top in a saucepan). Gradually add the sugars and stir until smooth. Beat in the eggs until well incorporated. Add the flour and baking soda; stir until just mixed and smooth. Don't over-mix. Pour into greased (or spray with cooking spray) 9" springform pan that has foil wrapped on the bottom to catch any grease dripping out of pan. (I personally prefer using a springform pan to bake this brownie but you can use a 9" round or square pan. Bake in a pre-heated 350 degree oven. (I have used both a regular oven and a convection oven and both bake about the same. I didn't find any cooking time difference. Altitude and each oven bakes different so I suggest you check at the earliest baking time and then adjust your recipe accordingly. I usually write a note on the side of my recipe). Bake for approximately 35-55 minutes or until toothpick inserted comes out clean or with moist crumbs. If you are getting runny batter in the middle then you need to continue baking. If your temperature is off and it looks like your edges are getting crispy and the center isn't done, put a piece of foil on the top of your pan and lower your oven temperature 25 degrees. My new oven bakes fabulously but my old oven required me to play around with recipes to get them to bake correctly....but I did it!
I melted the chocolate chips and butter in glass bowl in my microwave

Stir until fairly smooth

Getting ready to bake the brownies in pre-heated 350 degree oven
Let it cool for at least 20 minutes before removing from the pan. I like to put a clean dishcloth over the top of the pan so it stays moist as it cools. Foil can cause the brownies to sweat which isn't a good texture. Once the brownies are cool, you can sprinkle it with powdered sugar and serve it, frost it with a gluten free store bought frosting like Betty Crocker brand OR you can do what I do and add a sinful glaze over the top. Yes....dark chocolate glaze on top of a sassy brownie. Yep, that is the way I roll at our house!

Getting ready to pour glaze over the top of the cooled brownie

Side profile of the brownie before pouring the glaze on top

Dark Chocolate Glaze:

  • 1/2 cup water (I substitute milk unless I am baking for people with dairy allergy then I use either water or Coca Cola. Yeah...you will be surprised how I can improvise when I need to. I have used water, milk, goat milk, canned milk, non-dairy creamer, Coca Cola and coconut milk. It all worked fine. I have not tried Almond milk or Rice milk so I can't guarantee they will work but I can't imagine why they would work if water works). 
  • 1/2 cup real butter (I like the sinful flavor the real butter brings into the glaze but if you don't have it on hand or have a dairy allergy you can use Crisco vegetable shortening or Coconut oil shortening or a non-dairy butter substitute).
  • 1 cup unsweetened cocoa powder (I use a gluten free dark chocolate type. I prefer using the European style that my German family sends me when I have it on hand. Hershey Dark Chocolate Cocoa Powder works fine too). 
  • 3 1/2 cups of powdered sugar (make sure it is gluten free. Most brands are but you need to double check the ingredients if you have an allergy)
  • 1/2 teaspoon of Chipotle Chile powder, optional. (I like to add this little touch of sassiness to the glaze but you can certainly leave it out).

Heat the water (or milk), and butter (or shortening) in a saucepan on stove top until melted and smooth. (You can probably do this in the microwave also but I always do it on the stove top. Old habits are hard to break!) Stir in cocoa powder until smooth and then gradually add powdered sugar. If it appears too thick (should be a pourable consistency) then add a tablespoon of water or milk until you get the right consistency. If it appears too runny then add a few tablespoons of powdered sugar. Once you have the glaze nice and smooth you can add a pinch of chipotle chile powder if desired. Pour over slightly cooled brownies.
Melting the butter, water and cocoa powder on stove top

Just poured glaze on top. It looks messy because I wanted to cover the edges of the brownie. I transferred to new plate

Glazed brownie prior to decorating with my Geek chocolates

Ready to eat!

Up close view of my Geek Brownies

Side view of the brownies

Dessert Time!
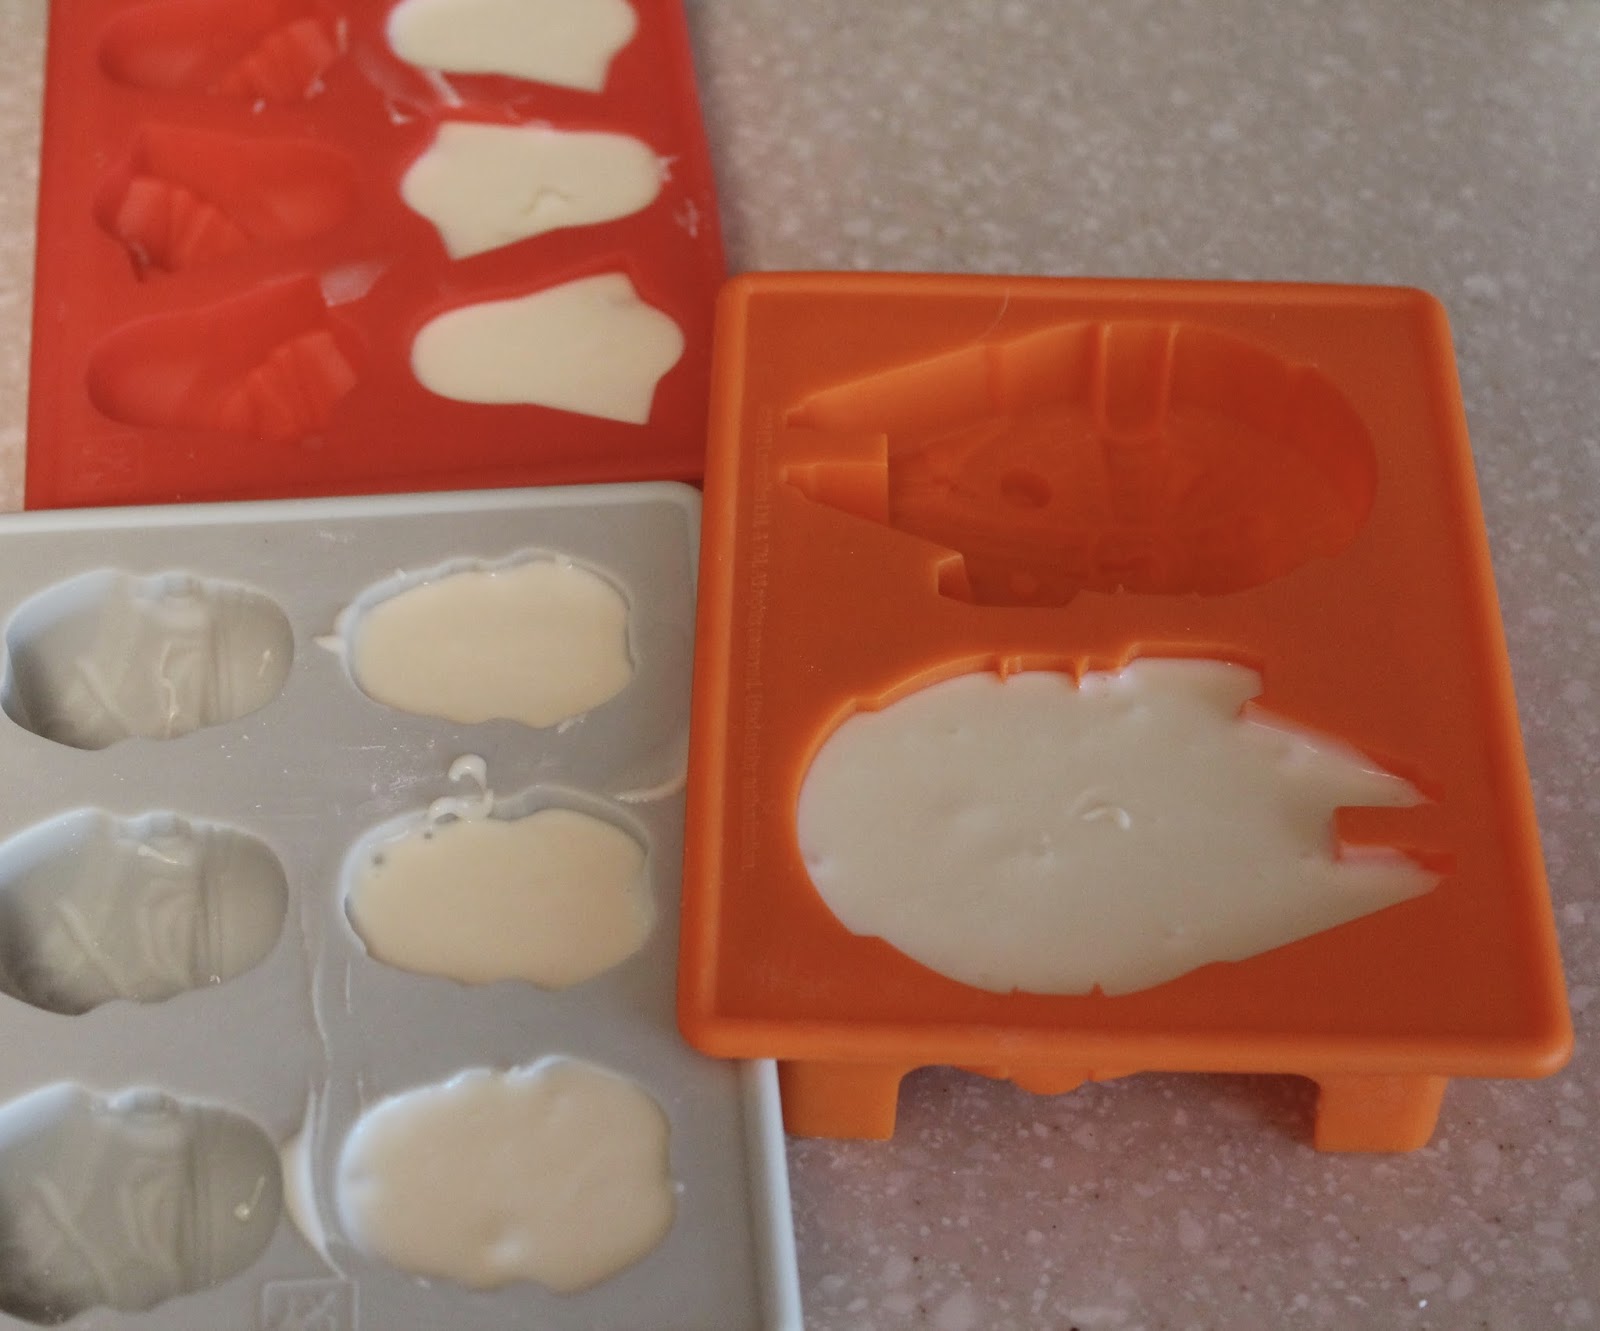
I chose to melt some white chocolate candy coating (also called almond bark) in my silicone Star Wars molds and refrigerate until they were hardened. I drizzled the leftover white chocolate over the dark chocolate glaze for a little decoration. You do not need to do this and make extra work for yourself. I just like to geek stuff up and my friends and family always get a chuckle out of it. I feel like I need to justify all the silicone geek molds! Ha! Ha!

Up close side view of cut brownie

Top view of brownie (geek style!)

Ready to eat! 

My Star Wars silicone molds that I poured melted white chocolate for shapes

I hope you enjoyed my Chipotle Fudge Brownie Recipe and try making them at home soon. They are great for any casual event or you can fancy them up for a gourmet party! The taste of these will rock any get-together and impress everyone. They are easy to make and the flavor is unforgettable.

Have a geeky brownie weekend!
Tanja
Gluten Free Casually

Saturday, January 16, 2016

Egg Taco

Egg Taco! This is a recipe I came up with because I really missed breakfast burritos! I like a nice, full burrito and not a scrawny one and I found that gluten free flour tortillas didn't seem to be big enough. One morning.....I decided to try something a little different. I put my scrambled eggs and cheese (you can use any toppings) onto a partially cooked gluten free flour tortilla. The results were incredible. It has a slightly crunchy exterior but soft and fluffy inside. It was perfect. This is a regularly requested recipe at our house for weekend breakfasts or quick dinners. It is super easy and affordable. My grand-daughter asks for these frequently. "Cheese Tacos" at our house are similar to quesadillas....just cheese and a gluten free flour tortilla... with cheese which is folded in half & pan grilled until crispy. It goes great with soup or for a quick lunch or breakfast.

I was not going to put this recipe on the blog because this recipe is very simple, nothing fancy and it isn't one that requires any cooking skills. However, every time we have friends staying at our house and I make them.....they love them and tell me I should put them on the blog because they would never have thought about making them and it so yummy and easy that college kids, teens, busy moms and single people can whip these up really fast with minimal kitchen tools and minimal ingredients. For those of you that are into fancier cooking....you still want to try this recipe because it is really yummy! These also freeze great so you can make a big batch of them on the weekend and meal prep for busy mornings, lunches or dinners. You can pop them into the freezer in zip-loc bags and just pop in the toaster oven or oven to warm them up. Using the microwave will warm them up also but you will be missing the slightly crunchy exterior which I really like! I keep my recipe really simple so it doesn't get soggy and it folds over into a taco shape really easy. I usually just add eggs, cheese and sometimes some BACON! I love bacon! :) However, you can add anything you like! This is like an omelette inside of a slightly crunchy taco shell!

Below are some photos of how to prepare this really simple, yet scrumptious egg taco:

These are ingredients I used for my Gluten Free version of Egg Tacos

I scrambled my eggs in a separate pan then got my cast iron skillet
pre-warmed on medium heat and put about 1 tbs. olive oil in pan.
I put the gluten free tortilla down in warmed skillet and placed
cheese and eggs on top. Once the tortilla was slightly crispy on
bottom, I flipped it over into a taco shape. I gently pressed down
so the cheese would stick to the other side of the taco fillings.

Remove from skillet and enjoy!

Up close look at the slightly crispy taco and warm, fluffy insides!

Ready to eat. I serve with some sliced fruit!

This is another view of one that is slightly more crispy on the outside (mine!)

Yummy!

Ready to eat!
This is probably one of the more basic recipes that I have put on the blog. It is very simple but
it holds it's own on the breakfast competition! My family loves these and requests them frequently!
My husband does not have a gluten allergy and he prefers the tacos made with gluten free tortillas.
He said the crunch is better. (Go figure!) If you don't have a gluten allergy, you can make these with
regular flour tortillas which will be less expensive. I prefer using the Mission gluten free tortillas since they seem to have the best texture and taste "normal". (I have tried a few other brands and I didn't care much for them). Of course many companies are reformatting their recipes and improving on their gluten free products so I am always trying new things!

Enjoy your weekend and try this simple recipe for one of your upcoming meals. I am pretty sure it will become a "classic" at your house too!

Enjoy!
Tanja
Gluten Free Casually


Sunday, November 15, 2015

Hawaiian Chicken (Gluten Free)

Hawaiian Chicken is a super easy, very moist and delicious main dish. I love it because it has a slightly sweet (from the pineapple) yet slightly salty flavor (from the ham and cheese) and the combination is delightful. I like to pair it with coconut rice for the extra sweet flavor but you can pair it with any side dish. Of course if you want true authentic Hawaiian style you can use SPAM instead of ham! ;)

Hawaiian chicken is great served not only for a quick dinner after a busy day at work but if you cut the pieces (or use chicken finger sized chicken) it makes a great appetizer or brunch recipe as well.

I came up with this recipe because I had some chicken in my refrigerator and I was tired of the "same old chicken recipes". I didn't have the ingredients to make my traditional pizza chicken recipe but I did have ingredients to make a "Hawaiian pizza" chicken. Therefore....Hawaiian chicken was born at our house! You can use any type of pineapple that you have on hand. I only had crushed pineapple and I love it because you get a little bit of pineapple in every bite. You can use pineapple rings for a more elegant presentation. You can also make extra chicken and freeze them for future use on a night that you are really busy. You can cook the pineapple and chicken in the crockpot for convenience and then just add the ham and cheese just before serving.

Hawaiian Chicken Recipe:
  • 4-6 chicken breasts
  • 4-6 slices of ham (you can use gluten free deli ham or sliced ham like I did today or for true Hawaiian style you can use thinly sliced SPAM)
  • 1 can pineapple (I used a 15 oz can and let the extra cook in the bottom of pan for extra juice and flavor)
  • 4-6 slices of  cheese (any type will work. If you only have shredded cheese that will work too!)
Put the chicken in an oven safe pan (or in your crockpot on low so it doesn't burn). Spoon the pineapple on top of the chicken. Cover the oven safe pan with foil. (If you are using the crock pot then put the lid on and set temperature on low and cook 4-6 hours until chicken is done and no pink is showing in center or until juices run clear). If you are baking in the oven, set the temperature on 375 degrees and put the foil covered chicken in the oven for approximately 30-45 minutes (depending on how thick your chicken is) until the juices run clear and chicken is no longer pink in center. Remove from oven and place the ham on top of the pineapple and place a slice (or handful of shredded cheese) on top of the ham. Return to oven until the cheese melts. (If using the crockpot just remove the lid and place the ham and cheese on top of the chicken and return the lid. Keep covered until the ham is warm and cheese is melted. I like to save any leftover juice and put it with any leftover chicken in the refrigerator for extra flavor and to keep the chicken moist until I re-heat it for a left over meal!

Prior to covering with foil and baking in 375 degree oven for 30-45 minutes

This is the gluten free sliced ham I used for today's recipe

Any type of sliced or shredded cheese will work with this recipe

Ready to eat! Extra Cheesy!

Yummy!

Up close view of the Hawaiian Chicken. See the layers?

Delicious!
This is a very easy recipe and can be changed to use what you have in your cupboards. If you have a dairy allergy then you can certainly use a dairy free cheese substitute. I like this recipe because it tastes really fancy but it goes together pretty quick and is budget friendly. It is simple enough for a casual weeknight dinner yet elegant enough for a holiday dinner or brunch! You can also make ahead and freeze them or make a few days ahead and refrigerate until ready to cook. This is great for those crazy schedules! Of course if you really want "traditional Hawaiian then you can substitute SPAM instead of ham!)
Enjoy!
Tanja
Gluten Free Casually