My youngest son & me

My youngest son & me

About me

Hi!
My name is Tanja (Sater) Miller and I'm excited about sharing my journey of converting my favorite recipes to gluten free! I am not a fancy cook - I prefer just a casual, fun meal. I am married with grown children (and have small grandchildren) & 3 dogs. I work full time as a registered nurse & I am a geek. Yes, I love Star Trek, Star Wars, Fringe, Firefly, Farscape and most of the other Scify shows. You will probably see a little of my geek side come out once in a while! Please join me on my journey of cooking, baking & converting every day recipes into yummy gluten free meals that everyone can enjoy (not just those with a gluten allergy!) Don't be shy about checking out my recipes....I have the gluten free version along with the regular recipe that I adapted from!

Thursday, January 16, 2014

Gluten Free Butter Pecan Cookies


Butter Pecan Cookies with Chocolate Chips (optional)
Butter Pecan Cookies. With or without chocolate chips. SCRUMPTIOUS! The browned butter flavor + toasted pecans & brown sugar = SCRUMPTIOUS! It's an old fashioned recipe that I have re-vamped into gluten free. If you don't have a gluten allergy then you can just use regular flour in place of the gluten free flour. My husband likes it with the added dark chocolate chips...I like it best without chocolate although either way is delicious. Seriously, how can you go wrong with butter, pecans and brown sugar?! The rich flavor of browned butter combined with the melt in your mouth brown sugar + crunchy toasted pecans... I think I could just eat the combination with a spoon....if calories didn't count!

I had to play around with this particular recipe to make the gluten free version taste delicious. The original recipe called for granulated white sugar but I found it made the cookies too crumbly. Switched it to brown sugar and got the texture I wanted. I also HIGHLY RECOMMEND that you brown your butter. It really brings out the incredible flavor in these cookies and you don't want to miss that tantalizing flavor on your taste buds! Trust me! I have tried it both ways and there is no comparison. The flavor is so much more intense if you brown your butter. (Browning butter simply means to cook it in a saucepan on medium heat until it is completely melted and the butter becomes a golden caramel color and has some sediment. Don't strain off the sediment. Use all of the yummy melted butter that is in the pan....including the sediment). I have never made this particular recipe with margarine or a butter substitute so I don't know if it would turn out the same but I doubt it. The browned butter plays a key role in the flavor of this cookie. I am sure if you have a dairy allergy or nut allergy you could tweak this recipe and still end up with a great cookie....but it won't be the same intense flavors. I also highly recommend that you lightly toast your chopped pecans to bring out their rich flavor and crunch. I have also added toffee bits in the past but I thought it made the cookie a little too sweet....although some people just loved it. Personal preference!

Butter Pecan Cookie Recipe:
  • 1/2 cup real butter (Don't skimp here. Use real butter for the best flavor! There is a difference in this recipe!)
  • 1 1/2 cups brown sugar, packed
  • 2 eggs
  • 1 tsp. salt
  • 1 tsp. baking soda
  • 2 1/2 tsp. baking powder
  • 1/2 tsp. xanthan gum (use this only if you are using gluten free flour mix that doesn't already contain xanthan or guar gum. If you are using regular flour, omit this!)
  • 1 1/2 cups gluten free flour blend (I used Trader Joe's brand in today's recipe. If you don't have a gluten allergy then you can use regular flour). I personally avoid gluten free flour blends that contain sorghum in my sweet baked goods. I don't like the flavor. It's fine in savory breads.
  • 1/2 cup finely ground almonds or pecans (or you can just use additional 1/2 cup gluten free flour if you don't have this ingredient. I have tried it both ways and it works fine either way).
  • 1 cup chopped pecans, lightly toasted.
  • 1 1/2 cup semi-sweet chocolate chips, optional (I usually take half the dough and leave out the chocolate chips and put about 3/4 cup of chocolate chips in the other half).
In a small saucepan, brown the butter. The butter will melt completely and turn a golden caramel color. It will have sediment in the bottom which is normal. I use all of it....sediment included for this cookie recipe. I pour it into my mixing bowl and let it cool slightly while I toast the pecans. (You don't want to mix really hot butter with the eggs!). I toast the pecans either in a skillet on medium heat stirring frequently so they don't burn just until lightly toasted. The other option is to put on a cookie sheet for 3-5 minutes or until lightly toasted. Watch the nuts closely! They can get burned really quickly! That is the one reason why I do the butter and the pecans separately. That way I can focus on one at a time and not ruin either of them. Butter and pecans are both expensive and I don't want to burn either of them! Add the brown sugar and cream until smooth. Add the eggs and beat for about 2 minutes. Add the salt, baking soda, baking powder and mix well. Add flour (and xanthan gum if you are using gf flour that doesn't already contain it or guar gum). Mix in toasted nuts. If you are using chocolate chips, add them too. Stir by hand. Batter will be slightly thick.  I refrigerate my batter for at least an hour. It is easier to handle and the cookies won't spread so much. They will come out slightly thick, soft and chewy. I found that if I didn't refrigerate the dough, the cookies spread a little more and came out a little crispier. Place spoonfuls onto parchment paper lined cookie sheets. Bake 350 degrees for about 9-11 minutes or until lightly golden. Cool before removing from cookie sheets. (I find that if I refrigerate my cookie dough for about an hour then the cookies will be a little thicker and don't spread as much. Both ways are delicious!)

Makes about 3 dozen nice sized cookies or 4 dozen small cookies

By the way, I took these cookies into work yesterday. They all claim they don't like nuts in baked goods. The cookies were all gone by 9am! (The traditional chocolate chip cookies were the last ones eaten!). I have to agree....I normally don't care for nuts in my cookies but these were so darn tasty. The butter and toasted pecans just explode flavor in your mouth. This recipe is a keeper! 

I used farm fresh eggs in this recipe today. My friend April gave me some assorted fresh eggs from her chickens. Different types of chickens lay different colored eggs. (They all cook up the same way but they look so cool looking). I almost hated using the eggs because they were so pretty! I have never had such a beautiful assortment of eggs. I wish I would have photographed the eggs before I used them. I had speckled, brown, white and light green eggs! I love using fresh eggs in my baked goods. Everything always turns out so much fluffier with fresh eggs! Thanks April! If I lived out of the city limits...I would definitely have chickens! I love fresh eggs!


With chocolate chips. See the yummy pecan pieces?

Ready for taste testing! (My favorite part)

These are the crispier version (no refrigerating before baking)

Up close view of the crispier ones

Butter Pecan (no chocolate chips). Crispier version (no refrigerating before baking)

Butter Pecan Cookies (Crispier version. No refrigerating before baking)

I hope you enjoyed my journey making these old fashioned cookies into a delicious gluten free version that everyone will enjoy! These would be a wonderful treat for your special Valentine!

Happy Baking!
Tanja
Gluten Free Casually


Sunday, January 12, 2014

Gluten Free Microwave Bread in a Mug

Gluten Free Bread Microwaved in a Coffee Mug!
Gluten Free Microwave Bread in a Mug! Yes, single serve gluten free fresh bread when you want it! You can add different flavors to customize it. I love this recipe because I am not a person that eats bread daily and I hate to buy a loaf of bread and have it wasted. I don't care for bread once it has been frozen so that really limits me. Plus when I am on vacation, I can whip up a fresh personal loaf whenever I want it in just a few minutes in the microwave! I just travel with a small bag of gluten free flour (like Betty Crocker or Trader Joe's versions) and I take a little travel size packet of xanthan gum and baking powder and those are my basics for my gluten free personal sized bread loaf. If I am traveling on vacation, I just snag a couple of packets of sugar and salt from a restaurant so I have it at the condo/hotel. You will need one egg per loaf but I almost always have eggs so that isn't an issue for me. Most of the condos/hotels that I have stayed in have a mini-fridge. You can make this bread without oil but I prefer a teaspoon of margarine, butter or oil....if you are on vacation then grab a butter packet at a restaurant. I always ask the waitress or cashier and they always give me a couple.

I have learned to live my life without bread for the most part. Sometimes when traveling to beach locations (or hiking trips), I like to have a peanut butter sandwich like everyone else. I hate to be "high maintenance" and pack a different type of lunch. This quick gluten free microwave bread recipe allows me to make a quick personal loaf of bread so that I can pack a sandwich too! This will be great for my upcoming trip to Hawaii with my siblings. I want to keep my suitcase light and travel smart. I hate to spend time shopping for specialty groceries for me (not only are they extremely expensive but shopping is time consuming) and it is wasteful if it doesn't get eaten. I can make a personal loaf when and if I need it. This recipe only takes a few minutes total so I can make it while everyone else is showering. Yep, it is that quick! I like to toast it if I am eating it for breakfast but it makes a decent sandwich for lunches too. I have always eaten it the same day so I am not sure how long it will keep or what the texture would be like a couple days later.

I have made the bread plain and if you add sugar it reminds me of Hawaiian rolls which I really like. Slightly sweet. You can leave the sugar out and substitute it with flour. I have also added cinnamon + a tiny box of raisins (about 2 tbs) for raisin bread. I have also used dried cranberries and walnuts. I have added dried rosemary or Italian seasonings for a savory bread if I am making it at home. You can pretty much customize it to whatever flavors you really like. I have also used the personal bread loaf as a base for a personal pizza. It is kind of like using french bread or bagels as your pizza base. ("Bagel Bites Pizza" idea) You just top it with pizza sauce, cheese and your favorite pizza toppings and bake until toasty and cheese is melted. It is great when you are in the mood for a quick, gluten free pizza snack without all the fuss. You can slice the bread into small round slices or you can slice it lengthwise for a sandwich - hoagie bun size.

The idea of microwave bread in a mug came to me when I was experimenting with coffee mug microwave personal chocolate cakes. I tried a few different recipes and several of them had a bread like texture. Hmmmm.....if I tweaked it just a little then I could have a personal loaf of bread any time I wanted. I liked the concept. I'm still experimenting with flavors and different flour blends. Although the texture is a little heavier than traditional yeast breads...you can't beat convenience of this super quick & easy bread and let's face it...it is very economical! I am not saying this is the absolute best gluten free bread...I am just saying that I really like it for a quick personal loaf without a lot of fuss. Who wants to drag out a bread maker or heavy duty mixer when you just want a personal loaf? This is also quick for busy mom's that need a quick breakfast or bread for a child on a gluten free diet. It takes just as long as making oatmeal in the microwave! This bread can also be made into French toast! Come on....how easy is that! (Not to mention that if you cut the bread into the round circles then it makes super cute French toast!)

Gluten Free Microwave Bread in a Mug Recipe:
  • 8 tbs. gluten free flour blend (I used Betty Crocker Gluten Free blend today. I have also used Trader Joe's brand, Cup 4 Cup brand, Hodgson Mill brand and my own gluten free flour blend. They all worked fine. I personally liked my gluten free flour blend and the cup 4 cup brand best. You can find my recipe for gluten free flour blend below). When traveling, I found it easier to take the smaller bags of flour like Trader Joe's or Betty Crocker Gluten Free Flour. I find it easier to go through security lines at the airport with the flour in the original package so I pack new small bag of gluten free flour! (I did not try Bisquick Gluten Free Baking Mix since I did not want a biscuit texture).
  • 1 tbs. sugar (I used raw sugar but you can use regular sugar)
  • 1/4 tsp. baking powder
  • 1/8 tsp. salt
  • pinch of xanthan gum or guar gum if your gluten free flour mix doesn't already contain it (I used 1/16 tsp. which is half of 1/8 teaspoonful. It is literally a tiny amount!)
  • 1 egg
  • 3 tbs. milk (you can substitute almond milk, soy milk, rice milk or water if you have a dairy allergy)
  • 1 teaspoon butter, margarine or oil
  • (you can add optional seasonings if you want like cinnamon, Italian blend, Rosemary or dried fruit like raisins or cranberries. I would limit the amount of dried fruit to about 2-3 tbs)
Mix the egg, milk and butter or oil together with a fork. Stir in flour, sugar, baking powder & salt (xanthan gum or guar gum if you need to use it).  Pour into a microwave safe coffee mug. You can even mix it in the coffee mug if you have to. I just like to lightly coat my coffee mug with cooking spray or butter/oil so the bread loaf pops out really easy. I have done it without the grease coating and it works okay too but just a little more work getting it out of the mug. Microwave on high for 90 seconds. I usually take a look at it and if still looks uncooked on the top then I toss it back into the microwave for additional 20-30 seconds. You don't want gummy bread. On the other hand, don't over bake it either or you will get a rubbery texture. Cool slightly and enjoy it warm, cold or toasted!

My Homemade Gluten Free Flour Blend Recipe:
  • 1 1/2 cups brown rice flour
  • 1 cup white rice flour (I used sweet rice flour for this batch)
  • 1/2 cup glutinous rice flour (made from sticky rice, gluten free)
  • 1 cup potato starch (not flour)
  • 1/2 cup nonfat dry milk, make sure it is very fine in texture
  • 1 cup corn starch or tapioca starch (I used tapioca starch for this batch)
  • 3 tbs. xanthan gum
Combine all ingredients together well. You can put it in the blender for an extra smooth texture if desired. I store mine in a glass container and use it in place of regular flour in all my recipes. This particular blend I really like for baked sweet goods and breads. (Note: if using my homemade gluten free flour blend you will not need to add additional xanthan gum to your recipe since this batch already contains it!)

Hawaiian Sweet Bread (added the sugar)


Plain white bread (only added a pinch of sugar and substituted the sugar listed in recipe with flour)

Raisin Bread Version. Added 2 tbs. raisins with 1 tbs. cinnamon


Up close view of my sliced raisin bread. It was delicious with strong coffee! :)

I hope you enjoy my very casual, very simple recipe for a personal loaf of bread made in the microwave. I would love to hear any substitutions or additions that you tried!

Tanja
Gluten Free Casually


Saturday, January 11, 2014

Truffles

Truffles! How to do you say yummy?! These are so ridiculously easy that you won't believe it until you try them. They remind me of the Lindt Truffles. Creamy smooth center with a burst of rich flavor. Don't let the ingredients fool you. My son (David) and I made these together and were impressed with the results.  We found this old recipe in a children's church packet from when he was a kid. They made similar ones but didn't dip them into chocolate. They pressed a Hershey Kiss in the center instead. That way the kids didn't get burned dipping chocolate (and I assume it was less messy!) We decided to dip them for a more truffle like flavor. When my mom got here for Christmas vacation....we made a couple more batches. She couldn't believe how easy and yummy they were!

We made them during the Christmas holiday season but you can make these for Valentine's day, wedding favors, baby shower, birthday party, mother's day, father's day or just simply for no reason at all. They are fun to make and the flavor combinations are endless! There is no flour in this recipe so they are naturally gluten free anyway. (Just double check your chocolate chips to make sure they didn't add gluten or process on equipment using wheat flour! Most brands don't contain gluten but double check. I like to use the Guittard brand because they are labeled as gluten free on the package!)

Truffle Recipe:
1 (12 oz) bag of chocolate chips (any flavor you want to use)
1 can (16 oz.) of frosting (like Betty Crocker or Pillsbury - any flavor)
12 oz. candy coating (also called almond bark) - you can use any flavor. Some brands like Wilton candy coating you can get in colors and flavors. Other brands are only available in white and dark chocolate. You can generally purchase them at your grocery store in the chocolate chip section or at craft stores like JoAnn Fabrics, Michael's Crafts, Hobby Lobby, etc.

(You can also add flavored extracts or juice to your filling to customize flavors. For example: in my key lime, lemon and orange flavored truffles, we added some zest and about 1-2 tbs. juice from fresh limes, oranges and lemons although you really don't need to do that if you don't have it on hand. It just gives the filling a punch of extra tartness which we like). You can keep this recipe extremely simple by just using the 3 ingredients above. It will turn out great. I like to play around with recipes a little bit so we usually come up with some interesting flavors. People that know me....well they know I like Chipotle flavor so yes....I admit that I added a touch of Chipotle chile powder to my dark chocolate truffles. Just a pinch of heat. Absolutely devine! Like I said....You can be creative!

DIRECTIONS:
In a microwave safe bowl, melt your chocolate chips (whatever flavor you are using is fine). I melt in 30 second intervals so I don't burn the chocolate. You can also use a double boiler if you prefer. Once the chocolate chips are completely melted and smooth, stir in the entire can of frosting and stir well. At this point, you can add any additional flavors if you want. (Peppermint extract, chipotle chile powder, almond extract, butter extract, citrus zest, citrus juice, etc.). I would start off with just 1-2 teaspoons of extract flavor if you are using it. It can be powerful in flavor! Stir well. This will be the "filling" of your truffle. I put it in the refrigerator for a couple of hours to let it harden a little bit. It will make it easier to work with. Roll in 1" balls. Refrigerate until slightly firm and chilled. This will keep them from becoming too soft when you dip them in melted chocolate. (If you prefer to keep it simple....you can just push a Hershey kiss in the center and call it done. You don't have to dip them. I prefer them dipped although it is a little more work!) Melt your candy coating (almond bark) in the microwave or double boiler until smooth. If you are having a hard time getting it smooth, add a teaspoon or two of Crisco shortening. It will help thin it out. You don't want the coating to be too thick on the truffles. You want a nice thin coat. I dip them with a fork. I lay the ball gently on the fork, dip the entire ball and let the excess chocolate drip off the fork. Place on waxed paper to cool completely so the chocolate will set. Sometimes I will add a sprinkle of colored sugar, sprinkles, chopped nuts, chopped candy, edible glitter, zest, or a contrasting color of candy coating to accent the truffles. 

Filling balls ready to be dipped

Dipping the filling balls into candy coating

Cooling on waxed paper

Cooling on waxed paper

Packaged for a party favor

Packaged as a holiday gift for extended family. I added a beautiful bow & card later

Up close view of my key lime flavored truffle. See the zest mixed into filling? Yummy!

Truffles ready for us to sample! These are the key lime & lemon flavors

Up close view of the key lime and lemon truffles
 
Some of the most popular truffle combinations I have tried:
  • Pillsbury Key Lime Flavor Frosting + White chocolate Chips (I added some lime zest & 2 tbs. fresh lime juice. I dipped them in lime green colored white chocolate candy coating. Sometimes Wilton candy coating will have key lime flavored which is also great but it is seasonal and they don't always have it available).
  • Pillsbury Orange Flavor Frosting + White chocolate chips. I added some orange zest & 2 tbs. fresh orange juice. I dipped them in white chocolate candy coating.
  • Betty Crocker Chocolate Frosting + Dark Chocolate Chips (Some of them I left the filling plain and the other half of the batch I added 1/2 tsp. chipotle chile powder for a spicy kick). Dipped them in dark chocolate candy coating. They would also be delicious dipped in white.
  • Betty Crocker Chocolate Frosting + Semi-Sweet Chocolate Chips (I added 1 tsp. peppermint extract for a minty flavor). Dipped them in dark chocolate candy coating. They would also be good dipped in white chocolate candy coating.
  • Betty Crocker Lemon Frosting + White Chocolate chips (I added some lemon zest & 2 Tbs. fresh lemon juice. I dipped them in white chocolate candy coating).
  • Betty Crocker cream cheese flavor frosting + white chocolate chips (I added 1 1/2 tsp. pumpkin pie spice and dipped them in white chocolate candy coating).
  • Pillsbury Strawberry Frosting + White chocolate chips. Dipped half the batch in White chocolate candy coating and the other half in dark chocolate candy coating. 
  • Vanilla or Chocolate frosting + Peanut butter flavored chips. Dipped them in dark or milk chocolate candy coating. 
  • Betty Crocker Chocolate Frosting + Semi-Sweet Chocolate chips (I added about 1/4 cup of either crushed Butterfinger Candy bar pieces OR Toffee Bits). Dipped them in dark or milk chocolate candy coating.
  • Betty Crocker Chocolate Frosting + Semi-Sweet Chocolate chips (I added 1 tsp. Instant Espresso Coffee powder and dipped half the batch in dark chocolate candy coating and the other half in white chocolate candy coating.


I hope you enjoy this super easy and delicious recipe for truffles. We had fun making this recipe and it is now a family favorite. You can use any flavor of frosting or chocolate chips to create custom flavor truffles. They also have flavored frosting sprinkles (found in frosting aisle) that allow you to customize your frosting flavor.  (I have not tried using homemade frosting in this recipe yet). There are also a lot of extracts and baking emulsions that you can use to customize your flavors. It just depends on how creative you want to get. The possibilities are almost endless! There is also nothing wrong with keeping it simple. You can just use the basic ingredients and still have a fabulous truffle. Try it. This is a great recipe to make on a lazy weekend or on a snow day! (Okay, we don't get snow days here in the Phoenix area but my friends and family in the midwest....well they sure have got dumped with a lot of snow lately!)

Feel free to post any of your combinations that you try. I am interested in hearing about how you customize your truffles!

Tanja
Gluten Free Casually

Wednesday, January 1, 2014

Summer Sausage

Summer Sausage. I can't imagine a Christmas Eve or New Year's Eve without my dad's recipe for summer sausage. It is super easy to make and I like that it doesn't have all the funky preservatives that you get from the store bought versions. It's naturally gluten free. You will be so surprised at how easy summer sausage is to make. You don't need casings or anything special for this recipe. This is a great old hillbilly recipe that our family has been making for generations.

I will include the original recipe and my version that has a more intense flavor. You can add any spices that you prefer but keep in mind that because of the curing salt added in the recipe you will want to go easy on adding any spice blends that include salt or your summer sausage may turn out extremely salty! I generally use lean ground beef for the recipe but you can use ground game meat or a mixture of hamburger and pork. You can also use ground chicken if you prefer. The recipe is flexible like that. (Most of our family recipes are very flexible. Sometimes you just have to improvise with the ingredients you have available). The key ingredient in this recipe is curing salt. I use the Morton Tender Quick brand. I have a difficult time finding it at our local stores in Arizona but you can order it online or ask your grocer to special order it for you. I stock up when I go to Ohio. I usually find it on the bottom shelf in the salt aisle. It runs just under $5 for a 2 pound bag and it will last for a very long time since you only use a couple of tablespoons per recipe. I store it in a glass jar. You can sometimes find curing salt at hunting supply stores but you will generally pay a lot more money for it. You might also be able to find it at specialty meat markets. Ask your butcher!


I have my second summer sausage in the oven right now. The one I made for Christmas Eve is long gone and we are wanting one that is a little spicier for New Years Eve. I really wanted one with some jalapeno and cheddar cheese blend but my mom doesn't like that flavor so I tamed it down a little. Just don't tell her I added a little chipotle chile powder! :) I even take a baggie full of my custom spice blend when we go on vacation to a condo that has an oven. It is so simple to make and it is a great snack for evenings or protein breakfast on the go! Sometimes we just want a light dinner of summer sausage and cheese after a big lunch or a tiring day of sight seeing. I like it because I know it doesn't contain gluten like some of the lunch meat, it is more economical and absolutely delicious!

Summer Sausage Recipe:
  • 2 pounds of raw ground hamburger or game meat (you can substitute ground chicken or mix in some ground pork if you prefer)
  • 2 tablespoons of curing salt (I use Morton Tender Quick)
  • 1 1/2 tablespoon Liquid Smoke
  • 1/8 teaspoon garlic powder NOT GARLIC SALT! (I add at least 1/2 teaspoon)
  • 1/2 teaspoon pepper (I add at least 1 teaspoon)
  • 1/4 cup water (I sometimes add BBQ sauce or broth instead for extra flavor!)

The above recipe is my dad's original basic recipe. You can add other spices like I do or add finely chopped cheese and jalapenos which we sometimes will do too. In my version today I followed the above recipe but also added the following spices:
  • 1/2 tsp. paprika
  • 1/2 tsp. chipotle chile powder
  • 1 tsp. onion powder or finely crushed onion
  • 1/4 tsp. ground mustard powder
  • 1 tsp. beef bouillon (gluten free)
  • 2 tbs. Worcestershire sauce
Mix all the ingredients together well. (I just mix it with clean hands so I can mix all the spices together really good). Roll into a log shape. Wrap in foil or plastic wrap. Refrigerate about 24 hours. Remove plastic wrap or foil. Bake in either a broiler pan or a cookie rack on top of a cookie sheet with edges so the meat drippings will drain and catch in the pan so you don't cause a fire in your oven!) Oven temperature should be 300 degrees. Bake 70-80 minutes until lightly golden. Cool and wrap in plastic wrap or foil. Store in refrigerator. (It will keep several weeks in your refrigerator!) Slice & serve!


This is the brand of curing salt I use
Ready to mix all the spices and curing salt together!
 

All mixed up and rolled into a log shape


For great appetizer you can serve with gluten free crackers and cheese or use the summer sausage slice to top with cheese ball, cheese spreads or any other topping instead of crackers. It makes a great presentation on a platter! I love this recipe because not only is it absolutely delicious but it is great to serve guests because everyone can eat it...even your gluten free guests!

One of the summer sausages ready to slice. It has ribbons of spices throughout!

Summer sausage and cheese plate

I use the summer sausage in in place of a cracker for cheese balls for a fun and elegant appetizer

I have been asked to share this recipe many times. I decided to add it to my gluten free blog since it is easy to make and it reminds me of my dad during the holidays. He is greatly missed and this appetizer reminds me of him.

Happy Holidays!

Tanja
Gluten Free Casually


Sunday, December 8, 2013

Gluten Free Chocolate Crinkle Cookies

Chocolate Crinkles! Deep, rich chocolate cookies with a light sprinkling of sugar. Decadent! These have a lightly crisp outside with a soft fudgy brownie texture in the center. They resemble a brownie but not overly sweet. The light powdered sugar coating gives them a festive snow-topped appearance. These are one of my holiday favorites because they go together pretty easy and the "snow cap" top makes them festive enough for my Christmas cookie plates yet satisfies my husband's chocolate needs. He won't eat traditional Christmas cookies. He prefers chocolate chip, brownies or M&M cookies. However, since these are similar to brownies....these are one he will eat. Most chocolate Crinkle cookies are rather bland or dry...but these bad boys are moist and have a nice, rich flavor. (Even Darth Vader and the dark side would love these! Geek alert!)

I like this particular recipe because it doesn't contain flour so no recipe adjustments were necessary. It does have ground nuts but if you have a nut allergy then you can easily substitute gluten free flour. Of course if you don't have gluten allergy you can use regular flour instead of nuts or gluten free flour.

I decided to make a batch for our dear friend Armando's birthday. He loves chocolate and I thought these would be perfect plus I had all the ingredients. I love the smell of dark chocolate and butter in my kitchen! The smells coming from my oven are heavenly! These cookies can be tweaked with spices if you want to customize them. If we are having a Mexican themed dinner, I will add one tsp. ground Chipotle chili powder or ground cinnamon to give it the Mexican flare. You can add a teaspoon or two of instant coffee or espresso granules for a European flare. Add a teaspoon of peppermint extract for a minty twist or a Hershey Kiss or Brach's Chocolate Star immediately when you remove from the oven for a "Kiss Cookie". This recipe is so versatile and the possibilities are endless!


Chocolate Crinkle Cookie Recipe:
  • 1 cup ground almonds (you can grind yourself or look for almond flour or almond meal)
  • 1 cup unsweetened cocoa powder
  • 2 tsp. baking powder
  • 1/4 tsp. Salt
  • 1/2 cup butter or margarine (that contains 70% fat), I used real butter today. You can also substitute Crisco vegetable shortening or Coconut Oil if you have a dairy allergy.
  • 1 1/3 cup brown sugar (this makes a nice soft cookie)
  • 2 eggs
  • 1 tsp. vanilla extract or butter vanilla extract
  • 1 cup dark chocolate or semi-sweet chocolate chips (please read your labels carefully. Some chocolate chips are made in a facility that processes wheat and some European chocolates use wheat flour as a thickener! The Guittard brand I used today is labeled GLUTEN FREE on the front of the package). Most Bittersweet chocolate chips don't contain milk or you can buy special dairy free chocolate chips if you have a dairy allergy.
  • 1/2 cup granulated sugar
  • 1/2 cup powdered sugar (confectioner sugar)
Whisk ground almonds, cocoa powder, baking powder, and salt in a small bowl. Set aside. Beat butter, brown sugar, and eggs until fluffy. Add vanilla extract. Melt chocolate chips in microwave or double boiler until smooth.

Stir the cooled melted chocolate into the butter mixture. Fold in almond mixture until just combined. Don't over mix. Cover bowl with plastic wrap and refrigerate about 10 minutes. This will make the cookies easier to work with. Scoop dough with a teaspoon and roll into balls. If you have a cookie scoop it will make perfect sized cookie balls. Roll each dough ball first lightly in granulated sugar then roll into powdered sugar. Place on parchment paper lined cookie sheets. (I used to not use parchment paper since it isn't absolutely necessary but it really does make the cookies easier to remove and they seem to bake more even). Bake in pre-heated 350 degree oven for 10-13 minutes. My cookies were perfect after 11 minutes. Oven temperatures and altitude can vary cooking times, always check at the lowest cooking time and adjust your recipe accordingly. Cookies may look undercooked but will firm up slightly when cooled so don't over bake!

Dough balls rolled in sugar and ready to put in my pre-heated oven
Store in airtight container up to a week or freeze for 4-6 weeks.

Like I mentioned earlier, I like this recipe because I can add Chipotle chili powder or cinnamon for a Mexican twist or since this cookie resembles a brownie in flavor and texture ....I can use the individual cookies to make mini brownie trifles in wine glasses. Layer a cookie or two, pudding, chopped candy or fruit, whipped cream = single serve trifles. Elegant and fun but great for my casual entertaining style. I just love desserts that are so versatile!

I love the crinkle snow capped look the cookies have from the sugars!

Cookies ready to serve up to our friends! :)

Inside the fudge cookie! Moist and yummy!

Cookie with the added chipotle powder for a little kick!

Trifle made with cookies, pudding, whipped cream and chopped butterfingers


I hope you enjoy my very versatile chocolate crinkle recipe and find a way to make it work for your busy holiday schedule! 

Welcome to the dark side! :)
Tanja
Gluten Free Casually


Tuesday, December 3, 2013

Cranberry Bread (Gluten Free)

Cranberry Bread. I love the tangy taste of cranberries tossed in a sweet bread especially on a crisp morning with a strong cup of hot coffee! Yummy. For this recipe I used cranberry sauce (which is a great way to use that leftover cranberry sauce from the holidays!) or you can use the canned whole berry sauce (like Oceanspray) for convenience. If you prefer using fresh berries or dehydrated cranberries you can substitute those instead. This recipe is flexible like that!

I've had this recipe for a long time and I can't even remember where I got it from. I've always liked the flexibility of it. I can use canned cranberry sauce, leftover cranberry sauce, fresh berries (more tart flavor) or dehydrated cranberries. I like to add some orange zest and a splash of either fresh orange juice or orange extract for a little extra flavor but you can leave that out and just use vanilla extract or almond extract if you prefer. You can also add chopped nuts for extra crunch and flavor OR you can substitute up to 3/4 cup of gluten free flour with finely ground nuts instead. The recipe can easily be doubled and baked in a bundt pan, coffee can without a lip on it, or two bread loaf pans. I just used the single recipe below that makes 1 regular size loaf pan. (You can also bake in muffin cups or mini loaf pans but you will need to adjust your baking time).

For this recipe, I went back to my roots and baked them "old school". I baked my loaf in an empty can. Yep, the old fashioned hillbilly way. When I was a young child, my mom and her dear friend Rosemary used to always bake the holiday breads in empty coffee cans or the mini loaves in soup cans. They would wrap the cooled bread in plastic wrap and tie with a bow for gift giving to neighbors or sometimes we would decorate the empty coffee can with wrapping paper and put the cooled bread back inside the can and cover with the plastic coffee can lid and put a sticky bow on top. Simple. Easy. I thought everyone made bread this way until I got older and noticed some people used loaf pans. I asked my mom why we used cans to bake our holiday breads. My mom's answer: you can make multiple batches of bread and bake at the same time because the cans take up less space in the oven and cans are free plus you can throw them away after you are done using them and not have to store them all year long. Not to mention...they look super cool when sliced because they are circles! :)

I have multiple sizes of bread loaf pans but nothing makes me smile more than when I see bread slices that have been baked in cans. It brings back a flood of happy holiday memories and takes me back home to the best cooks I know! I catch myself looking for coffee in real cans (without lips on them because the bread will not slide out if there is a lip on the top!) during the holiday season. I was at a friends house over the weekend and I saw her about ready to toss her 40 oz. empty can into the recycle bin. I snagged it and brought home my "loaf pan can" so I could bake my bread in it for today's recipe. (My husband rolls his eyes when I do this). You just grease or spray the inside of the empty can with butter or oil and fill 2/3 full. Cover with foil and keep it right side up just like you are storing it on a shelf & bake in the oven for the same amount of time you do for the appropriate size loaf. Since this is a single loaf pan size recipe....I baked mine in a 40 oz. empty sweet potato can. Worked perfect. I hate to admit that I am washing and keeping the can to bake another loaf soon. I can't help it... I love the round slices! :) I also admit that I plan on buying my coffee in a can for this month so I can use the can to bake my holiday bread!

If you don't have a gluten allergy then you can just use regular flour. The original recipe called for regular flour but I have tweaked it to work with gluten free flour.

Cranberry Bread Recipe:
  • 1/2 cup sugar (I used raw sugar but you can use regular granulated sugar or brown sugar)
  • 1/3 cup oil + 2 tbs
  • 3 large eggs
  • 1 tsp. baking soda
  • 1/2 tsp. baking powder
  • 1 1/2 cup gluten free flour (I used Trader Joe's brand today because I didn't have any of my own mix prepared). If your gluten free flour doesn't contain guar gum or xanthan gum you will need to add 1/2 tsp. of either of them to the recipe so it doesn't turn out crumbly. I used xanthan gum. You can substitute up to 3/4 cup of finely ground nuts in place of 3/4 cup flour.
  • zest of 1 orange (optional)
  • 1/2 tsp. ground cinnamon (you can add more if you want)
  • 2 tsp. orange extract (or substitute vanilla extract or almond extract)
  • 1/2 cup chopped nuts (walnuts, almonds or pecans), optional
  • 1/2 cup cranberry sauce (If you are using fresh cranberries then increase your sugar by 1/3 cup because they will be more tart. If you are using dried cranberries then add 1/2 cup boiling water and let them sit for about 5 minutes to plump. Discard water).
Some of the ingredients I used today
Note: I use either homemade or canned whole cranberry sauce with this recipe. My homemade sauce does not contain celery, onions or anything that isn't sweet. If you add sauce that contains onions or celery you may not get the sweet flavor of this bread. It may become more of a savory bread instead.

Combine the eggs, oil, extract and sugar. Slowly mix in the baking soda, baking powder, cinnamon, gluten free flour (and add 1/2 tsp. guar gum or xanthan gum if your gluten free mix doesn't already contain it). Add cranberry sauce (or cranberries), orange zest and nuts if you are adding them. Don't overmix. Just stir until combined. Pour into a greased loaf pan or can. Bake in pre-heated 350 degree oven for about 45-55 minutes or until knife inserted comes out clean and top is lightly golden. (Oven temperatures and altitude may vary cooking times). Check at 45 minutes and then again every 5 minutes until done. My loaf took 50 minutes. Mark it on your recipe for future cooking. Usually I bake muffins for 18-22 minutes and mini loaves about 30-35 minutes but you will need to check them at the minimal baking time and adjust accordingly.

If you think you may have over baked it a little then just put some foil over the top when you remove it from the oven to trap in some moisture and that may just salvage your loaf! :) Just leave the foil on for about 10-15 minutes and then remove it. You want to trap the moisture but not make the bread "sweat". Another tip I would like to share is that if you make a sweet bread or cake and it doesn't turn out just perfect....cut it up in chunks and let it dry out like you would for croutons. You can "recycle" the bread chunks by making into a delicious baked french toast, bread pudding or use the crumbs for my "Cookie Crumb Cake Recipe (November 2012 recipe on blog)! Baking isn't cheap and I don't like to waste it even if it isn't perfect.

The first time I converted this bread recipe to gluten free, the recipe called for only 2 eggs but the bread turned out slightly crumbly and felt a little too heavy although it was still tasty. Gluten Free flours are a bit trickier to work with than traditional flour so sometimes you have to tweak each recipe depending on how "heavy" it is. I felt that 3 eggs worked out better than 2.

NOTE: I use cans that do not have the white lining in them. I am not sure if it is safe to bake in the cans with the white lining therefore I just don't do it. 

Let cool for at least 30 minutes before removing from loaf pan or can. I find this recipe tastes better the next day and slices best when chilled. It looks awesome sliced and put on a glass plate for gift giving or for brunch (especially the round slices!) I love baking my holiday breads in the round loaves and slicing them up. People always ask where I got my special round baking pans. :) I guess they don't know my hillbilly secret: "Recycled Cans"!

Did I mention that this bread is absolutely delightful when you slice it into the chunky circles and lightly toast it? Spread a dab of real butter on top. Mmmmm....my mouth is watering now!

This is how full I filled can with batter

Fresh from the oven!

Cooling in the can for 20-30 minutes before removing

Just removed from the can

This one is ready to give to a friend. Sometimes I decorate with curly ribbon and tags.

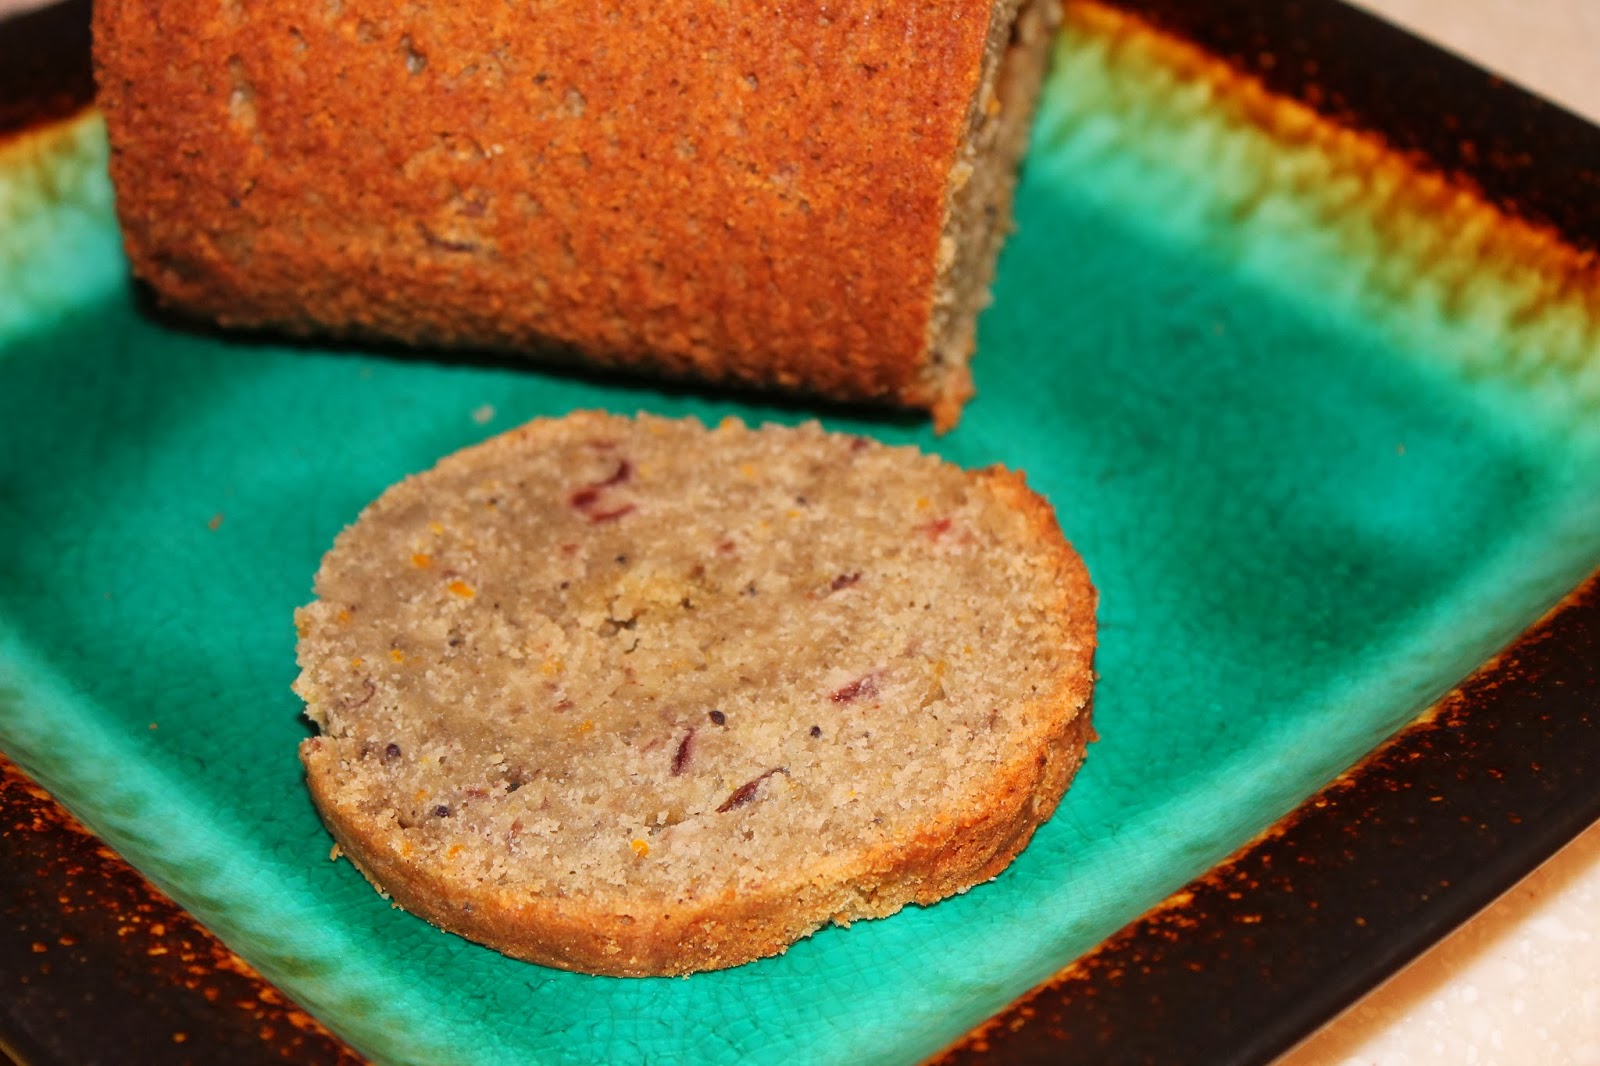
This is my slice that I will  have for breakfast. Yummy!

Up close view of the bread. See the pieces of cranberry & orange zest?

Yummy! This tastes great with a dab of butter or cream cheese!

I hope you enjoy this recipe that I have been making for many years. If you don't have a gluten allergy or you are making this for someone that doesn't then you can just use regular flour. I don't care for the gluten free flour blends that contain sorghum for my sweet breads although they work well for savory breads.

You can add a light glaze on this bread by mixing powdered sugar with either orange juice, milk or water to get a consistency for drizzling. I don't add the glaze because I like the flavor of the bread plain. If I were making muffins and wanted to dress them up a little bit, I might add a little drizzle of the glaze but otherwise...no. I like my bread plain and simple.

Enjoy!
Tanja
Gluten Free Casually