My youngest son & me

My youngest son & me

About me

Hi!
My name is Tanja (Sater) Miller and I'm excited about sharing my journey of converting my favorite recipes to gluten free! I am not a fancy cook - I prefer just a casual, fun meal. I am married with grown children (and have small grandchildren) & 3 dogs. I work full time as a registered nurse & I am a geek. Yes, I love Star Trek, Star Wars, Fringe, Firefly, Farscape and most of the other Scify shows. You will probably see a little of my geek side come out once in a while! Please join me on my journey of cooking, baking & converting every day recipes into yummy gluten free meals that everyone can enjoy (not just those with a gluten allergy!) Don't be shy about checking out my recipes....I have the gluten free version along with the regular recipe that I adapted from!

Sunday, September 30, 2012

Meat Loaf

Meat Loaf. Simple. Comfort food for some of us. This was always one of my kids' favorite dishes growing up. There is nothing fancy about this dish...it is easy to make and tastes great either hot as a main dish or served cold on a sandwich (my favorite!). This is also the same meat recipe that I use for my cabbage rolls & stuffed peppers. I just tweaked it with some gluten free crumbs & onion soup mix to make it gluten free! My kids always liked it served with mashed potatoes and green beans and my personal favorite is served cold on soft bread (I like Udi's gluten free bread) with mustard the way my dad used to like his. I remember packing my lunch at school and if I opened up my lunch box (my mom packed our lunches for us) and there was a meatloaf sandwich...well it was almost like hitting the lottery! :)

There are a lot of ways to make meat loaf but this is the way my mom made it (except she made it with regular bread or cracker crumbs instead of gluten free ones) and this is the way my family likes it. I have friends that make it with rice or chunks of moist bread or green peppers, oats, etc. Basically,  you can make meat loaf with whatever you want. You can also make these into meat balls or mini loaves or muffin pans and freeze them for later. My husband prefers his meat loaf made into little hamburger patties and cooked in the cast iron skillet. Like I said...this recipe is easy and you can tweak it to make it work for many other uses besides meat loaf! If you don't have a gluten allergy...just use regular bread or cracker crumbs in place of the gluten free ones. (And if you prefer having rice or oats instead of crumbs then just swap it out cup for cup). You can also add chopped onions or peppers if you prefer. I like mine just the way my mom made it...except for the gluten free version now!

I found the Onion Soup Mix (gluten free) at Albertson's grocery store for $1/box for Essential Everyday which is their store brand. 4C brand Onion soup mix is also gluten free and you can frequently find it at 99cent stores, Dollar Stores or at specialty stores. The Lentil crackers (not chips!) which taste like pita chips - I usually find at Home Goods, TJ Maxx or Ross stores for $2.99. You can also find them at some specialty stores but they are usually more costly. I used the Lentil crackers because I had them on hand but if not, I would have substituted finely crushed Tortilla chips (On the Border brand) instead.

Meat Loaf Recipe:

  • 2 pounds of ground hamburger (I use 90-93% lean so I don't have grease in my pan)
  • 1 envelope of onion soup mix (I used Essential Everyday brand from Albertson's which is gluten free, photo below)
  • 1/3 cup ketchup (I  used Heinz) + extra for glaze on top if you like it that way or you can substitute BBQ sauce -  just make sure it is gluten free!
  • 1/8 cup prepared yellow mustard (I used French's)
  • 2 eggs
  • 4 tbs. Worchestershire sauce (I used Lea & Perrins original which is gluten free)
  • 1/2 tsp. pepper
  • 1 cup gluten free finely crushed bread or cracker crumbs or tortilla chips (I used Lentil crackers which taste like pita chips, see photo below) Note: I have used Tortilla chips finely crushed in this recipe before and it turned out great also. I usually use "On the Border brand Tortilla chips because they are labeled gluten free on the package and I like the flavor/texture of them and you can find them at Walmart & Sam's club)
My gluten free items used in the recipe today
Mix all the ingredients together with clean hands in a big mixing bowl. Put meat loaf mixture in a bread loaf pan (or your muffin or mini loaf pans). Top with extra ketchup or BBQ sauce to make a glaze if desired. If making meat balls, you can bake on a cookie sheet. Bake 350 degrees for about 60-70 minutes for the loaf pan. Note: Mini loaf pans, muffins and meat balls will cook in less time, check your meat after about 20-25 minutes. Remove from oven. Let stand for at least 10 minutes before cutting. 

Meat Loaf with Ketchup glaze on top

Sliced perfectly for sandwiches

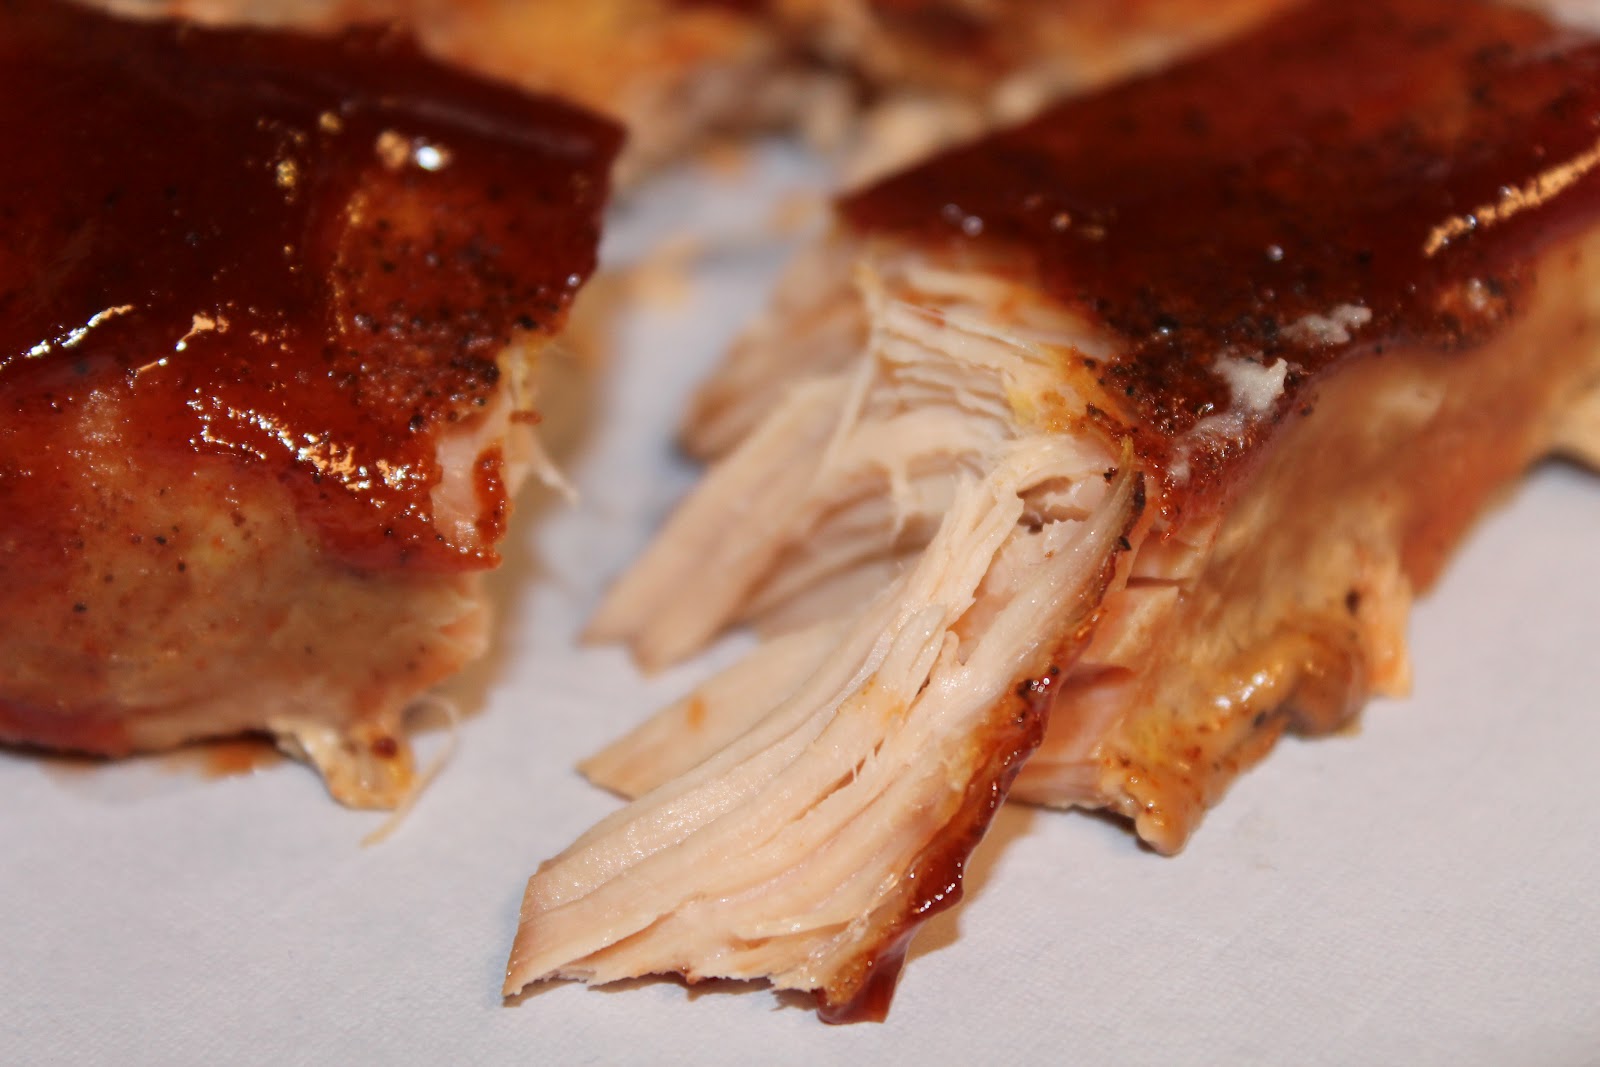
Very moist, not dry and it has flavor but not overpowering

Enjoy!
Tanja
Gluten Free Casually


Wednesday, September 26, 2012

Pumpkin Cookies with Brown Butter Frosting

Frosted Pumpkin Cookies! Can you smell the spicy deliciousness? I just made a batch of wonderful little pumpkin cookies that have a cake-like texture with the most heavenly frosting glaze. My kids all love just about anything pumpkin but my husband does not. He won't touch these. (He hasn't tried them and probably never will but he thinks he doesn't like them. Okay, his loss!) Since the kids all moved out, I have gotten away from making hardly anything pumpkin. The other day one of my patient's came into the office and said she and her sister liked my blog but I need something pumpkin on it and she would like to taste test it! Well...here goes converting my old pumpkin cookie recipe into gluten free. Since this recipe makes a lot of cookies... I was really hoping that they weren't going to be a failed experiment and end up in the garbage. They smelled fabulous while they were baking in the oven. It made my house smell like the holidays!

When the time came to remove them from the oven and frost them, I caught myself holding my breath hoping they would be delicious. I was tired after working all day on my feet so I didn't want to keep experimenting and I didn't want to disappoint my patient tomorrow. After taste testing several cookies (quality control you know!)...I decided that they are quite tasty and I will take my patient some cookies into work tomorrow and post the recipe on my blog. This recipe makes a lot of cookies but the dough refrigerates well so you can bake them later or just reduce all the ingredients by half and just make half a recipe. I like my pumpkin cookies with just the frosting but you can add chopped walnuts or pecans or cranberries or raisins to the batter before baking if you want. I personally don't think these cookies  need any of the extra additions. (I have tried adding mini chocolate chips to my non-gluten free version a few years ago but thought the chocolate chips took away from the pumpkin flavor. I want the pumpkin to be the star in this recipe!) I like the nice spicy flavor of the pumpkin with the sweet buttery flavor of the frosting.

Pumpkin Cookie Recipe:
  •  1 (15 oz.) can pumpkin puree (make sure it isn't the pumpkin pie filling) 
  • 2 eggs
  • 1 cup brown sugar, packed
  • 1 cup granulated sugar
  • 4 cups flour (I used my gluten free flour blend, recipe below) but you can use regular flour if you don't have a gluten allergy). You will need to add 1 tsp. xanthan gum or guar gum if you are using gluten free flour and it does not already contain one of these. If using regular flour then omit. 
  • 1 tbs. cinnamon, ground
  • 1 tbs. pumpkin pie spice
  • 2 cups Crisco shortening
  • 1 tsp. salt
  • 2 tsp. baking soda
Cream shortening, sugars, pumpkin, cinnamon and pumpkin pie spice until creamy. Beat in eggs. Add baking soda, salt, and flour. Mix well. Drop by spoonfuls (I used a cookie scoop) onto cookie sheet. (I used parchment paper to line my cookie sheet). Bake 350 degrees for 10-12 minutes or until lightly golden on top. These will not spread much, they will have a slight cake texture so don't over bake them. You can spread frosting onto slightly warm cookies or you can just turn cookies upside down and just dip the cookie tops into the frosting while warm to glaze them which is what I do. I find it easier to do it this way. (They are also good without the frosting if you prefer them not as sweet. I personally have a SWEET TOOTH and love the frosting glaze on these little bad boys! I can't make a huge batch and leave them around because I catch myself just popping them in my mouth every time I walk into the kitchen...hence the jeans getting too tight! I like to share the calories - oops I mean cookies with others!)

Pumpkin cookies on parchment paper prior to baking


Brown Butter Frosting:
  • 1 stick real butter
  • 8 tbs. milk 
  • 2 cups powdered sugar
  • 1 cup brown sugar

In a saucepan, melt the butter, milk and brown sugar until sugar is dissolved. Cool slightly and then whisk in the powdered sugar. It should have a light brown/tan color. Dip cookie tops into warm frosting for a smooth finish or smooth frosting onto cookies with a knife.


Gluten Free Flour Blend Recipe:
  • 1 1/2 cups brown rice flour
  • 1 cup white rice flour (I used sweet rice flour for this batch)
  • 1/2 cup glutinous rice flour (made from sticky rice, gluten free)
  • 1 cup potato starch (not flour)
  • 1/2 cup nonfat dry milk, make sure it is very fine in texture
  • 1 cup corn starch or tapioca starch (I used corn starch for this batch)
  • 3 tbs. xanthan gum
Combine all ingredients together well. I store mine in a glass container and use it in place of regular flour in all my recipes. This particular blend I really like for baked sweet goods. 


Cookies after dipping tops into slightly warm frosting. It looks a
little messy but they will transfer just fine after they have cooled.

The delicious little cookies ready to eat!

Taste testing the results of the gluten free version of my pumpkin cookies!

I hope that this recipe will help anyone with a gluten allergy make some really delicious treats for the upcoming holidays or for whenever you are craving some pumpkin deliciousness! (You can also make these yummy little cookies using regular flour if you do not have a gluten allergy!)

Enjoy!

Tanja
Gluten Free Casually


Tuesday, September 25, 2012

Pasole

PASOLE. Mmmmm! This soup is one of my favorites. Since moving to Arizona, we have come to love the Mexican flavors that enhance our food! For those not familiar with Pasole, (pronounced Pah sole Ay) it's a soup traditionally made with either pork or chicken, hominy, cilantro & spicy tomatoes. A little tickle for the taste buds! YUMMY! Served with tortilla chips makes for a wonderful supper or lunch and just happens to be gluten free without alterations. I like quick & easy soup recipes like this that can be thrown together in minutes & the recipe can easily be doubled for large crowds & kept warm in the crock pot for parties. People hold back on trying it because they have never tried hominy. Alone it doesn't have much flavor but it really gives this recipe a nice finish and it is inexpensive. You can improvise a little with the ingredients and I will give you some substitutions & suggestions below. Leftovers can be frozen or canned & the hominy seems to hold its shape no matter how many times it gets reheated. It is a great swap out for chili on a cold night or for entertaining the guys for game day.

For convenience, you can purchase rotisserie chicken or use left over pork roast to make it super quick! This is one of my favorite soup recipes thanks to Julie (one of my co-workers) that was kind enough to share the recipe she uses with me. Most of the recipes I have had for Pasole were just too much work for a quick supper. This recipe is a keeper! We need to get meals to the table FAST with our busy schedules! Oh and did I mention that the soup tastes even better the next day? Yep, that is my kind of supper! It is a soup that comes together quickly but tastes like you spent a lot of time on it.

Pasole Recipe:
  • one pound of shredded or diced chicken or pork (pre-cooked)
  • 1 can (approx 28 oz) Hominy, not drained
  • 1 small can (approx 15 oz) Mexican style tomatoes (like Rotel)
  • 1 small handful of fresh cilantro leaves or 2 heaping tbs dried Cilantro
  • 1 1/2 cups water or chicken broth
  • 1 tsp. Better than Bouillon Ham base, optional
  • sprinkle of sea salt (optional, taste your soup first...it may not need any)
I combine the ham base bouillon with hot water and stir to dissolve. This is an optional step. You don't need the ham base bouillon. (I used to not add it to the soup and it was still delicious). I think it just adds a nice slightly smokey flavor if you have some on hand but I wouldn't go out and buy some just for this recipe. To a large pot add the chicken or pork (I like mine shredded so I get a taste of meat in each bite but you can cube it if you prefer), hominy with the juice, Mexican tomatoes, water (with bouillon if you are using it) or broth and cilantro. Cook until heated through. Serve with tortilla chips. (The tortilla chips bring a crunch and slight corn flavor that I think adds a more satisfying crunch than crackers! - plus the tortilla chips are gluten free!) 

If you don't have Mexican style tomatoes you can use a can substitute any of the following:
  • 1 can of regular tomatoes + 1 small can of green chiles
  • 1 can of regular tomatoes + 1 tsp. pepper flakes (you won't get quite the same flavor but it will work in a pinch)
  • 1 can of regular tomatoes + 1 chipotle chile pepper in adobe sauce (chopped fine or pureed), this will give you a slightly smokey flavor which I like!
  • 2 cups of chunky salsa (this will let you control how spicy you make the soup. If you like it with minimal spice then use mild salsa, if you like it just a little heat then use medium salsa and if you like it spicy then use a hot salsa. I would stay away from fruity salsas with peaches, mango, pineapple, etc. But the salsa with chipotle tastes really good in this recipe!)
You can also substitute the vegetarian "chicken strips" diced in this recipe for those that are vegetarian.

You can substitute quick cooking rice in place of the hominy but I really wouldn't unless that is the only option you have. (You will need to cook the rice in the broth until the rice is tender & you may need to add additional broth/water because the rice will soak it up while it cooks) The hominy just gives the soup something that rice can't. However, sometimes you have to cook with what you have on hand and rice...most everyone have that in their pantry. 

Pasole with Shredded Pork


The next rainy or chilly day you have, stop on your way home from work and pick up some pre-cooked shredded pork or a rotisserie chicken and make yourself a pot of Pasole...you won't be sorry you tried it! 

Enjoy!

Tanja 
Gluten Free Casually


Wednesday, September 19, 2012

Butterfinger Cookies

  
Butterfinger Cookies! Everyone at my house loves Butterfinger candy bars. I have tried a couple different recipes for Butterfinger cookies in the past but the taste or texture just wasn't right so I gave up. The other day I found a sale on a 6 pack of Butterfinger candy bars and decided to improvise one of my cookie recipes and see if I could give the Butterfinger cookies one more try! It worked! They were so yummy and a nice change from the every day chocolate chip cookies. (I cut back on some of the butter and added a little bit of peanut butter to give the cookie just the right back ground taste in the cookie.  Not overpowering peanut butter...subtle. I did not want it to taste like a peanut butter cookie. I wanted the Butterfingers to be the star in this cookie. I also used all brown sugar for more flavor & chewiness. We thought the final result was a nice, chewy cookie with subtle peanut butter undertones and bits of Butterfinger candy. I think you could also alter this recipe and add only 3 crushed candy bars and add a handful of semi sweet chocolate chips for a nice cookie too!


Butterfinger Cookie Recipe:
  • 2 1/2 cups gluten free flour mix (see my recipe below) or if you don't have a gluten allergy then by all means just use regular flour
  • 1 1/2 cups brown sugar (or you can substitute raw sugar)
  • 1 stick real butter, softened but not melted
  • 1/4 cup Crisco shortening
  • 1/3 cup peanut butter (either creamy or crunchy will work)
  • 2 eggs
  • 1 tsp. baking soda
  • 1 tsp. salt
  • 6 full size Butterfinger Candy Bars, crushed
Preheat oven to 350 degrees. Mix the butter, Crisco and peanut butter until creamy. Beat in brown sugar and eggs. Add baking soda, salt and flour. Beat until well mixed. Stir in crushed candy bars. Drop by tablespoonfuls (I use a cookie scoop - looks like a mini ice cream scooper) onto parchment paper lined cookie sheets. Do not flatten, leave in little round balls - they will flatten on their own while baking. Bake 10-13 minutes or until lightly golden. Cool on cookie sheets for 10 minutes before removing to cooling racks. (I have not tried cooking these cookies on a cookie sheet without parchment paper. I was too afraid of the cookies sticking and making a big mess. They turned out perfect on the parchment paper!)


Gluten Free Flour Blend Recipe:
  • 1 1/2 cups brown rice flour
  • 1 cup white rice flour (I used sweet rice flour for this batch)
  • 1/2 cup glutinous rice flour (made from sticky rice, gluten free)
  • 1 cup potato starch (not flour)
  • 1/2 cup nonfat dry milk, make sure it is very fine in texture
  • 1 cup corn starch or tapioca starch (I used corn starch for this batch)
  • 3 tbs. xanthan gum
Combine all ingredients together well. I store mine in a glass container and use it in place of regular flour in all my recipes. This particular blend I really like for baked sweet goods.


I hope you enjoy these chewy bites of deliciousness!

Tanja
Gluten Free Casually


Sunday, September 16, 2012

Melt in your mouth RIBS

RIBS! Melt in your mouth, finger licking good ribs! Makes my mouth water thinking about them. Yummy! My husband (& my boys when they are home) request these frequently and they are so easy to make... just plan on making them early in the morning so they are ready for supper! I used to really suck at making ribs. Then one of my patient's that used to own a rib joint before he retired told me the secret. Since then, my ribs always turn out delicious. The trick to great ribs is cooking them on a low temperature for a long time. It really doesn't matter whether you use beef, pork, baby back, country ribs, boneless ribs....any of them will work with this recipe and I usually buy whichever ones are on sale. I usually make my own homemade BBQ sauce but you can certainly use your favorite store-bought sauce for convenience, just be sure it is gluten free if you have a gluten allergy! If you don't want to heat up your kitchen you can make these on your charcoal grill, gas grill or smoker too. Just remember to cook them on a low temperature for a long time! If you try to cook them too fast, they will not be tender and moist!

This is a great recipe for the football game parties, fall BBQs, potlucks or just a lazy weekend at home. If you buy the ribs when they are on sale, it isn't expensive to make and it's really a simple recipe. You just have to plan on the cooking time. Try the recipe...you won't be sorry!

BBQ Rib Recipe:

  • 2-3 racks of ribs (or use boneless, country style, etc)
  • dry rub seasoning of your choice (I used Stubb's BBQ rub today)
  • BBQ sauce (my homemade recipe is below but you can use store bought, be sure it is gluten free if you have a gluten allergy!)
Dry rub seasoning on country style boneless ribs

Take a heavy duty cookie sheet with edges or a deep roasting pan and cover with foil. Place the ribs on the foil. Sprinkle dry rub into the meat and gently rub it in. 


Put another large piece or two of foil over the top of the ribs but make sure it isn't tight against the meat. I call it "tenting" the foil so it looks kind of like a tent with space for air flow/steam over the meat. 


Put a glass bowl or casserole dish filled with water on the bottom rack of the oven and put the cookie sheet with foil & ribs on the top rack. Bake at 275 degrees for at least 7.5-8  hours. Check the water after 4 hours to see if you need to add additional water. (The water helps steam the ribs).  If you are using the BBQ grill you will still want to put them on the cookie sheet with foil and put a bowl of water off to the side to help cook them tender! After 7.5-8 hours, remove from oven and take a knife or fork and gently tug on the meat. If it comes apart easily then they are ready for adding the BBQ sauce. (If meat doesn't flake away easily then cook additional 30 minutes covered & check again) Spread the BBQ sauce over the ribs and return to the oven or BBQ grill without the foil on top. This will allow the BBQ sauce to thicken on the ribs and form a glaze. YUMMY! Cook about 20-30 additional minutes and then remove from heat and these babies are ready to EAT!


Boneless Country Style Ribs

Ribs with bones


My homemade BBQ sauce recipe:

  • 1 cup ketchup
  • 1/4 cup brown sugar or raw sugar (more if you want it sweeter)
  • 1/2 tsp. dry mustard spice
  • pinch of sea salt
  • 1 tsp. chipotle chile powder (more if you like it spicy)
  • 2 tsp. vinegar
  • 2 tbsp. Worcestershire sauce (make sure it is gluten free if you have an allergy to gluten)
  • 1 cup beef broth (or I have substituted a packet of gluten free dry onion soup mix with 1 cup of hot water in a pinch!)
Cook on medium heat until boiling. Turn heat down and simmer on low until thickened. If you want your BBQ sauce thicker, add 2 tbs. corn starch.

Note: I have found that in addition to the expensive gluten free onion soup mixes you can find online or at specialty stores is Albertson's grocery store brand onion soup mix is gluten free & 4C brand that I frequently find at the 99cent store is also gluten free. Both are 2 envelopes in the box for around $1. I find that a lot of the "brand names" use wheat flour as a thickener but some of the "generic" brands are made with corn starch or xanthan gum which are gluten free. Gluten free does not have to be expensive or taste funky!


I hope this post got your taste buds watering for some "fall off the bone" ribs!

Enjoy!
Tanja 
Gluten Free Casually


Saturday, September 15, 2012

Chocolate Chip Cookies

Chocolate Chip Cookies! My husband wanted some chocolate chip cookies and I was feeling a little too lazy to look through my recipes for my original cookie recipe. So I just used the recipe from the back of the bag of generic store brand chocolate chips. I noticed it was slightly different than my regular one but decided to give it a try. I substituted my gluten free flour mix for our batch (but I have made them for friends since then using the regular flour and the results were exactly the same!). This is probably my favorite chocolate chip cookie recipe now. I almost always have some type of cookies at our house. The guys & kids that visit are disappointed if we don't have cookies. So I make cookie dough frequently and sometimes keep the dough in the refrigerator and just bake them as I need them. This is one of the most requested cookies. I like them because they hold their shape well and don't fall apart if I transport them. They have a nice texture and wonderful flavor. You can also add 1 cup of your favorite chopped nuts if desired. Sometimes I will grate a small plain chocolate bar and add it to the cookies or add a small handful of milk chocolate chips, sprinkles or dried cranberries just for additional flavor or color but it isn't necessary...these are quite tasty on their own! Now I catch myself looking on the back of different brands of chocolate chips for different recipes. I have quite a collection of different recipes to try! (I will post the ones I think are worthy!)

Chocolate Chip Cookie Recipe:
  • 2 1/2 cups flour (I used my gluten free flour blend - recipe below) but if you don't have a gluten allergy you can just use regular flour.
  • 1 cup brown sugar, packed (I used light brown sugar)
  • 1/2 cup granulated sugar
  • 1/2 cup (1 stick) real butter (if substituting margarine, make sure it is at least 65% fat for best baking results)
  • 1/2 cup Crisco shortening
  • 2 eggs 
  • 2 tsp. vanilla extract
  • 1 tsp. baking soda
  • 1/2 tsp. salt
  • 12 oz. bag of semi sweet chocolate chips or chunks (or substitute 2 cups M&M candies)
  • 1/2 cup of chopped nuts, dried cranberries, sprinkles (optional)
Preheat oven to 350 degrees. Beat softened butter with crisco, gradually add sugars and beat until fluffy. Add eggs and vanilla. Beat for 1-2 minutes until fluffy & smooth. Add flour, baking soda & salt. Stir in chocolate chips. Drop by rounded teaspoonfuls onto non-greased cookie sheet. (I use a cookie scoop because I find it really is easier to use than spoons. I fought this for years because I didn't think I needed a cookie scoop...but I will say I love using a cookie scoop!) Bake 10-12 minutes or until lightly golden brown. Cool slightly before removing to a wire rack or newspaper to cool completely.

Note: If you prefer crispier cookies then substitute 1/2 cup additional butter or margarine for the Crisco. Crisco will give the cookies a slightly fluffier texture which my family prefers. You can also substitute raw sugar for both of the sugars if you prefer. If you prefer a chocolate chocolate chip cookie then substitute 1/4 cup of unsweetened cocoa powder for 1/4 cup of flour. For mint chocolate chip cookies substitute 1 tsp. mint extract for 1 tsp. vanilla extract. 


Gluten Free Flour Blend Recipe:
  • 1 1/2 cups brown rice flour
  • 1 cup white rice flour (I used sweet rice flour for this batch)
  • 1/2 cup glutinous rice flour (made from sticky rice, gluten free)
  • 1 cup potato starch (not flour)
  • 1/2 cup nonfat dry milk, make sure it is very fine in texture
  • 1 cup corn starch or tapioca starch (I used corn starch for this batch)
  • 3 tbs. xanthan gum
Combine all ingredients together well. I store mine in a glass container and use it in place of regular flour in all my recipes. This particular blend I really like for baked sweet goods. 


You can also easily layer the dry ingredients in a jar for gift giving. I layered the recipe in a jar but substituted M&M candies and added some sprinkles since it was going to friends with small kids and it just looks nicer for them with all the colors! I just attached instructions to dump contents into a bowl & mix with butter, crisco, eggs & vanilla or almond extract & included the baking instructions. Quick, easy and no mess for me to clean up & they can bake them at their convenience. I just attached a ribbon and spatula to the jar. This is a great gift for the holidays for friends, neighbors, teachers, bus drivers, college kids or anyone that loves cookies! 

Enjoy!
Tanja
Gluten Free Casually


Tuesday, September 11, 2012

Sunshine Cookies

Sunshine Cookies! I love lemon flavored desserts. Since I had a refrigerator full of lemons I decided to try making a cookie similar to a chocolate chip cookie but made with some lemon rind & white chocolate chips. Rather than search the internet, I just grabbed one of my favorite chocolate chip cookie recipes and tweaked it some to make these. The result was yummy. (Since it was raining in Arizona today - a rare thing - I decided I needed a little sunshine of my own making. Hence the name...Sunshine cookies!  :)


Sunshine Cookie Recipe:

  • 2 1/2 cups flour (I used my gluten free flour blend - recipe below. If you don't have a gluten allergy then by all means just use regular flour)
  • 1 cup brown sugar
  • 1/2 cup granulated sugar
  • 2 eggs 
  • 1/2 cup (1 stick) real butter, softened but not melted
  • 1/2 cup butter flavored Crisco
  • 2 tbs. fresh lemon juice
  • grated lemon rind (I used about 3-4 tbs. from 3 medium lemons)
  • 1 tsp. baking soda
  • 1 1/2 tbs. custard powder (I use Hearth Club or Weikfield brand which you can usually find in either the baking isle or the pudding isle) but if you don't have it you can substitute dry vanilla pudding mix or just omit it. (I like to use it especially when using gluten free flour blends because it gives a little elasticity to the dough)
  • 1/2 tsp. salt
  • 2 cups white chocolate chips (I used Nestle mini white chocolate chips)
Preheat oven to 350 degrees. Beat the sugars, Crisco, butter and eggs until fluffy. Add the lemon juice and lemon rind. Then beat in the custard powder, flour, baking soda & salt.  Beat until well combined, about 1-2 minutes. Stir in white chocolate chips. Drop onto non-greased cookie sheets about 2-3 inches apart. Bake 10-12 minutes or until lightly golden in color. 

Note: If you prefer crispier cookies, substitute additional 1 stick of real butter in place of the Crisco. The Crisco will give the cookies a fluffier, softer texture (which my husband prefers) while the real butter will give the cookies a crispier flatter texture. If substituting margarine, make sure the fat content is at least 65% for the best baking. You can also substitute raw sugar in place of both the brown & the granulated sugars if you prefer. 

Gluten Free Flour Blend Recipe:
  • 1 1/2 cups brown rice flour
  • 1 cup white rice flour (I used sweet rice flour for this batch)
  • 1/2 cup glutinous rice flour (made from sticky rice, gluten free)
  • 1 cup potato starch (not flour)
  • 1/2 cup nonfat dry milk, make sure it is very fine in texture
  • 1 cup corn starch or tapioca starch (I used corn starch for this batch)
  • 3 tbs. xanthan gum
Combine all ingredients together well. I store mine in a glass container and use it in place of regular flour in all my recipes. This particular blend I really like for baked sweet goods. 


I hope I was able to share some sunshine with you today!

Enjoy!
Tanja
Gluten Free Casually


Monday, September 10, 2012

Lemon Mashed Potato Cake

Lemon Mashed Potato Cake. Okay, the true geek in me comes out in this recipe. I was watching a sci-fy show on BBC and the characters were eating a lemon mashed potato cake and talking about how wonderful it tasted. Curious, I jumped on the computer to research this unusual cake especially since the characters were bragging about how moist it was. To my excitement, I realized that it was already a gluten free cake without me having to alter it at all! I also had all the ingredients. I just had to try it. The original recipe was written in grams rather than cups so I got out my handy little scale and weighed all my ingredients and then put into measuring cups so I could write it out for everyone else.

It is indeed a very moist cake. I have tried it both with baked potatoes that I peeled, cooled & and mashed without milk or butter and I have tried it with instant mashed potatoes - cooked according to box instructions. Although both are tasty...I prefer the fresh potato version over the one made with instant mashed potatoes. The texture with instant mashed potatoes has more of a baked cheesecake texture while the one made with fresh potatoes has more of a sponge cake texture. I have also made it with oranges instead of lemons. I am betting lime flavor would also be quite tasty. I will be experimenting with this basic recipe a little more in the future! This is an awesome way to use up leftover mashed potatoes as long as you don't have garlic or spices in them!

Lemon Mashed Potato Cake Recipe:
  • 200 grams of butter, softened but not melted, approximately 14 tablespoons
  • 200 grams of raw sugar, approximately 1 cup
  • 4 eggs
  • 175 grams of finely ground almonds, approximately 1 3/4 cup. (mine was ground into a flour texture)  If you want to make it nut free, you can substitute either brown rice flour or if you don't have a gluten allergy then by all means use regular flour
  • 250 grams of mashed potatoes (preferably without any milk or if you are using leftover mashed potatoes make sure it doesn't have spicy seasonings in them!)
  • zest of 3 lemons (can substitute limes or oranges)
  • 2 tsp. baking powder (I used gluten free)
Drizzle:
  • 4 tbs. sugar
  • juice of 1 lemon (or substitute lime or orange)
  • 1 tsp. lemon zest

Preheat oven to 355 degrees. Butter (or use cooking spray) to coat a spring-form pan or round cake pan. Beat the sugar and butter together until light and fluffy. Gradually add eggs, one at a time. Fold in ground almonds, cold mashed potatoes, lemon zest and baking powder.

Spoon into prepared pan and make sure it is pretty level. Bake for 40-45 minutes or until top is golden and toothpick inserted in center comes out clean. Cool in pan for 10 minutes before removing to cooling rack. Mix sugar and lemon juice glaze together then spoon over cake letting it drip down the sides. Let cake cool completely before slicing.

You can see the difference below in the photos of the one made with regular potatoes and the one I made using instant mashed potatoes prepared according to box instructions. Both were tasty!

Lemon potato cake made with fresh mashed potatoes

Orange mashed potato cake made with instant mashed potatoes

Enjoy!
Tanja
Gluten Free Casually

Saturday, September 8, 2012

Asian Chicken Sloppy Joes


Asian Chicken Sloppy Joes. We were having a little get together and my husband was making Sloppy Joes. My daughter doesn't eat beef and asked if we could make something with ground chicken for her instead of Sloppy Joes. I love to experiment in the kitchen! Sometimes things turn out great and sometimes...well not so great. Luckily, this was a hit. You can substitute ground turkey, ground pork, ground beef or ground game meat in this recipe. This is a fun, easy meal for potlucks, tailgating or football parties. You can re-heat in the microwave or crock pot for casual & easy entertaining. This recipe also freezes well.


Asian Chicken Sloppy Joe Recipe:

  • 1 pound ground chicken (you can substitute any ground meat that you prefer)
  • 1/4 cup teriyaki sauce (I used Essential Everyday which is gluten free)
  • 2 tbs. corn starch
  • 1/8 cup sugar (can use raw sugar if you prefer) - add more sugar if you like yours sweeter
  • 1 carrot, finely minced
  • 1 tsp. crushed ginger (I used ginger from the tube found in refrigerated section in produce department)
  • 3 tbs. sesame oil
  • 1 tbs. hot sauce
  • 1/2 cup salsa (I used salsa because I was too lazy to dice up onions & peppers but you could dice up some onion & green peppers and add to a small can of tomato paste if you prefer)
  • 2 green onions, chopped thinly 
  • 2 tbs. Rice Vinegar (or substitute white vinegar) - add more if you like yours more tangy
  • 1 tbs. minced garlic
Brown the ground chicken in a skillet on medium heat until completely cooked. Drain any grease. In a separate small bowl combine the teriyaki sauce, corn starch, sugar, sesame oil, vinegar and hot sauce until no lumps. Gradually add the salsa, green onion, ginger, garlic and carrot. Pour over the cooked ground chicken and cook on medium-low heat until the chicken absorbs most of the liquid and it becomes thick enough to serve on buns (if you have a gluten allergy, Udi's makes a great gluten free hamburger bun - look in your freezer section) or it is also delicious served on corn chips, salad or wrapped in lettuce leaves as an appetizer. 


Enjoy!
Tanja
Gluten Free Casually


Wednesday, September 5, 2012

Asian Noodle Salad

 Asian Noodle Salad. I wanted a pasta salad that I could make with Rice Noodles instead of traditional noodles. (Rice noodles are gluten free) My hubby took me for a lunch date to a Vietnamese Restaurant which inspired this dish. It is pretty easy to make and you can probably use regular spaghetti noodles if you don't have a gluten allergy. (Rice Noodles are gluten free so I chose them plus they absorb the flavors nicely and are very inexpensive at our local Asian Market, $1.59 for 16oz. bag). You can also use gluten free spaghetti noodles (like Ronzoni brand) if you prefer traditional noodles. I have made them both ways!)


Asian Noodle Salad Recipe:
  • 1(14oz or 16 oz.) pkg Rice Noodles
  • 2-3 green onions, chopped
  • 3 Persian Cucumbers (or use 1 large cucumber), sliced or diced
  • 1 carrot, chopped fine
  • 2 cloves garlic or 2 tsp. minced garlic
  • 1/2 cup Teriyaki sauce (I used Gluten Free. I found that Albertson's Grocery Store carries quite a bit of gluten free items which are their own store brand labeled "Essential Everyday". Very economical! I found their Essential Everyday Teriyaki sauce on sale for $1 & it was gluten free!)
  • 3 tbs. lime juice
  • 1/4 cup water
  • 2 tsp. fresh ginger, crushed (I used the one in a tube found in refrigerator section of produce department), you can probably use the dry powdered ginger spice if you don't have fresh
  • 1 tbs. Rice vinegar (or substitute white vinegar if you don't have Rice Vinegar)
  • 1/4 cup sugar (can use Raw sugar if you prefer)
  • 2-3 tbs. Sesame Oil
  • Fresh Mint Leaves, sliced (optional)


Put the noodles in boiling water & cook for about 2 minutes (Rice noodles cook much faster than wheat noodles). Rinse & cool. Mix the Teriyaki sauce, sugar, ginger, sesame oil, garlic, vinegar, water & lime juice together with a whisk. Combine noodles with the onions, cucumbers & carrot. Pour the teriyaki mixture over top. Gently toss. Refrigerate for a couple of hours or overnight for best flavor. This allows the teriyaki mixture to soak into the noodles. Garnish with fresh chopped mint if desired. You can also add chile pepper flakes if you want a little kick to the salad.

I wanted a fun pasta dish that everyone can enjoy if they have a gluten allergy or not. This is a simple, inexpensive salad or side dish that works well. I used spring rolls as my inspiration as I created this recipe! You can also add other ingredients like the little Asian baby corn cobs or whatever else you would like. I just kept it simple for my Labor Day get together. 


This is an awesome recipe for a pot luck, BBQ or casual dinner. You can also use the left over noodles to put inside spring rolls which we really like at our house! If you want to turn it into a main dish instead of a side dish...just add grilled chicken, pork or steak. 


Enjoy!
Tanja
Gluten Free Casually