Although this is a cooking blog...I have been asked by so many people to share my recent "geek project". Since it is related to cooking, I decided I would share. I love geeky items like Star Wars, Star Trek, green aliens, etc. I wanted a baker's cabinet but didn't want to spend a lot of money and I wanted something on the geeky side rather than a "girly" flower type cabinet. I found a used hutch on craigslist for a decent price then I got started on my project.
I researched a lot before I got started. I didn't want to keep the original maple color and the hutch wasn't in perfect condition. It was used, had some minor scratches and dents but was perfect for the "upcycle" project I had in mind. I wanted to go with fun, bright colors to match the kitchen chairs that I re-upholstered with the help of my friend Laura. (My friend Judi scored me the awesome Star Wars fabric!) I really loved the fun print and the bold, sassy colors in the geek fabric and I wanted to bring the same fun colors into the hutch.
Before I got started, I researched the best way to paint furniture. Although there are many great products out there and a lot of different ways to do it, I chose to clean the wood furniture really well with Dawn dish soap and water. I purchased Zinsser primer. It doesn't require you to sand the furniture or strip it first which is convenient. It got great reviews online so I decided to try it. I did two coats of the Zinsser primer (letting it dry between layers). The primer coat doesn't have to be perfect.
Since we really like the Valspar paint, I chose two colors that were a close match to my fabric. I chose the colors "pool party" which is a dark turquoise blue color and "sassy green" which is a very bright lime color. I won't tell you about the eye rolls I got from the people behind the paint counter. They asked what I was painting with bright colors. I whip out my fabric and show them how well it matches! They asked me if I was doing a kid's bedroom. Hahahahahaha! When I told them it was for a Star Wars themed hutch...for a kitchen....well....I think they were speechless. You know you are a total geek when people don't get as enthusiastic about a geek project as you do. I tend to be a bit of a chatterbox and I can get quite enthusiastic about things I love. Well...I quickly realized that my audience at Lowe's were giving me the "Crazy Lady" looks...so I grabbed my paint and hurried home. I am sure the contractors listening at the counter where thankful that I wasn't their wife! Star Wars Kitchen?! Heck, I doubt any of them even knew who Yoda was. Hahahaha! Anyway...I did two coats of each paint in the areas I used them. I used a small smooth roller on the sides and top for faster & smoother application and a brush every place else. I did not put a "sealer" top coat over the paint. I was told it would eventually turn a yellowish color and that it wasn't needed since it isn't a kitchen table and won't be getting abused.
The insides of the cabinet were just cheap particle board and I like a surface that is easy to clean up. We chose to get some inexpensive peel & stick linoleum tiles and cut to fit in each of the drawers and the bottom of the cabinet. I know I would end up spilling something eventually and I wanted it to look neat and easy to clean!
Then came the knobs. Wow...I had a difficult time finding knobs. Not only are they EXPENSIVE but I couldn't find anything geeky or modern in my price range. I needed 16 knobs and I sure didn't want to pay more money for knobs than I had for the cabinet. I also didn't want to go with cheap plastic knobs or with something girly. So I did some brain storming. I had silicone ice cube/chocolate molds that I had received as a gift. I knew that I should be able to make some type of knobs out of clay. I went to Hobby Lobby and purchased some clay that you can bake (Of course I used my 40% coupon that I found online!). If you don't have a Hobby Lobby near you, I am sure any craft store like Michael's, JoAnn Fabrics and even the craft department at Wal-Mart will have the clay. Just make sure it is the type you bake. Read instructions because each brand is slightly different. They come in colors or white that you can paint. (I bought the colored). I measured the size screws that I would need. My grand-daughter (age 2) helped me press the clay into the molds. I carefully placed the screw in the unbaked clay. Then I baked the molds with the clay & screws for 30 minutes at 275 degrees. I let them cool then I gently popped them out. BINGO! Inexpensive custom knobs! Geek alert!
After it was all assembled, I thought I needed a little more green accent. I purchased some green clay (the one you can bake) and rolled it out on parchment paper. I used a Yoda cookie cutter to cut the Yoda accent piece. I used an industrial glue to attach it.
I am pleased with the results. It isn't perfect...if you look closely I am sure you can find a few flaws but it works great for my geeky baker's hutch. It offers storage for my baking supplies. I have enclosed pictures of my project in stages so anyone that is interested in making something similar at home can do it easily.
 |
| My silicone DarthVader Molds (suppose to be for ice cubes or chocolate...but you can make knobs out of them!) |
|
 |
| This is the base of the hutch. I had already taken the top off and started to dissemble it before I remembered to take photos. Sorry! |
 |
| I took all the hinges off the doors and put them in a bag & labeled it |
 |
| The drawers |
 |
| After two coats of the Zinsser primer paint (it is white) |
 |
| 2 coats of the Zinsser primer |
 |
| After Two coats of the "Pool Party" blue color from Valspar (I chose satin finish) |
 |
| This is the maple top portion of the hutch. I have already removed the door and the drawer |
 |
| After two coats of the Zinsser primer paint |
 |
| My green clay and Yoda cookie cutter. I baked on parchment paper at 275 degrees for about 20 minutes. |
 |
| Cooled off and slightly hardened. Ready to glue onto my hutch for accent color and fun! |
 |
| This is the hutch ready to use! (Don't mind the unfinished walls behind it. This geek kitchen is still under remodeling! |
 |
| Another view of the hutch after it is assembled |
 |
| These are the kitchen chairs that gave me the idea for the colors of the hutch |
 |
| Up close view of the super cool fabric! |
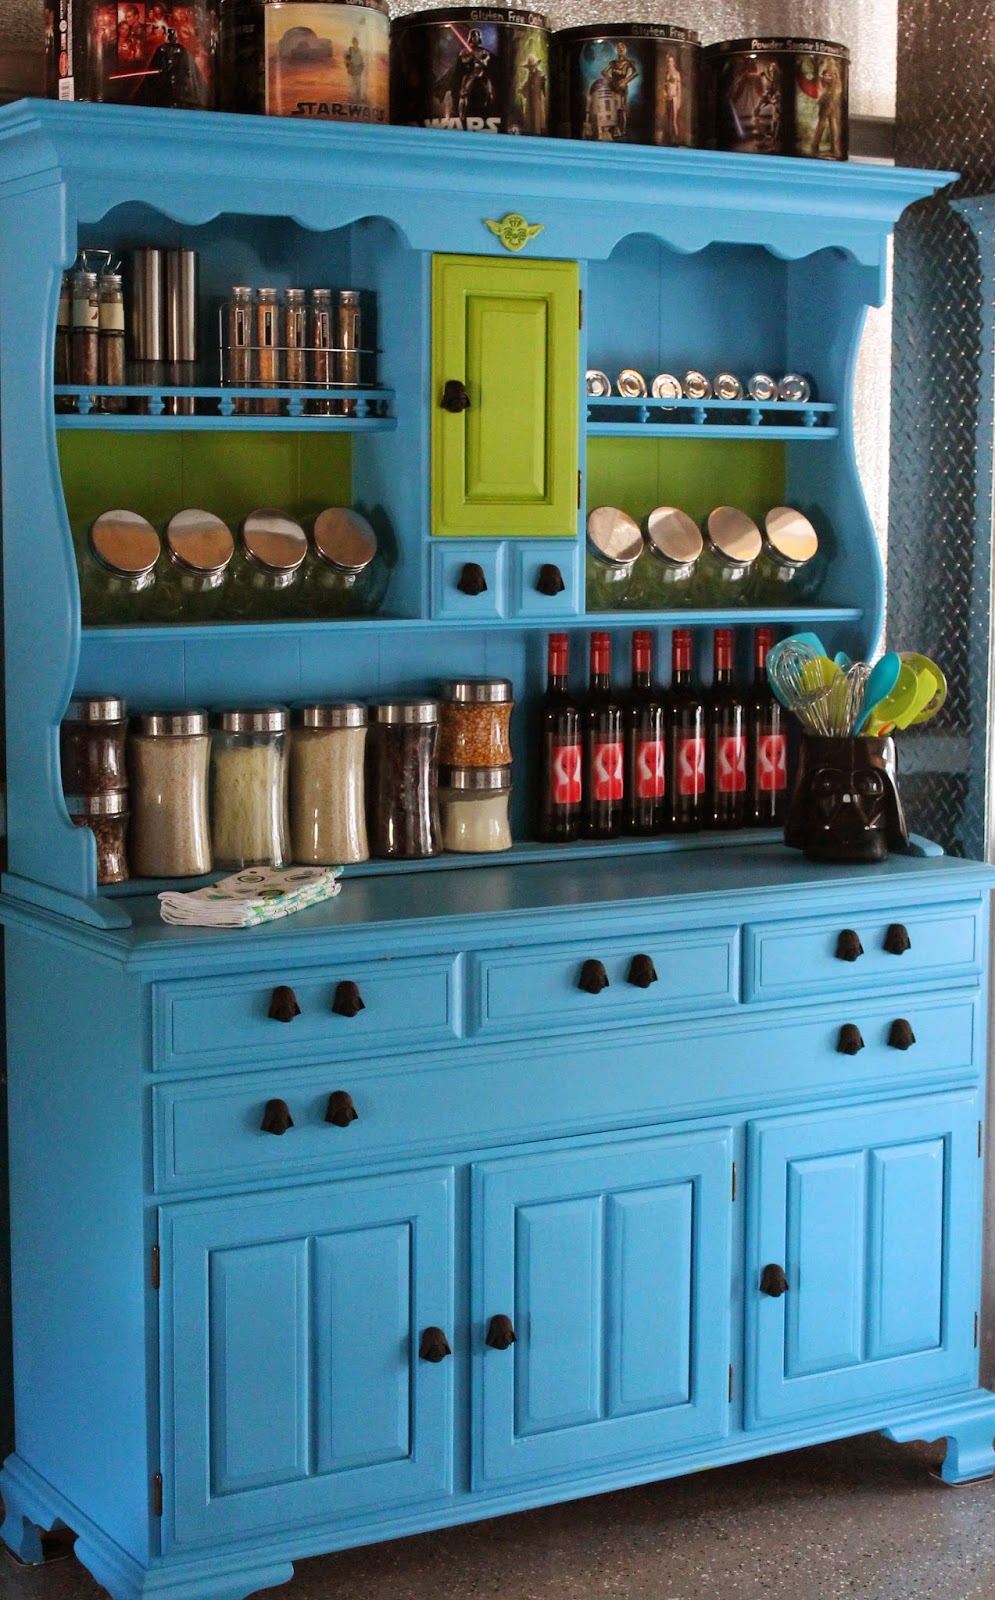 |
| GEEK ALERT! Star Wars Hutch! |
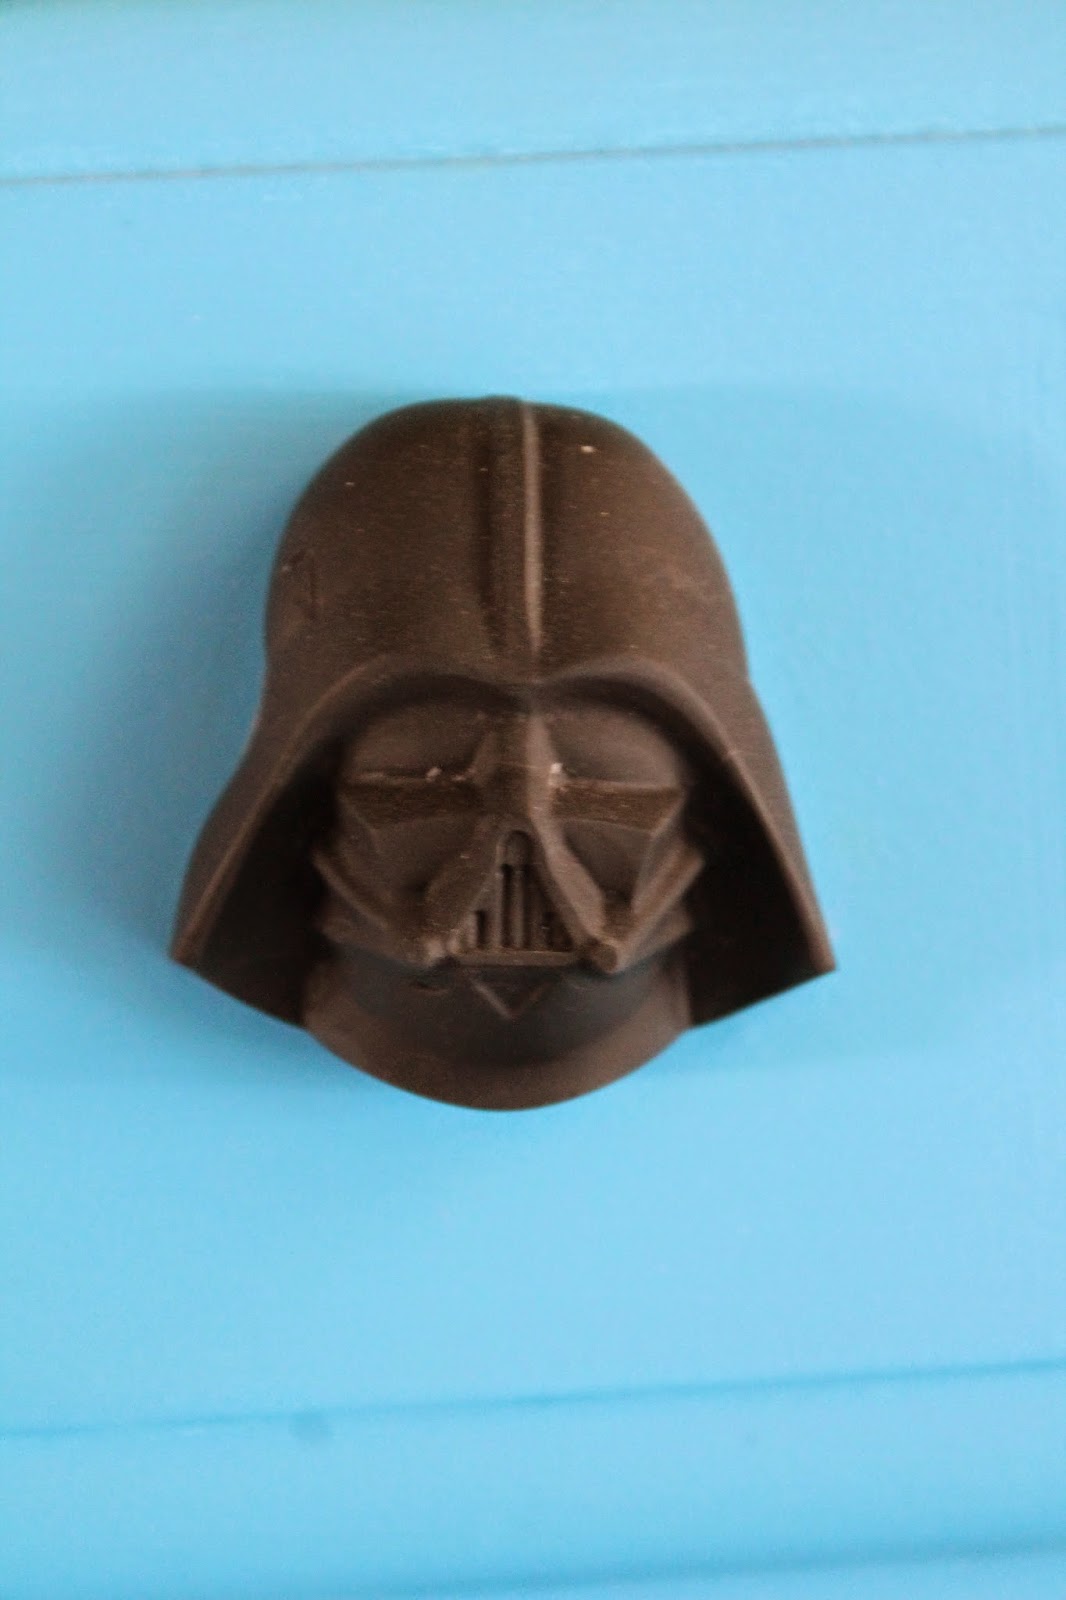 |
| Up close view of my Darth Vader Knobs |
 |
| I am using a Darth Vader Halloween Pail as my utensil holder |
 |
| My Star Wars empty popcorn tins now hold my gluten free baking flours & sugars |
 |
| Inside the little door on the hutch top piece. It will store my measuring cups & spoons in addition to some spices |
I hope you enjoy my little geek project. I had a lot of fun doing it and I like how it pulled together the colors from the Star Wars kitchen chairs. I would like to say "SORRY" to the lady I bought the hutch from. She was so excited that it was going to a good home. I think she was under the impression that I was going to strip it down and refinish it. I didn't have the heart to tell her that I was about to "GEEK" up her grandma's hutch. The hutch will be loved & cherished though! :)
Please don't hesitate to contact me if you have any questions. By the way, I did not get paid or compensated in any way to recommend the products I used. I am honestly telling you what I used in case someone else would like to do a similar project.
Geeky Girl
Tanja


I was recently at Hobby Lobby and noticed they carried Star Wars knobs now. (They didn't last summer when I did this project!). You can now purchase pre-made Star Wars knobs there. They have them on sale frequently too.
ReplyDelete